


You can now make fresh homemade ramen noodles at home! All you need are flour, eggs, warm water, salt, sodium carbonate, and a trusty pasta roller. These noodles have the perfect chew you look for in good ramen. So good!
Craving a bowl of good fresh ramen that's not from the package? Well, it all starts with making some amazing, fresh homemade ramen noodles! It may sound intimidating, but it's actually pretty easy.
I need to stop talking and just get rolling, lol. 😆
If you're looking for a ramen recipe using the packaged ones, check out our creamy peanut butter miso ramen! It'll make you feel like you've been upgraded from basic to platinum. 😉
Let's dive into making some fresh ramen noodles, shall we?
What's sodium carbonate and how do I make it?
Sodium carbonate, aka baked baking soda, is an alkaline salt made from baking or cooking baking soda. When you apply heat to baking soda, aka sodium bicarbonate, it undergoes a chemical change, breaking the compound into sodium carbonate, water, and carbon dioxide. If you heat it a little while longer, evaporating the water and releasing the carbon dioxide, the compound then is left with just sodium carbonate!
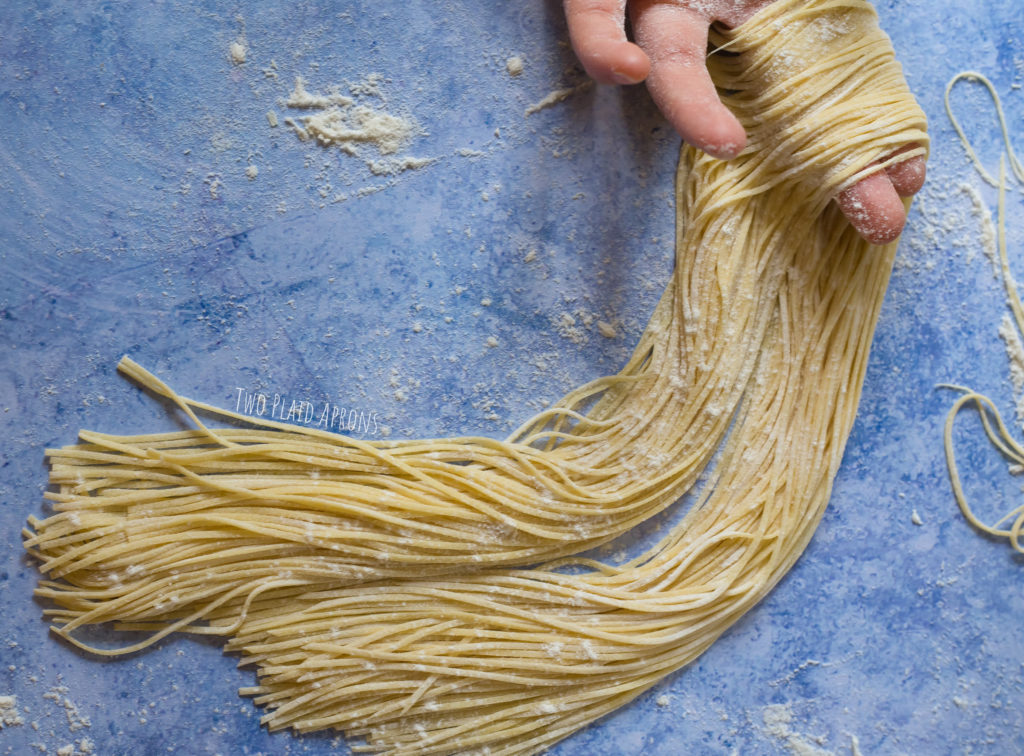
 Just look at this beautiful sheet of noodle!
To make your own baked baking soda, you can either:
- spread it onto a foil lined sheet pan and bake it for 1 hour at 250F, or
- cook it on the stove top on medium to medium high heat, while stirring occasionally, until the baking soda stops bubbling and clumping. The cooking time depends on the size of your pan and how much baking soda you are cooking.
Make sure to let the baked baking soda cool completely before using or storing in an airtight container!
Why do I need sodium carbonate in my ramen noodle dough?
Sodium carbonate is what gives your ramen noodles the bounce, snap, and chew. Without the alkaline salt, your ramen will be soft and limp.
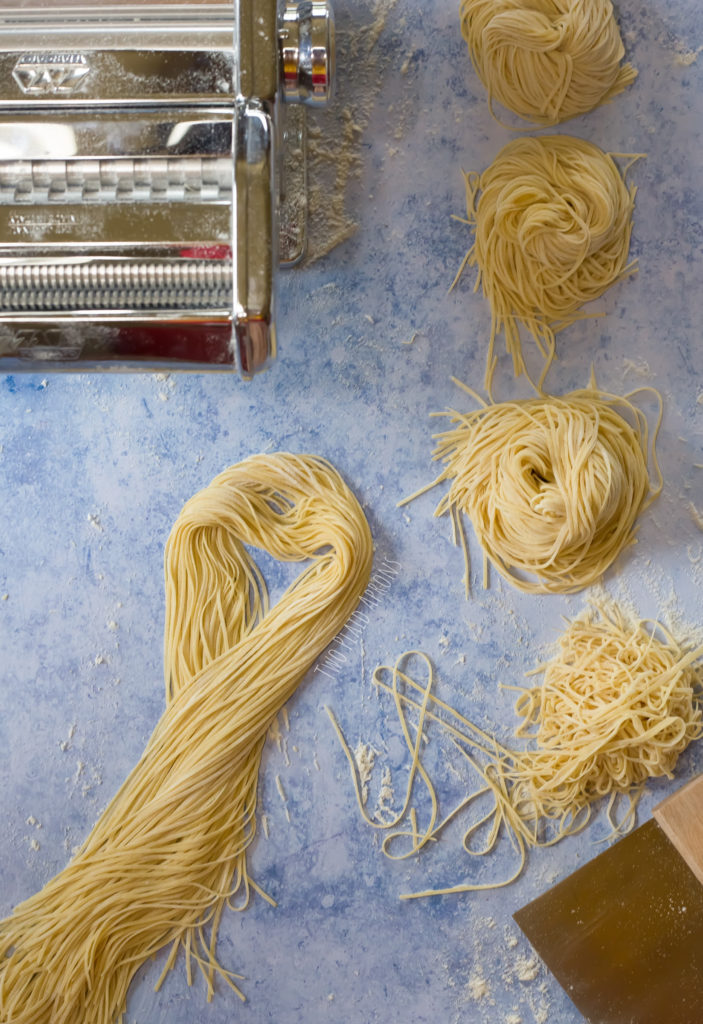 Just cuz some strands of noodle aren't long enough or fell out of the bunch, doesn't mean you can't enjoy it just as much! Collect a straggler pile!
Are eggs necessary for this ramen noodle dough?
No, eggs are not necessary in making ramen noodles, however, we found that incorporating eggs in the dough gives it more flavor and make the noodles tastes more like those you can find in packages (yes...I do think some package ramen's got their flavor and texture on point). So it's all up to you, but for this recipe, our ratio is based on using eggs.
Can I knead my ramen dough using a stand mixer?
I would want to avoid using a stand mixer to knead this ramen dough because the it's on the dry side. The last thing you want is to overwork your beloved stand mixer. But the good news is that this dough doesn't have to be kneaded until smooth. So just get your hands in there and give it about 10 minutes of good elbow grease until the entire dough comes together and no longer look shaggy.
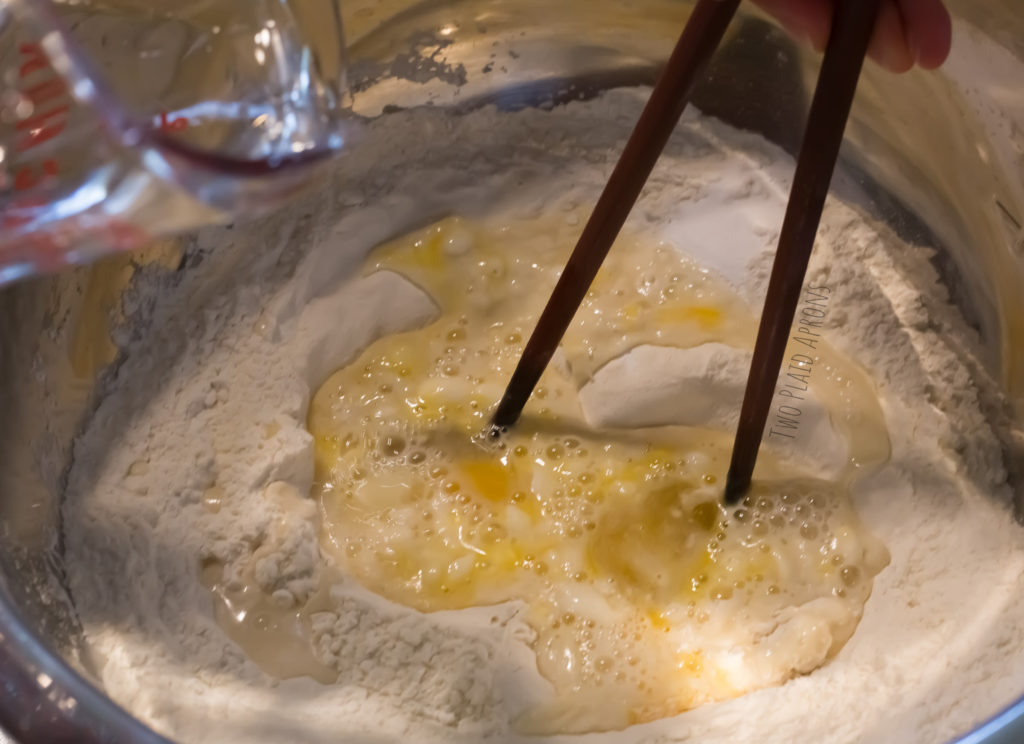 I prefer to mix my dough initially with a pair of chopsticks because they are easier to clean than my hands lol. 😅
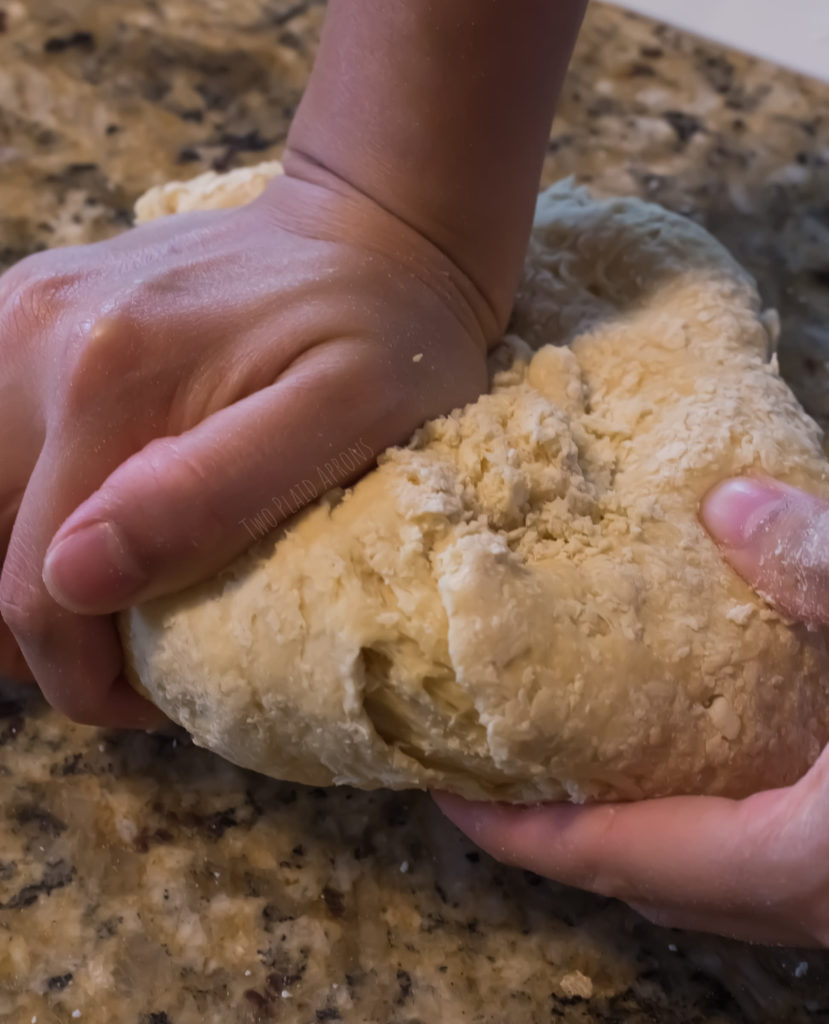 You don't want this shaggy dough in your mixer...Use those arm muscles! We're almost there! 💪
Does the ramen dough have to rest?
Yes, I highly recommend resting the dough for about an hour to relax the gluten so that it's more supple and easier to feed into your pasta roller.
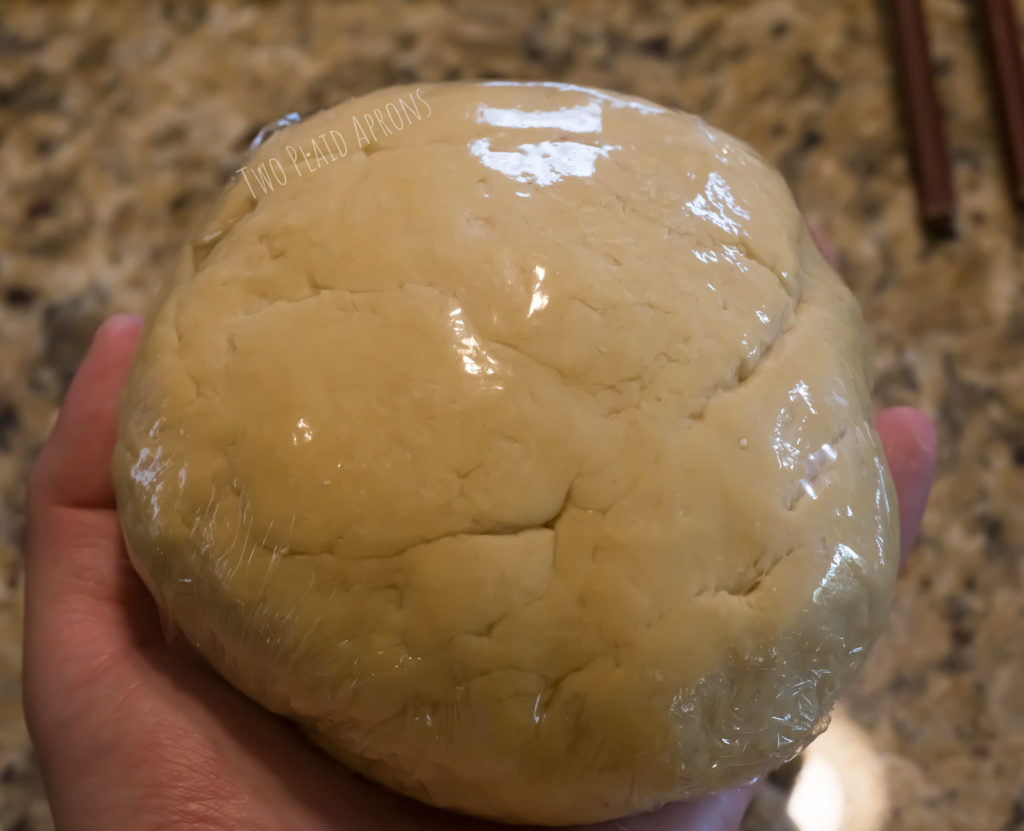 Keep the dough wrapped at all time to prevent drying. Let this baby rest for an hour to save your pasta roller some unnecessary work.
How thick should I roll my ramen dough to?
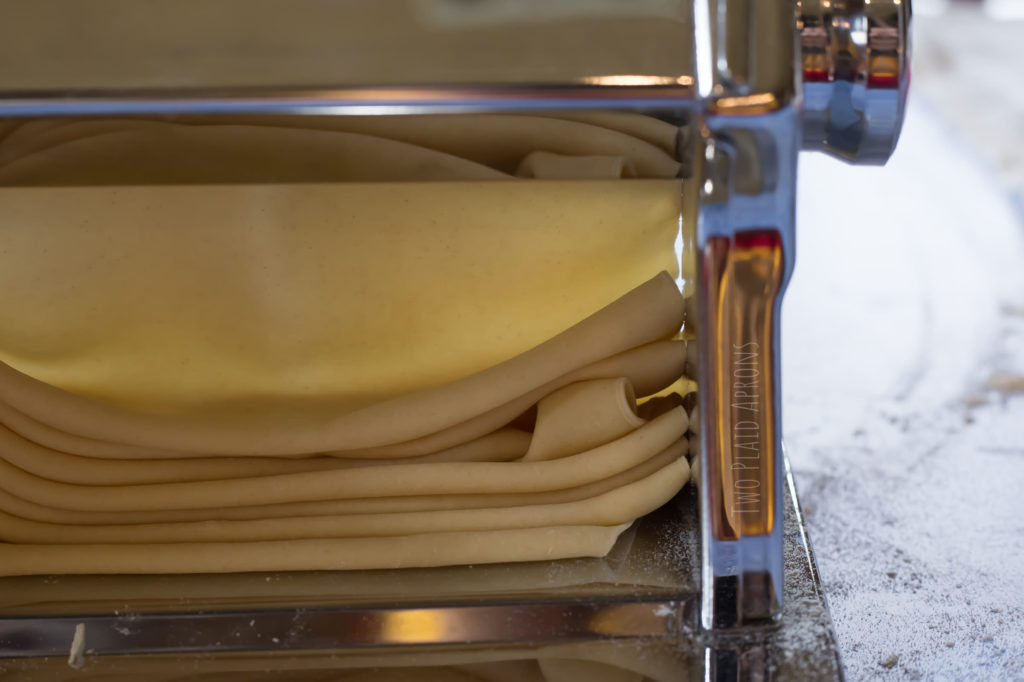
Each pasta machine is different so I can't tell you the specs for your specific machine. We usually roll our noodles to size setting "4" or "5." Just think the normal thickness of package ramen, about 2mm thick.
If you are looking for a good, trusty pasta roller, I highly recommend Marcato Design Altas 150. It's been with us for several years, and we love it! (So all of the numbers and usage direction is based on our pasta roller, Atlas 150.)
Pasta roller and dough tips:
- Treat this dough like pasta dough. If the dough feels wet, dust it with some flour to prevent it from sticking to the pasta roller.
 After dusting flour on the dough, wipe down the dough to prevent divots of flour from ruining your sheet.
- Always make sure your dough is thin enough to feed through the pasta roller. For the initial feeding, always start at size setting "0."
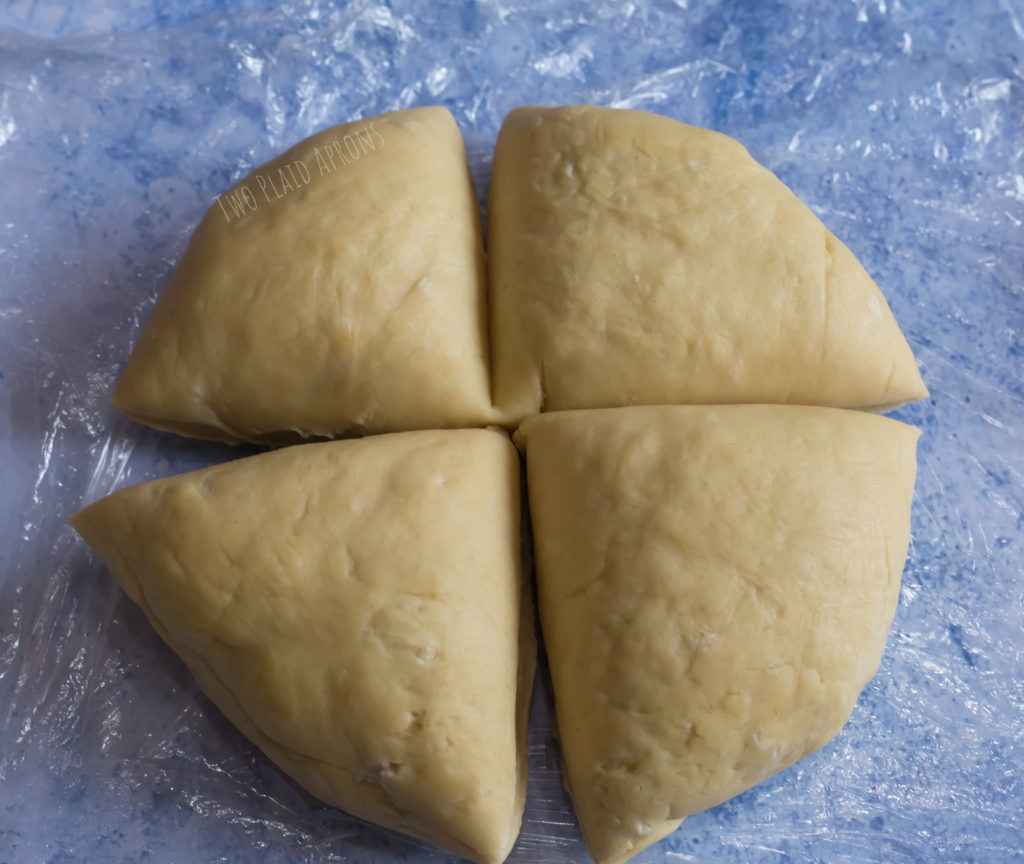 Divide your dough into smaller pieces to work with ease. Always keep the pieces wrapped when not in use.
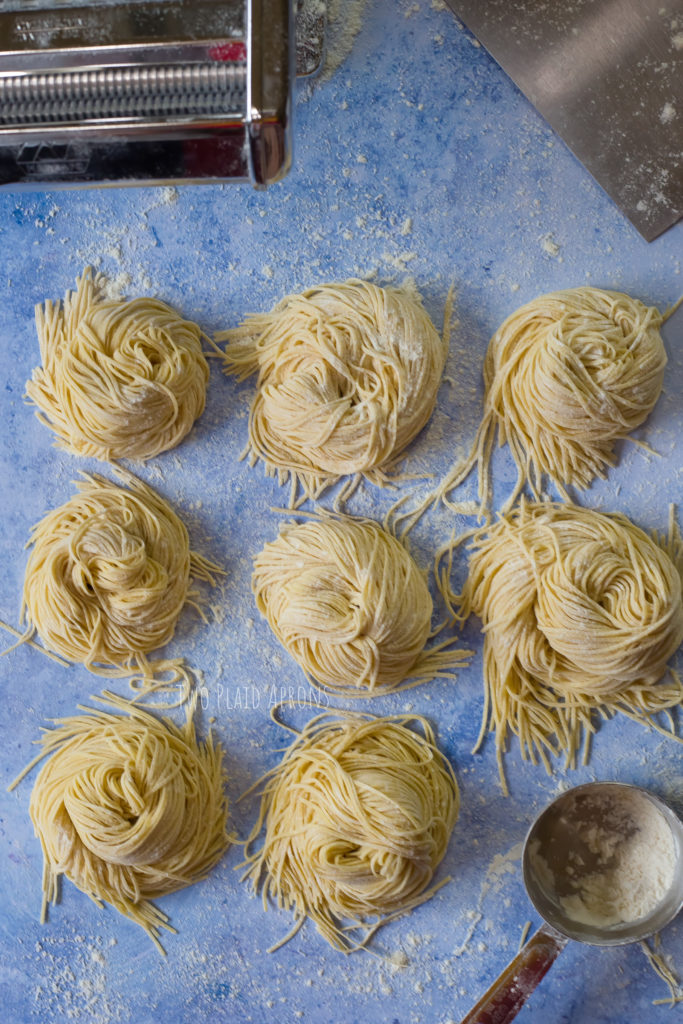
 Look at that!
- After feeding your dough into the roller for the first time at size setting "0," fold it like a pamphlet to create some straight edges so that you can optimize the pasta roller from edge to edge.
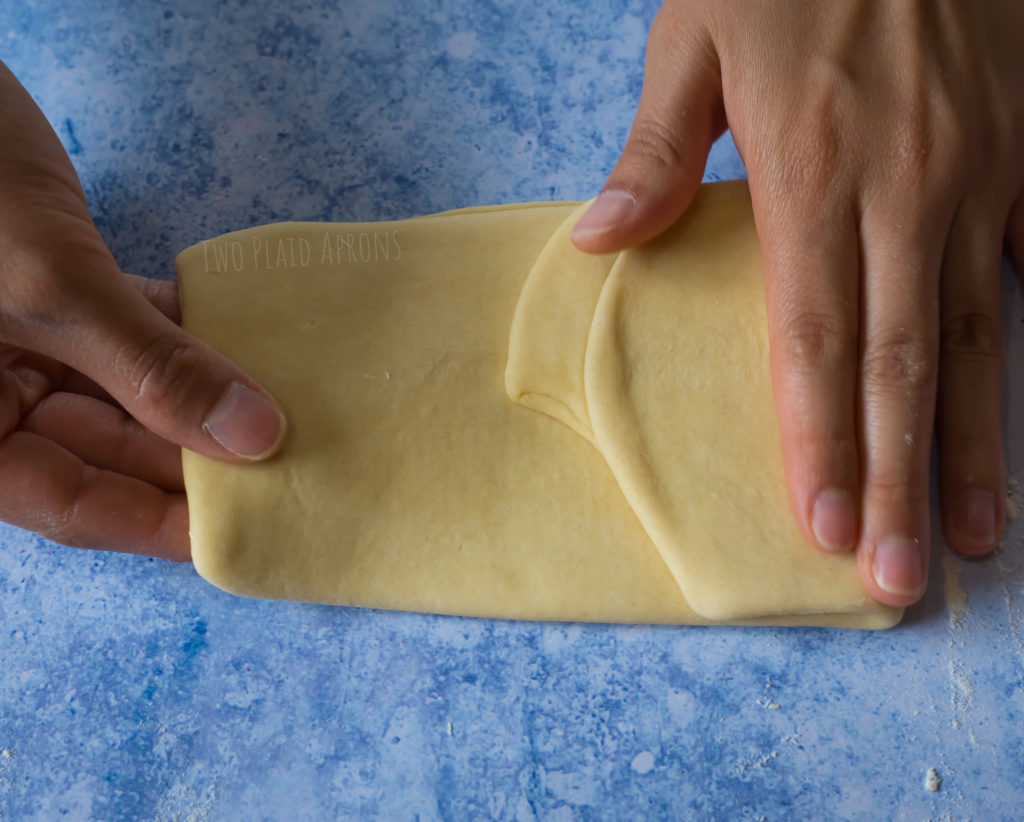
 I Sometimes repeat this step a couple of time until I like my edges. After folding the dough, try to flatten it to no more than ⅓ of an inch before feeding.
- Once the dough starts to become thinner and longer, DO NOT try to hold it with your fingers or your knuckles. Instead, keep your hands straight and carry the dough sheets on the back of hands to prevent unwanted stretching and grooves.
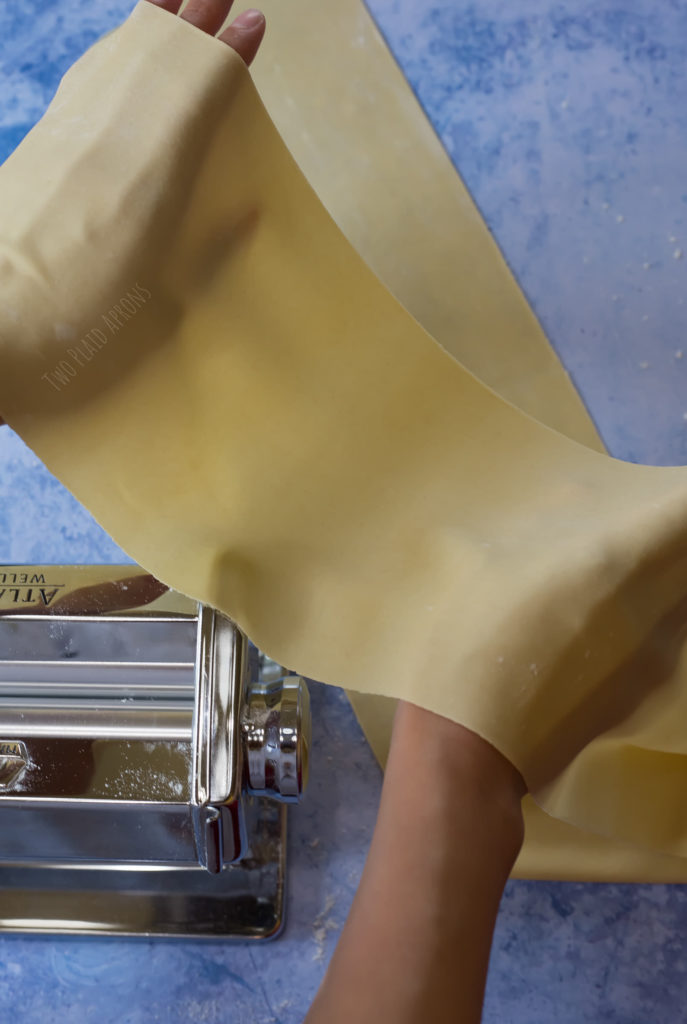 By holding the dough with the back of your hands, tearing and stretching is less likely because larger surface areas are being supported.
Do I have to shape my noodles and how do I do it?
Shaping and portioning the noodles are all personal preferences. There are many ways to portion and shape. If you rather skip this step, that is perfectly okay. If you want to portion and shape it, that's great as well.
Some people simply portion the noodles and roughly scrunch them up. Just remember to be gentle because the dough can get squished together and that's not what we want!
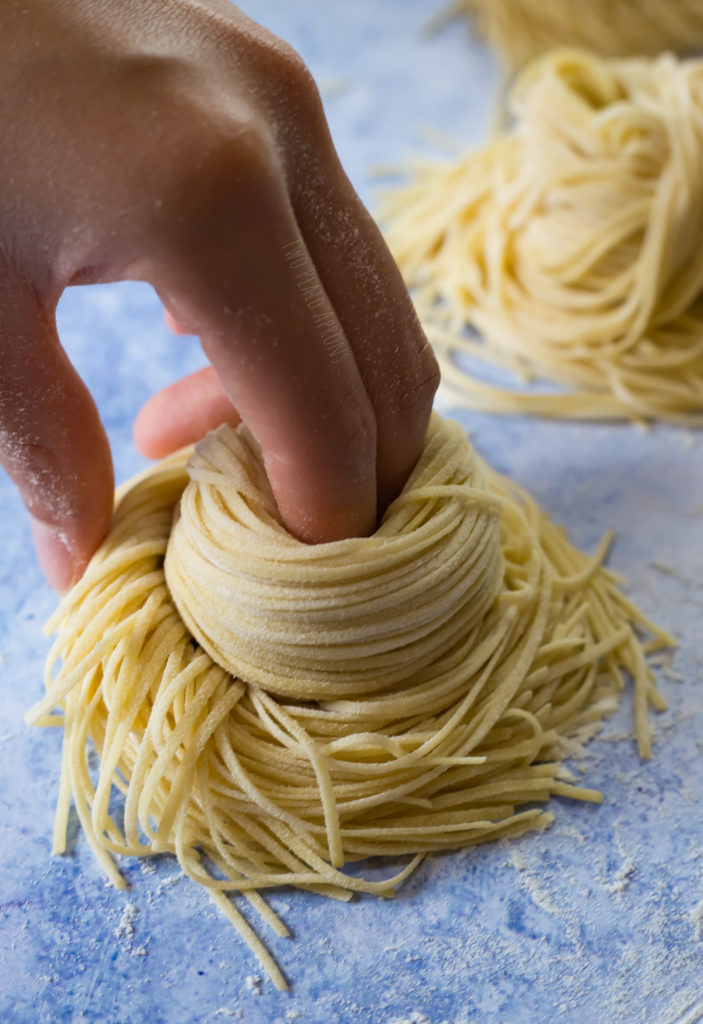
Kyong likes to do the classic pasta noodle portioning and shaping because that what he is used to doing in restaurants. Also it just makes it uniformed and satisfying to look at.
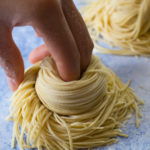
How to portion and shape the ramen noodles like Kyong:
We divided this the dough into 4 pieces and worked with 1 at a time. After we finished rolling each piece at size setting "5," we cut the sheet into 2 so that it's easier to manage. So the following portion is based on half a sheet of dough.
 1. Hold it with two fingers and secure it with your thumb, gently.
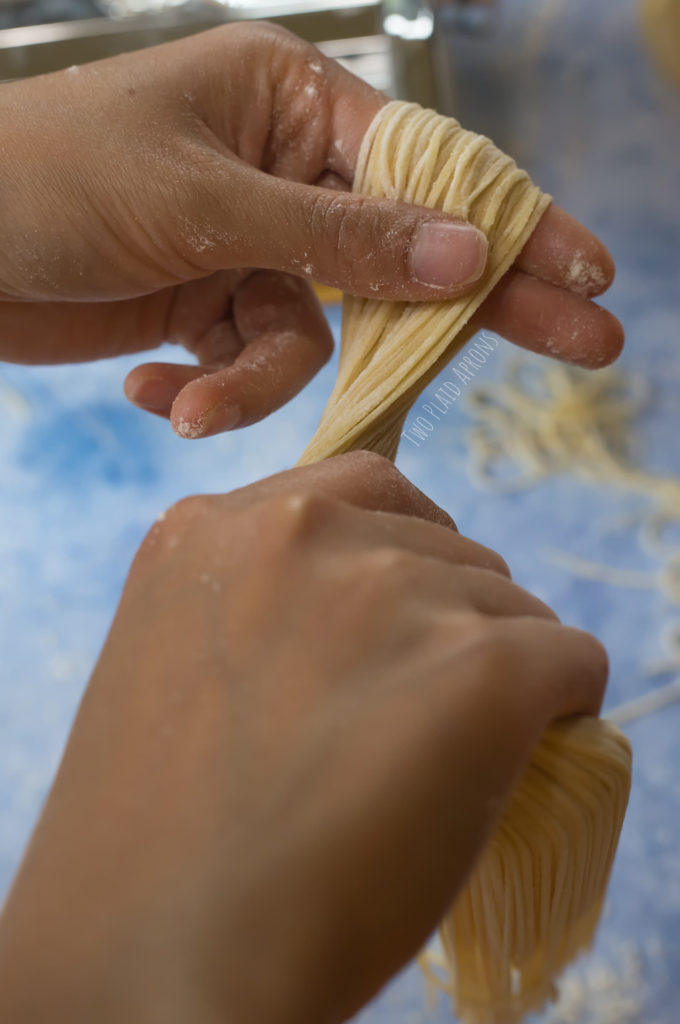 2. As you bring the noodles up to wrap, gently twist the noodles.
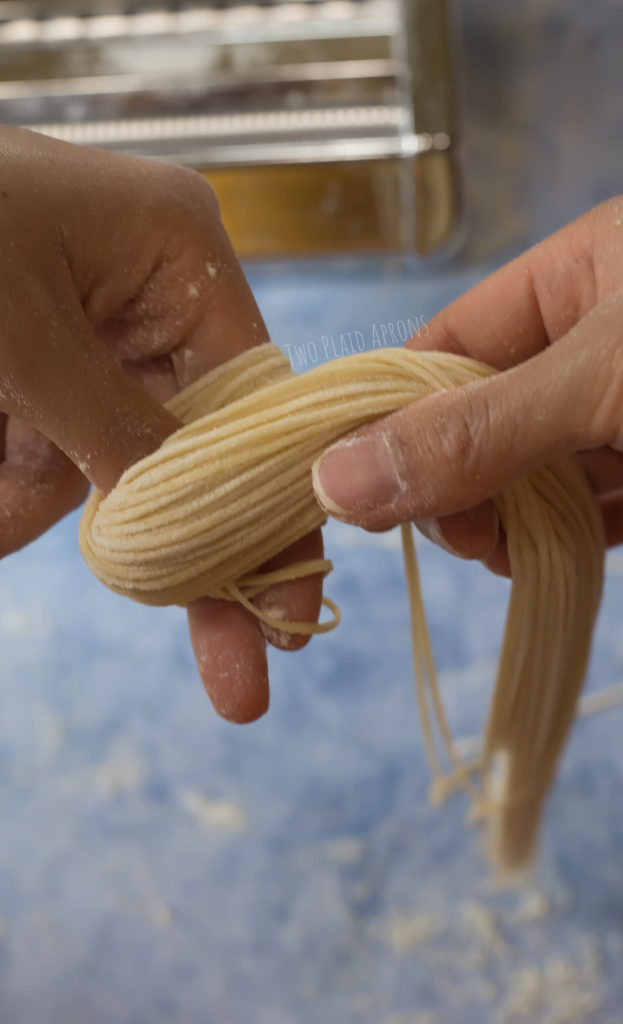 3. As you bring the noodle over your thumb and 2 fingers, remove your thumb and let the noodles hang over your 2 fingers.
 4. Keep wrapping the remaining length of the noodle around your two fingers. Place it down on a lightly floured surface and remove your fingers.
Must I dry my ramen noodles?
No, drying is not absolutely necessary. However, we find that drying the noodles for a few hours gives it better flavor and a chewier texture.
How do I cook fresh ramen noodle?
 After cutting the noodles, dust with more flour before shaping.
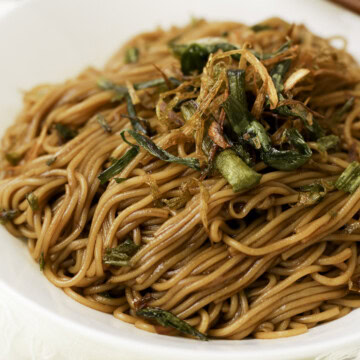
To cook your homemade ramen noodle, simply unravel it and add it to boiling water. Stir it every so often so that the noodles don't stick together or to the bottom of the pot. Cook the noodles until the insides are almost no longer opaque. So bite one and see!
Once it's done, run it under cold water to give the noodles extra chew.
Cook with love!
Mei ❤️
If you made this recipe or any recipe from our blog, please tag us on Instagram @twoplaidparons! We would love to see your creations! It absolutely makes our day! 🥰
📖 Recipe
Fresh Homemade Ramen Noodles
Ingredients
- 3 cups all-purpose Flour
- 1 teaspoon salt
- 1 teaspoon baked baking soda (or sodium carbonate)
- 2 large eggs, beaten
- ½ cup warm water (or as needed)
Instructions
- In a mixing bowl, whisk together flour, salt, and the baked baking soda.
- Add the eggs and warm water* and mix until the dough comes together and looks kind of shaggy.*The amount of water needed can vary depending on your environment, so hold back a couple of tablespoon or use a little more as needed. Your dough should be on the dryer side but it should come together after some kneading.*
- Pour the dough onto a clean work surface and knead the dough until it all comes together, about 5-10 minutes. The dough won't be smooth, but it should not have any visible dry flour.Wrap the dough in plastic wrap and let it rest for about 1 hour.
- Once the hour is up, divide the dough into four pieces.Working with one piece of dough at a time, flatten the dough into about ¼ inch thick and no thicker than ⅓ inch.
- Feed the dough into the pasta roller until it reaches the thickness of package ramen, about 2mm. Make sure to flour both sides of the dough sheet as needed.Repeat with remaining dough and stack each finished sheet on top of each other. Make sure to generously flour in between each layer and cover with a clean towel.*Cut the rolled dough in half if needed for easier handling*
- Once all the dough has been rolled into sheets, flour the dough and cut with the linguine cutter. Portion and shape if desired. Repeat with remaining sheets.
- You can use the ramen immediately or let it air dry for a few hours for a better texture and flavor.


Iolana says
Great recipe, thanks.
Mei says
Hi Lolana!
Thank you so much for trying out our recipe!
Cook with love!
Mei ❤️
London Surgenor says
This recipe makes the best ramen noodles! They are springy and quite flavorful!
Mei says
So glad you liked the ramen noodles!
Mei ❤️
Chanel Pugh says
Is it possible to make homemade ramen noodles as instant and shelf-stable as commercial instant ramen noodles?
Naomi says
From my research as long as you thoroughly dry them out and then store them in a air and moisture free packaging they will last 24 months or longer. I would suggest either storing them in mason jars that you have used a vacuum sealer on. Or in Mylar bags with oxygen absorbers. You can air dry the noodles before storing, just ENSURE that they are completely dried. If you want to be extra sure, you can throw them in a dehydrator at 125 degrees F until they are fully dry.
Vlad says
Came out fantastic, I made 1/2 measure and it gave me 4 portions. Sodium carbonate makes them really easy to work with. So much fun and healthier than store bought.
Mei says
Hi Vlad! So glad the ramen noodles turned out good! It really is so fun and rewarding to make at home =)
Mei ❤️
Nour Kehali says
I tried them without using baked baking sodium, they turned great as a first attempt, My question is : they are similar in taste in pasta right? Thaank you so much 😇
Mei says
Hi Nour! Thanks for giving these ramen noodles a try and so glad it turned out well! For this recipe, the ramen noodles without the baked baking soda (sodium carbonate) will taste quite similar to pasta. The sodium carbonate adds both flavor and texture that is iconic to ramen noodles.
Mei ❤️
Karissa says
How long do you baked the baking soda?
Mei says
Hi Karrisa! Bake the baking soda at 250°F for 1 hour. You can get more details in the post above. =)
Mei ❤️
Jordan says
How would you recommend storing the noodles after they are left to dry?
Mei says
We recommend freezing in an airtight container for the longest storage life, which is around 2 months. Hope this helps =)
Mei ❤️
Liz says
Can I freeze the noodles to store them? Have a younger sister who loves Ramen but want to batch make a large amount so she can have a healthier version on hand. These look great!! Thank you!!! ❤️
Mei says
Hi Liz! That's so sweet of you =) Yes, you can definitely make a large batch and freeze the noodles. Kyong recommends portioning out the noodles and freezing them on a sheet pan lined with parchment (and lightly dusted with flour). Once they're frozen, you can store them in freezer safe containers.
Mei ❤️