


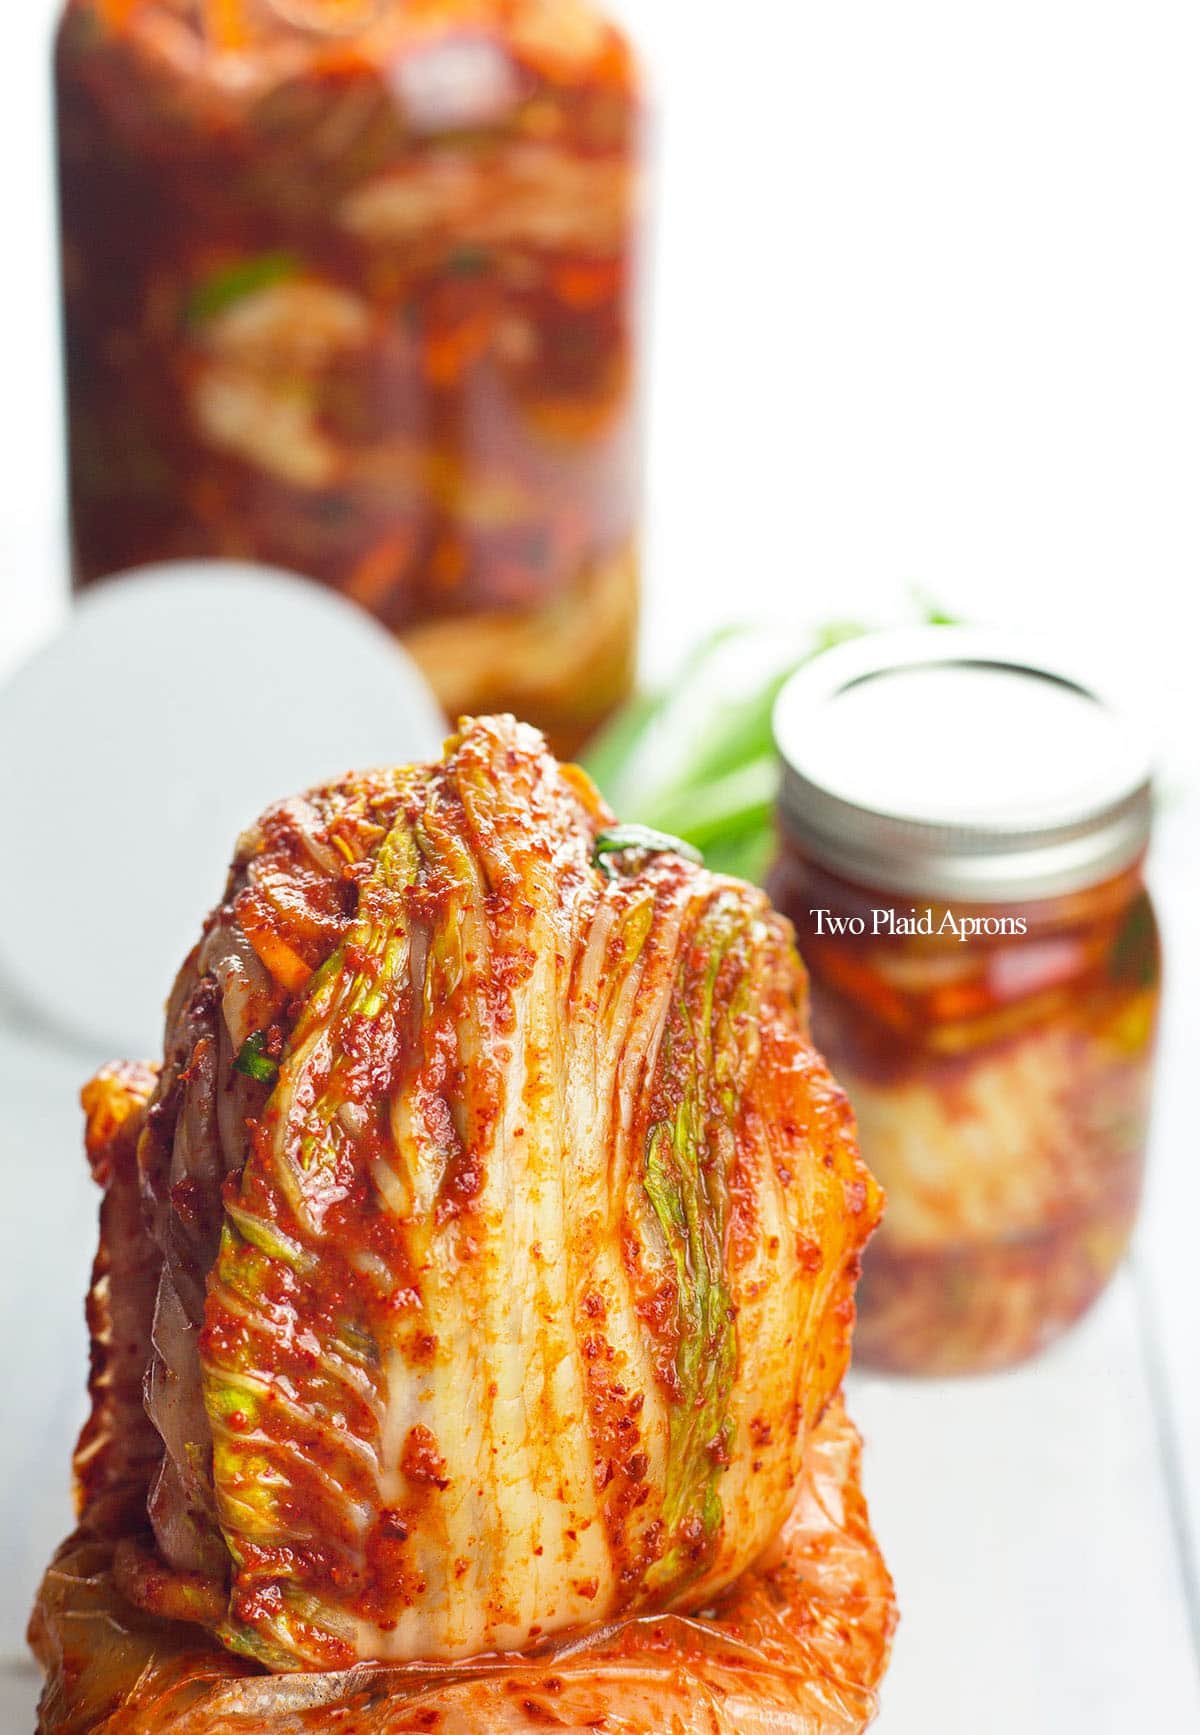
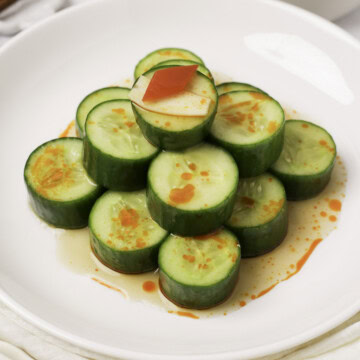
Kimchi or more specifically, napa cabbage kimchi (baechu kimchi - 배추김치), is one of the most popular and classic kimchi loved and enjoyed all over the world! This kimchi recipe is traditional and authentic, made with quartered napa cabbage, which means the process is a bit more labor intensive. However, this process allows for longer storage and longer fermentation compared to geotjeori (fresh kimchi), which is meant to be enjoyed quickly and has a much shorter storage time. You can also try our quick cucumber kimchi for a cucumber alternative that takes only 20 minutes.

If you’ve made this recipe or any recipes from our blog, please tag us on Instagram using #twoplaidaprons! You can also tag us in your Instagram stories using @two_plaid_aprons. We would love to see your creations! It absolutely makes our day! 🥰
Jump to:
What is kimchi?
When we think of kimchi, most of us instinctively think of the classic napa cabbage kimchi that's fermented and often served at Korean BBQ restaurants as part of their complimentary side dishes (banchan) or the cabbage used in budae jjigae (Korean army stew).
But kimchi, or kimchee, literally translates to pickled vegetables. So technically any vegetable can be made into kimchi, like kkadugi (cubed radish kimchi) and our quick cucumber kimchi!
For any kimchi, the vegetables are first salted to kill any harmful bacteria and to remove excess water content so that the vegetables can be preserved. After salting, the vegetables are rinsed to remove the extra salt and finally slathered in the iconic, red, spicy marinade marinade. Often times, a mixture of carrots, Korean radish, and buchi (Asian chives) are added to the marinade to add flavor and to bulk up the kimchi.

How to eat kimchi and what to do with it
To clear any confusion, kimchi can be enjoyed immediately after it is made or enjoyed after it's been sitting and fermented. Both stages have their pros and cons and are more suitable for different applications and can be up to your personal preference.
Freshly made kimchi is often enjoyed as a side dish but it's almost a tradition to eat it with boiled pork as a wrap (bossam). At this stage, the kimchi tastes vibrant, spicy, and a balance between salty and refreshingly sweet.
After the kimchi is fermented, it becomes funkier, still spicy, and tangy. It'll become more sour the longer it's fermented. At this stage, there's so much you can do with kimchi! Here are some of our favorites:
- Kimchijeon (savory kimchi pancakes)
- Kimchi mac and cheese
- Kimchi jjigae (kimchi stew)

- 10 minute kimchi chili oil ramen (ADDICTIVE!)
- Kimchi spam fried rice
- Creamy kimchi pasta (a great weekday meal!)

Ingredients and substitutions
Please scroll down to the recipe card for the ingredient quantities!
For the bulk of the kimchi:

- Napa cabbage - The main star of this classic kimchi! Napa cabbage is usually available at most Asian markets and even at local grocery stories. But the price is definitely better at Asian markets.
- Salt - We highly recommend using Kosher salt or any coarse salts. Coarser salts are easier to control when salting.
- Carrot and Korean radish - Both add flavor, mild sweetness, and extra texture. For the Korean radish, it can be found at most Asian markets. These radishes are the thicker ones with white and green skin. If you can't find Korean radish, daikon radish is a good substitute or you can simply omit it.
- Buchu - Also known as Asian chives. They really bring the FUNK to kimchi. Asian markets usually sell it in a large bunch, so if you have any leftovers, use it for pork and chive dumplings (they're really tasty!). If you cannot find any buchu, feel free to use green onions instead.
For the kimchi marinade:
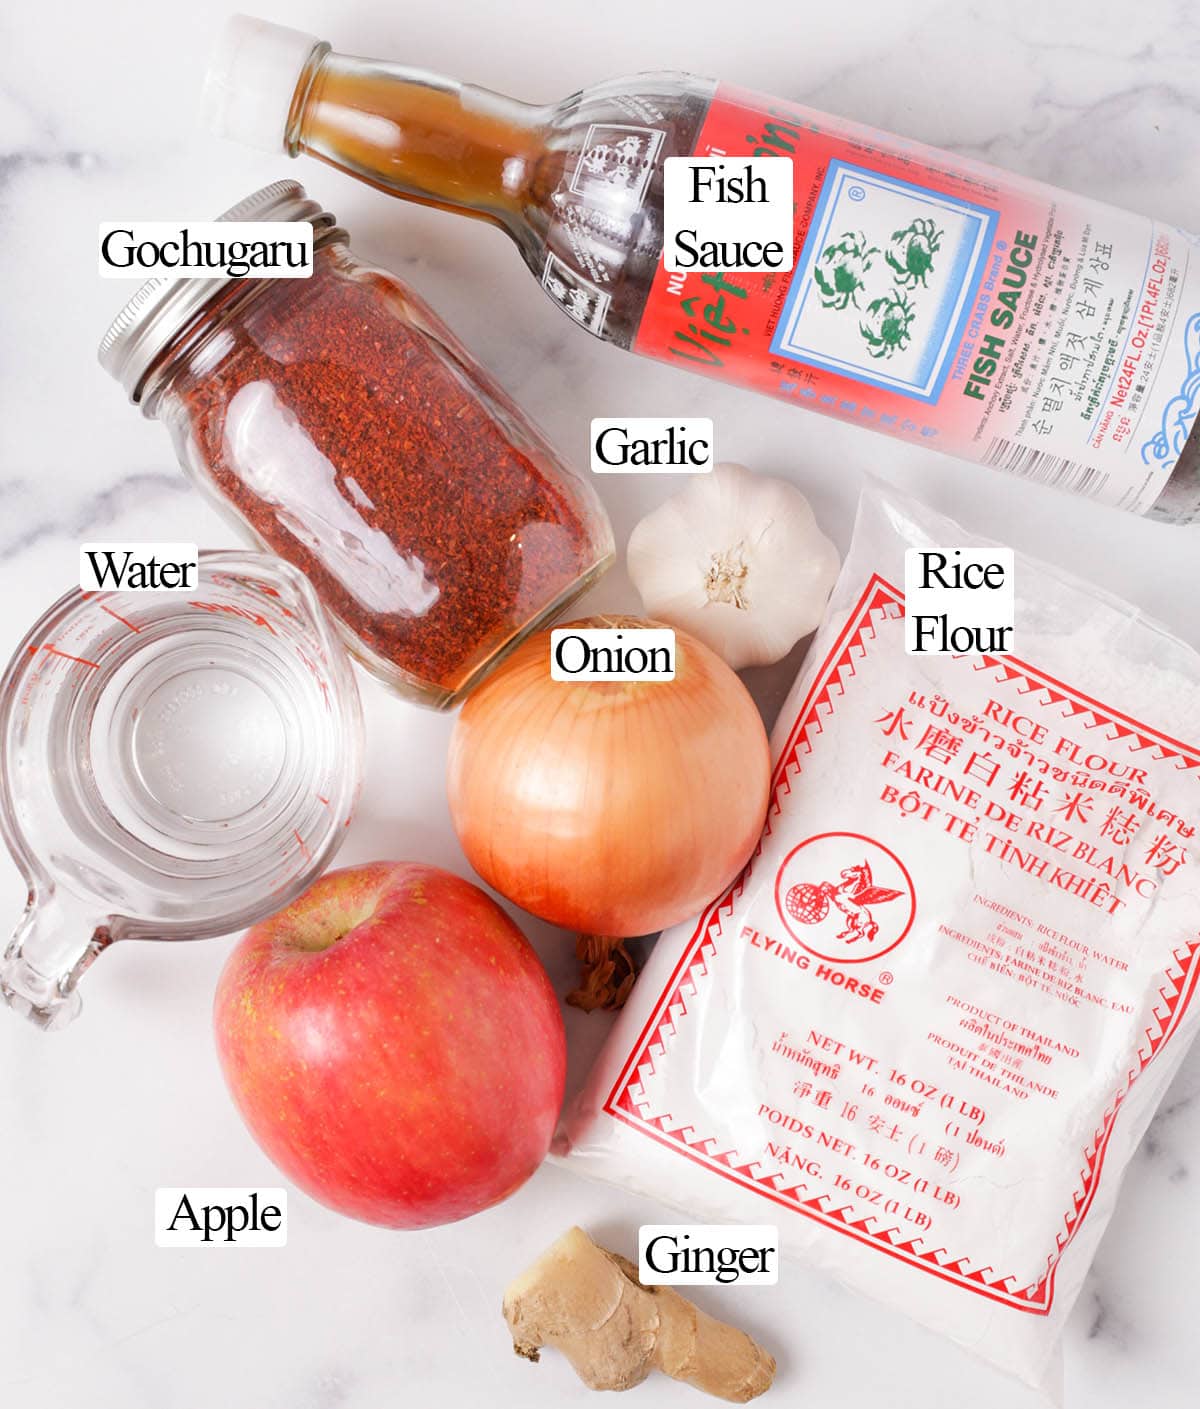
- Rice flour and water - These two ingredients are cooked into paste that makes the marinade stickier so that the marinade can adhere to the napa cabbage. You can use either regular rice flour (red bag) or glutinous rice flour (green bag).
- Gochugaru - Also known as Korean red pepper flakes. Make sure to get the coarse gochugaru. The fine version is too fine for kimchi. Also, some Korean markets offer different varieties of gochugaru that differ in spice level. You can choose the one that you prefer.
- Yellow onion, garlic, ginger - These are the base flavors of the marinade. They also add spiciness to the kimchi.
- Apple or Korean pear - Either fruit is good fine. They serve as a natural sweetener and provide some extra liquid for the marinade. If using apple, we recommend juicy apples, like Fuji.
- Fish sauce or saeujeot- The purpose of both ingredients is to add funk and saltiness to the marinade. In Korean households, saeujeot (fermented salty shrimps) is the more preferred option, but saeujeot has gone up in price and can be quite expensive. So a good fish sauce is a great substitute.

How to pick the best napa cabbage and Korean radish
The cold season, mid fall and winter, is when napa cabbage and radishes start to come into season. Hence, why homemade napa cabbage kimchi is often made during fall.
When picking napa cabbage, look for ones that feel heavy for their size and have a fresh looking core on the bottom. The weight indicates how full the cabbage is, which usually also means it's got good water content and probably sweeter. Also, if you can find ones with yellow leaves instead of dark green leaves, it means the napa cabbage is younger and more tender. Green leaves are fine too. The leaves may just be a little heartier and nothing is wrong with that!
As for Korean radishes, and radishes in general, look for ones that feel heavy. Just like the napa cabbage, heavy radishes mean they have good water content and not dried out. This is especially noticeable with daikon radish. Light weight ones are usually quite fiber-y. Lastly, look for Korean radishes that have more green than white. That usually means the radish is sweeter.
How to make authentic kimchi
Clean and cut the napa cabbage:
1. Peel away and discard any undesirable outer layer leaves of the napa cabbage.
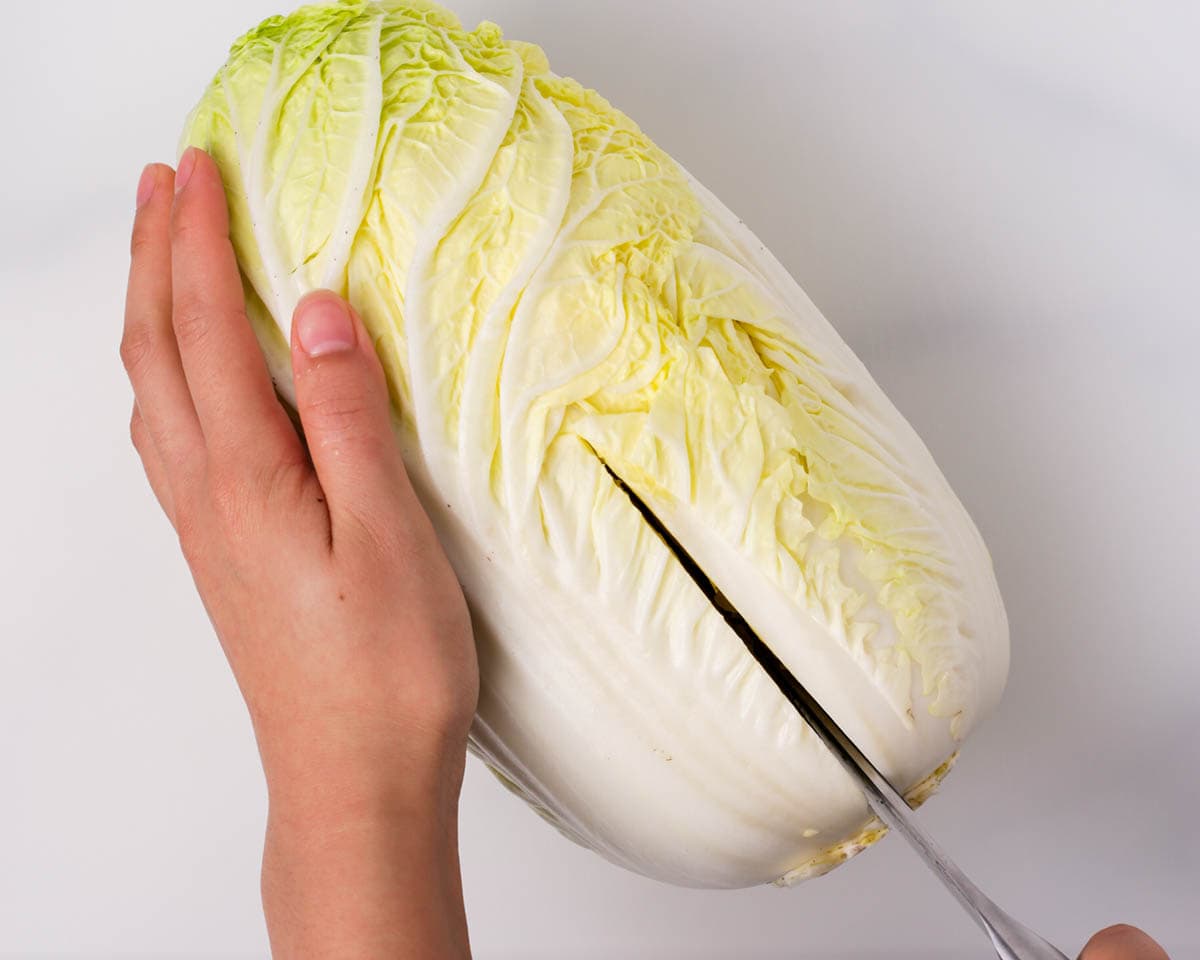
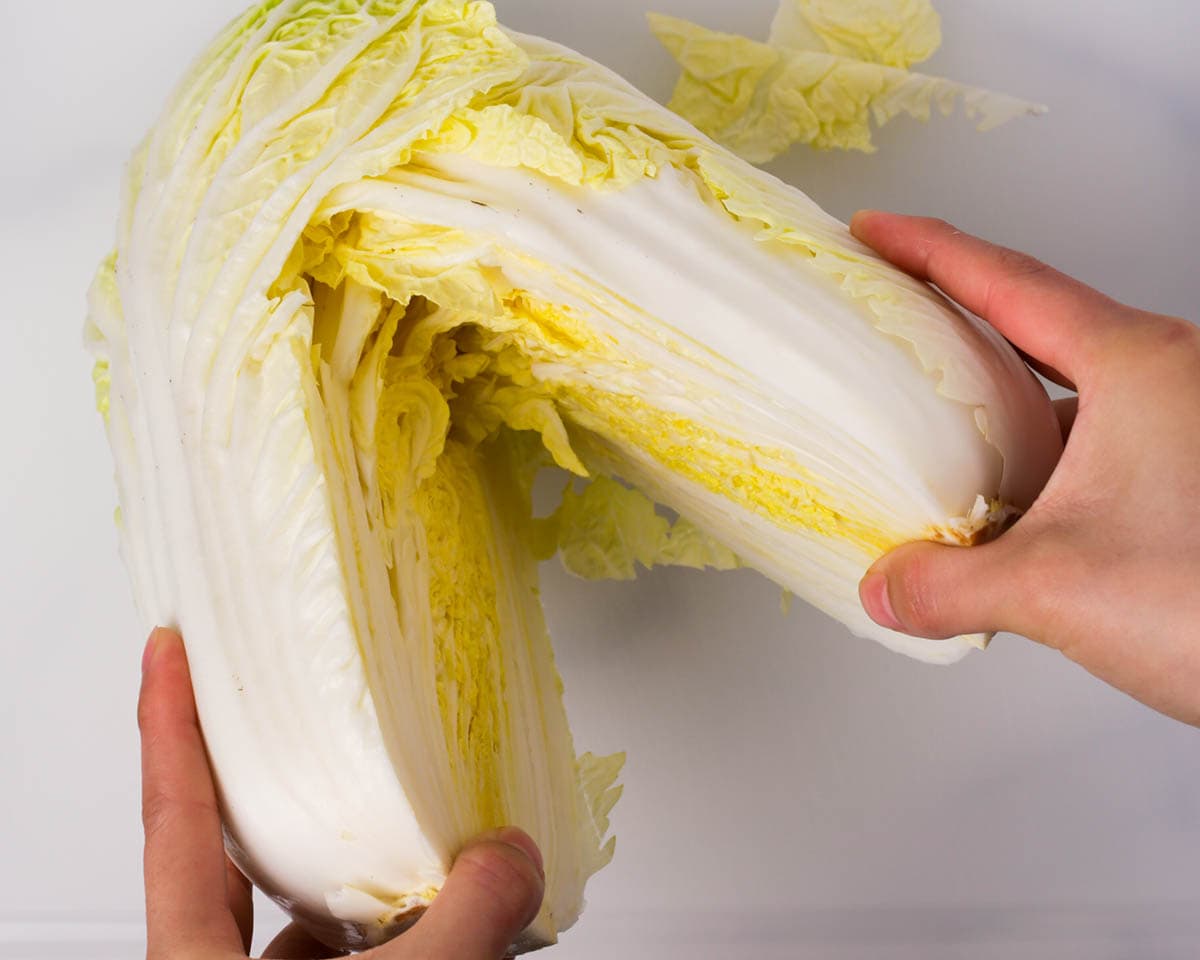
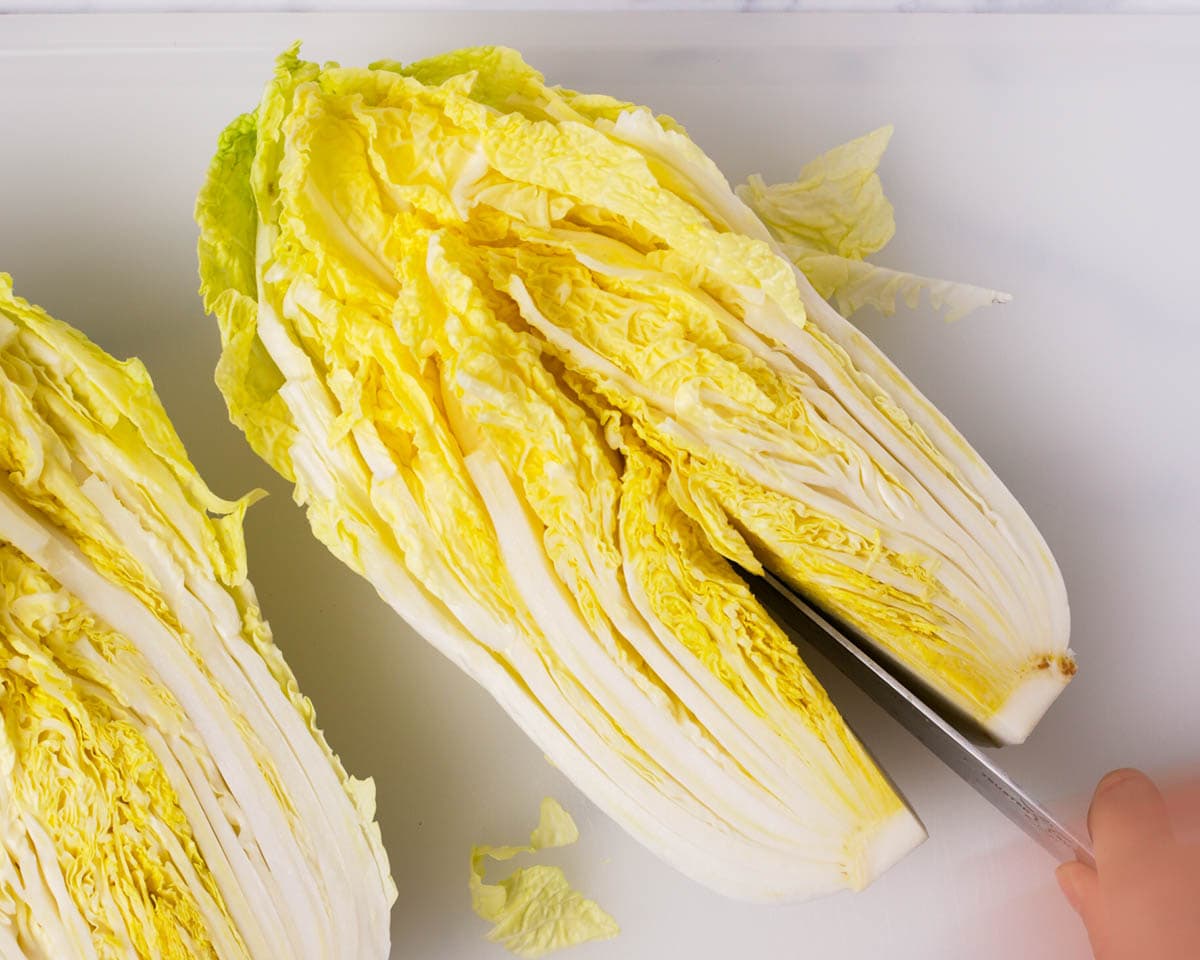
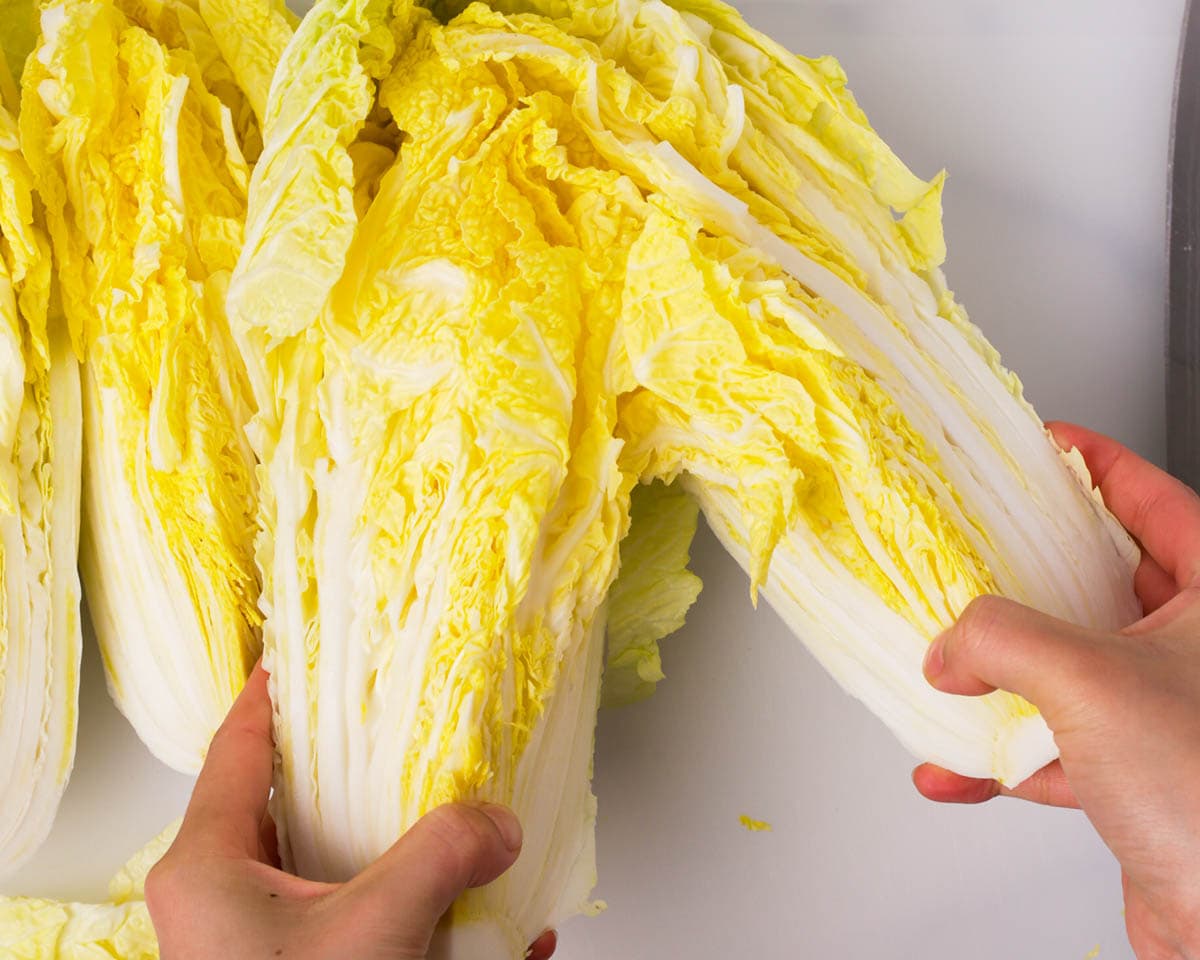
2. With the napa cabbage laying on its side, quarter the cabbage long ways. You can also just cut the stem area of the cabbage and rip the rest of the cabbage open with your hand. Repeat with remaining napa cabbage.
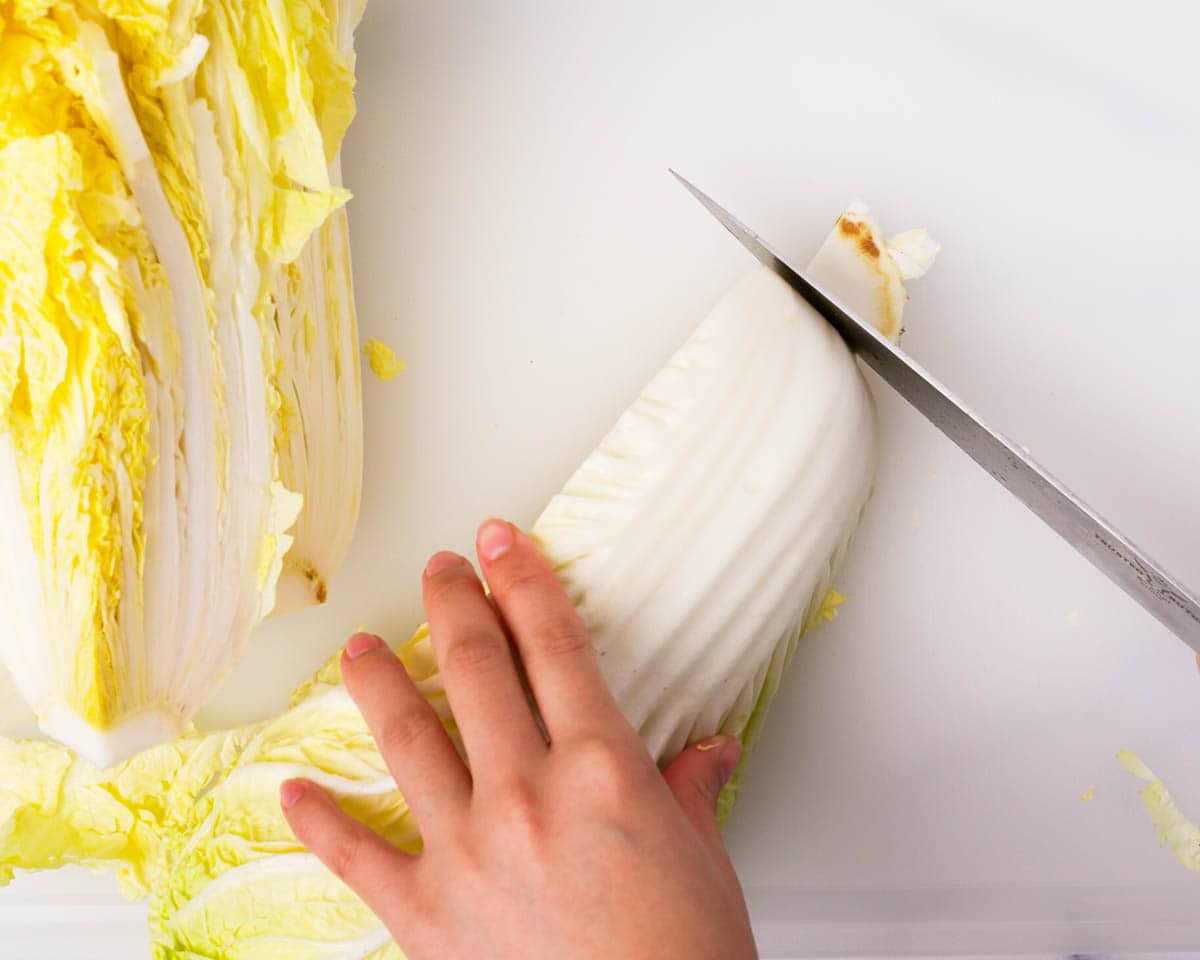
3. Trim away excess part of the cabbage core but not too much so that the leaves can stay intact. Then, rinse between each leaf to remove dirt or grim. Make sure to pay extra attention to the outer few leaves. Drain the cabbages as best as you can.
Salt the napa cabbage:
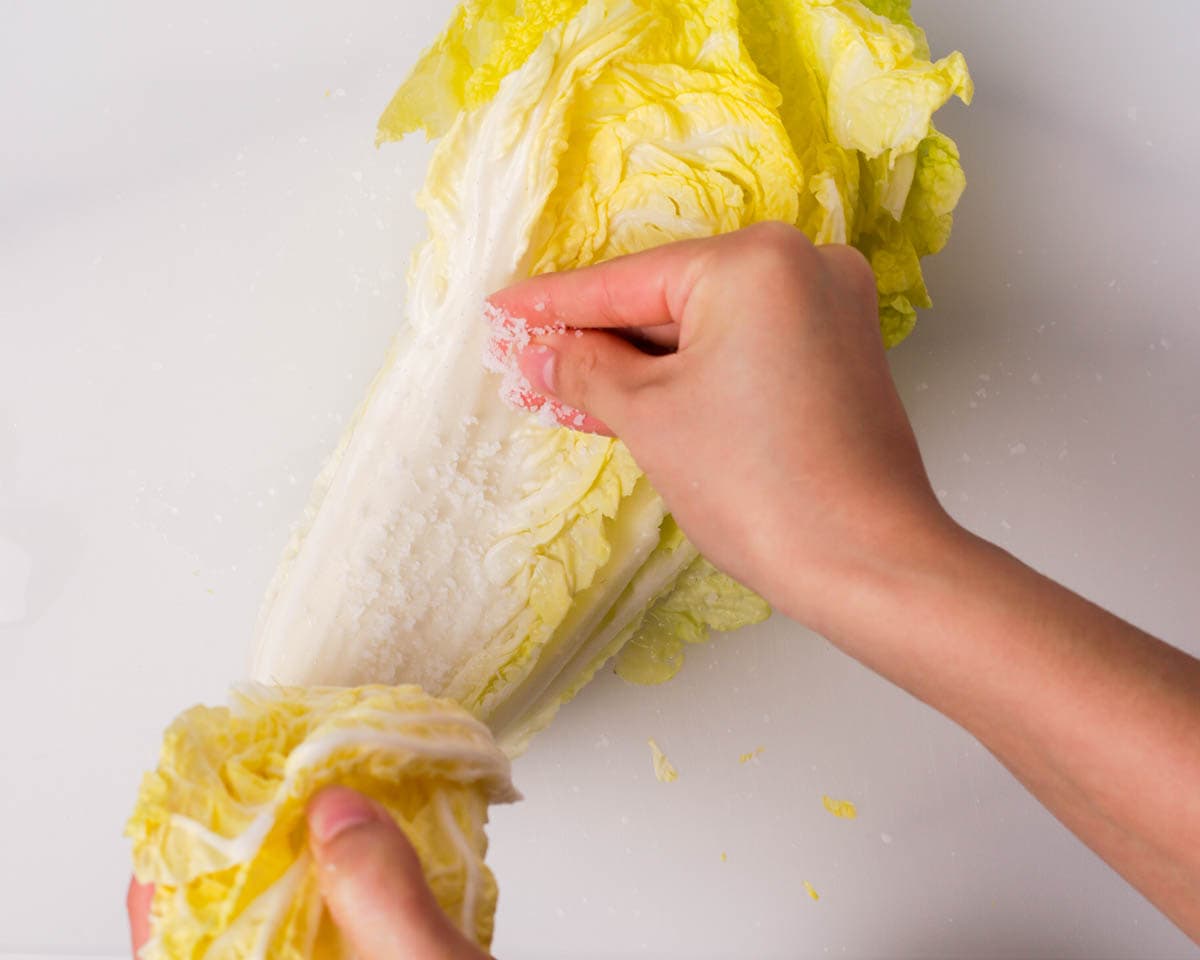
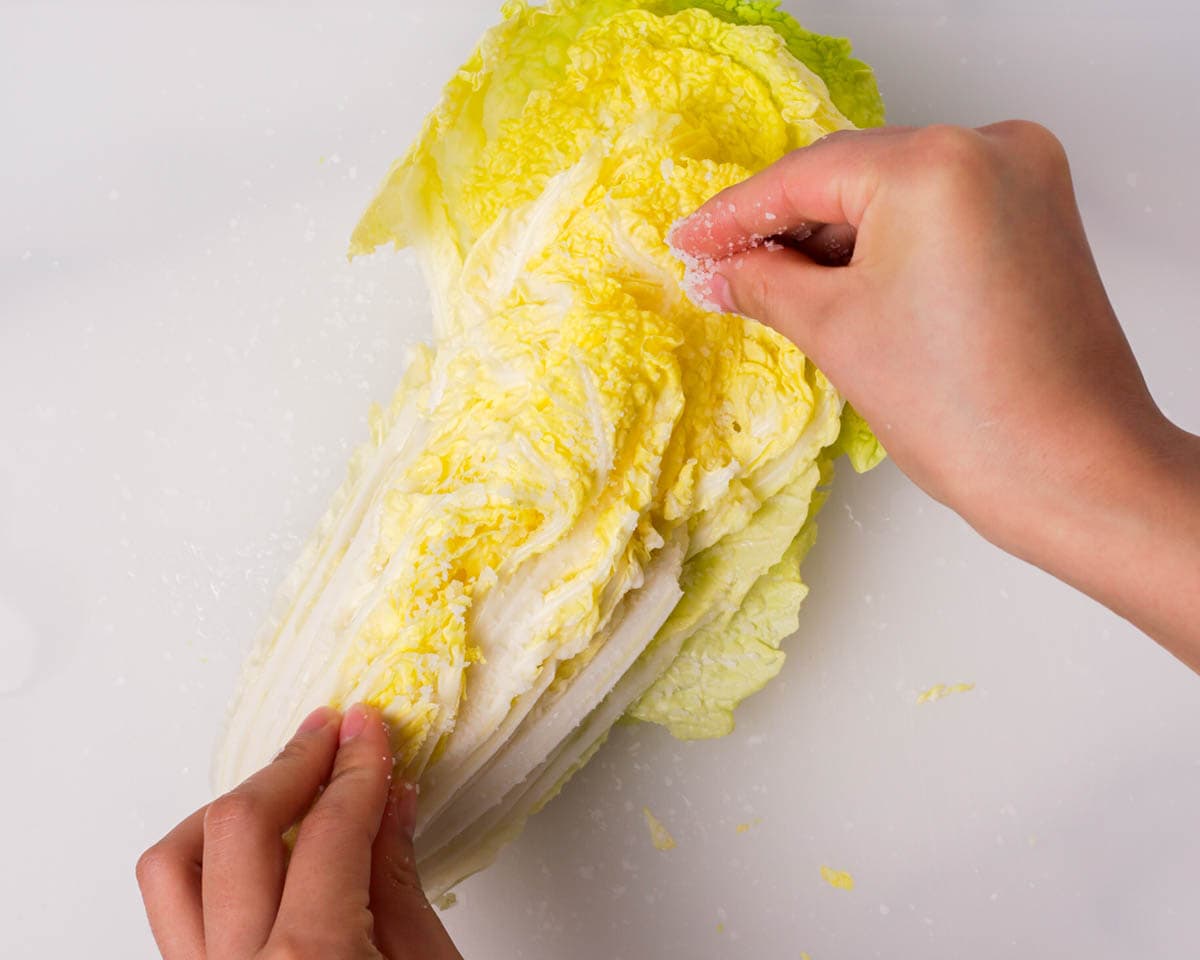
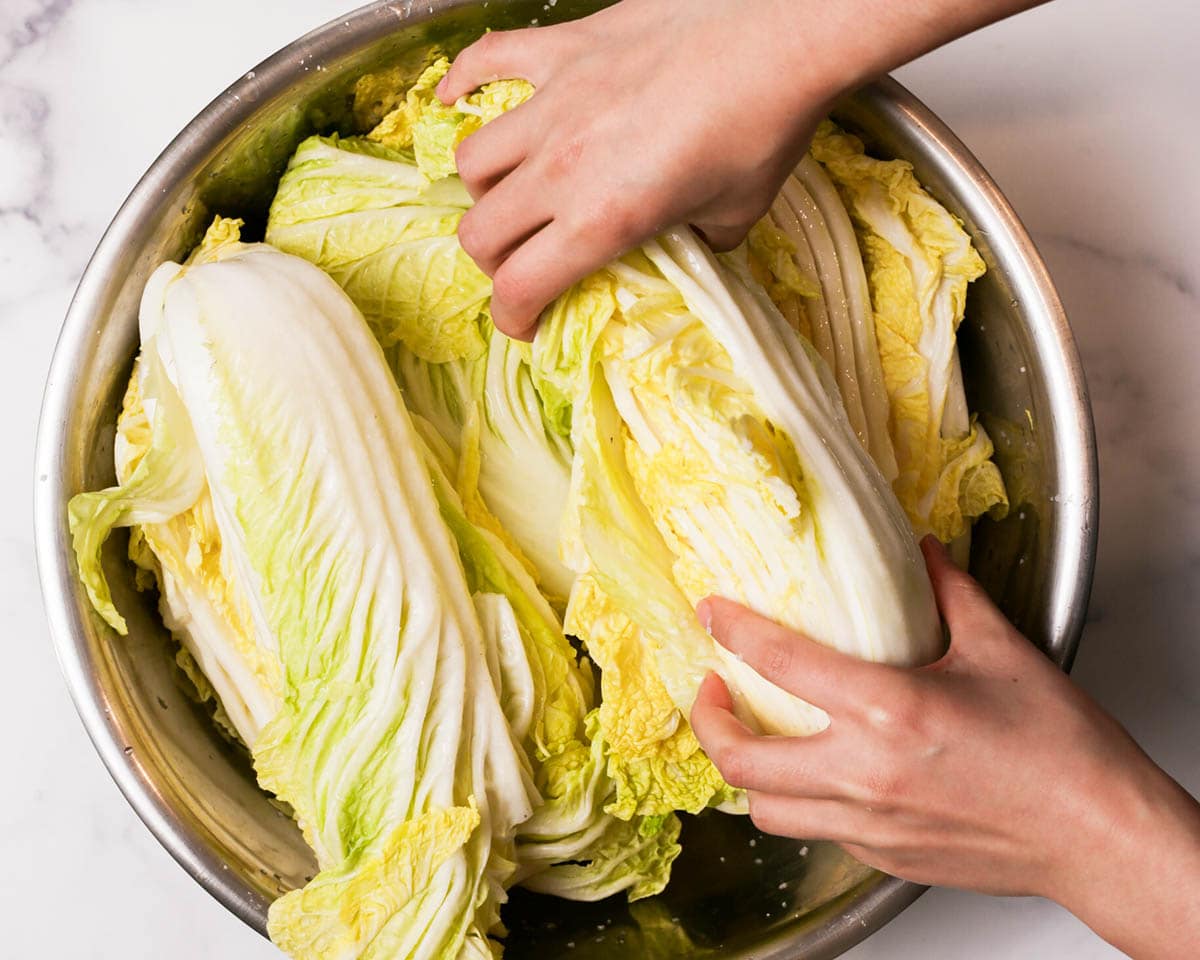
4. In a clean, sanitized area (like a large bowl in a clean sink), salt each quarter of napa cabbage by sprinkling salt between each and every layer and from the root to the tip of each leaf. Make sure to salt more generously around the stems. Repeat with all cabbages.
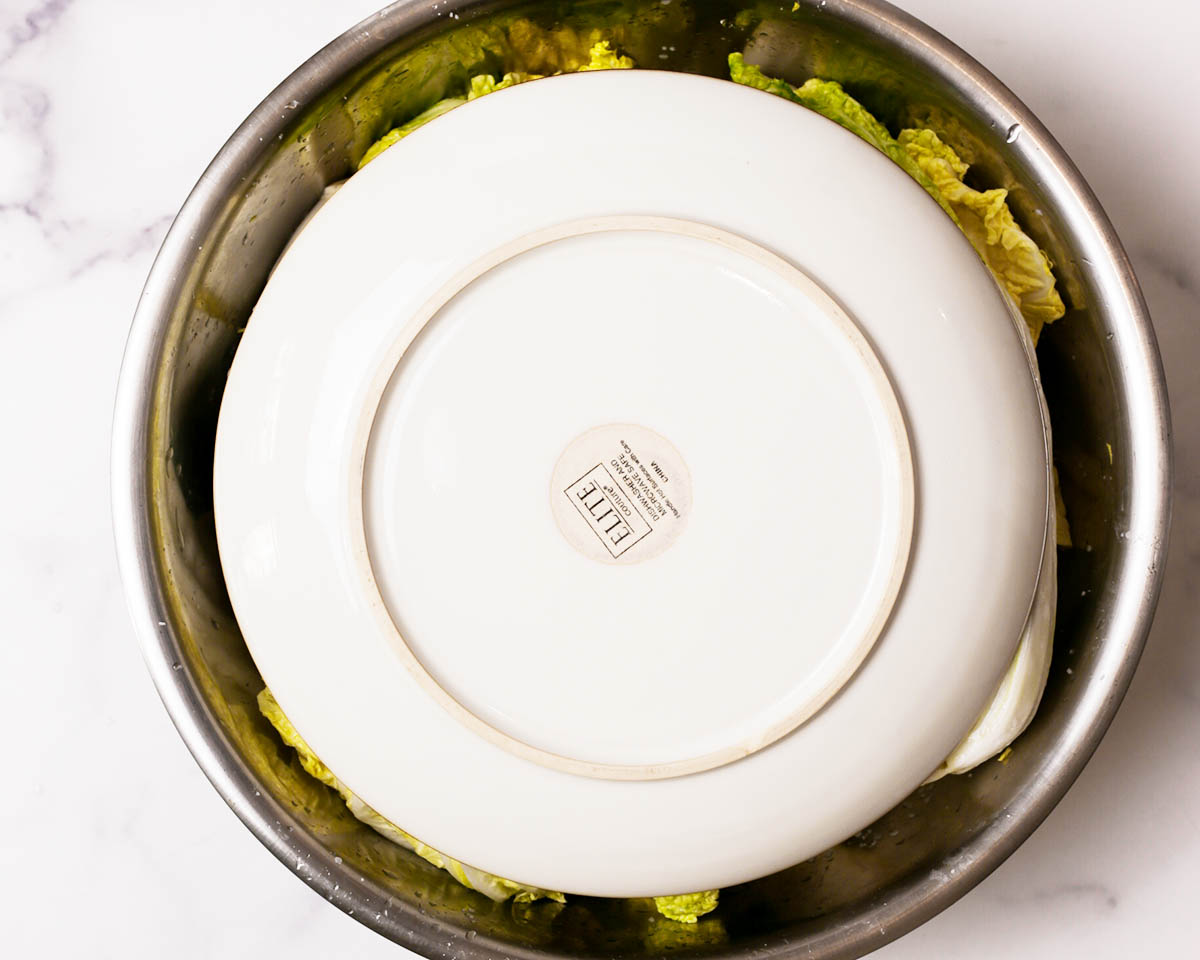
5. Once all of the cabbages are salted, arrange and stack them in a large bowl. Cover and weigh down the cabbages with something heavy and let them salt for 1½ to 2 hours. Rotate the cabbages every 30 to 60 minutes, moving the ones on the top to the bottom.

6. To check if the napa cabbage is done salting, rip off a small leaf of cabbage and rinse it well with fresh water. Taste the cabbage. The cabbage will be very bendable and should taste well seasoned at the stem, while the leaf should be a littler saltier but not unbearable. If the cabbage does not taste salted enough, continue with the salting process for another 30 minutes to 1 hour, until the desired saltiness is achieved.
Make the kimchi marinade:
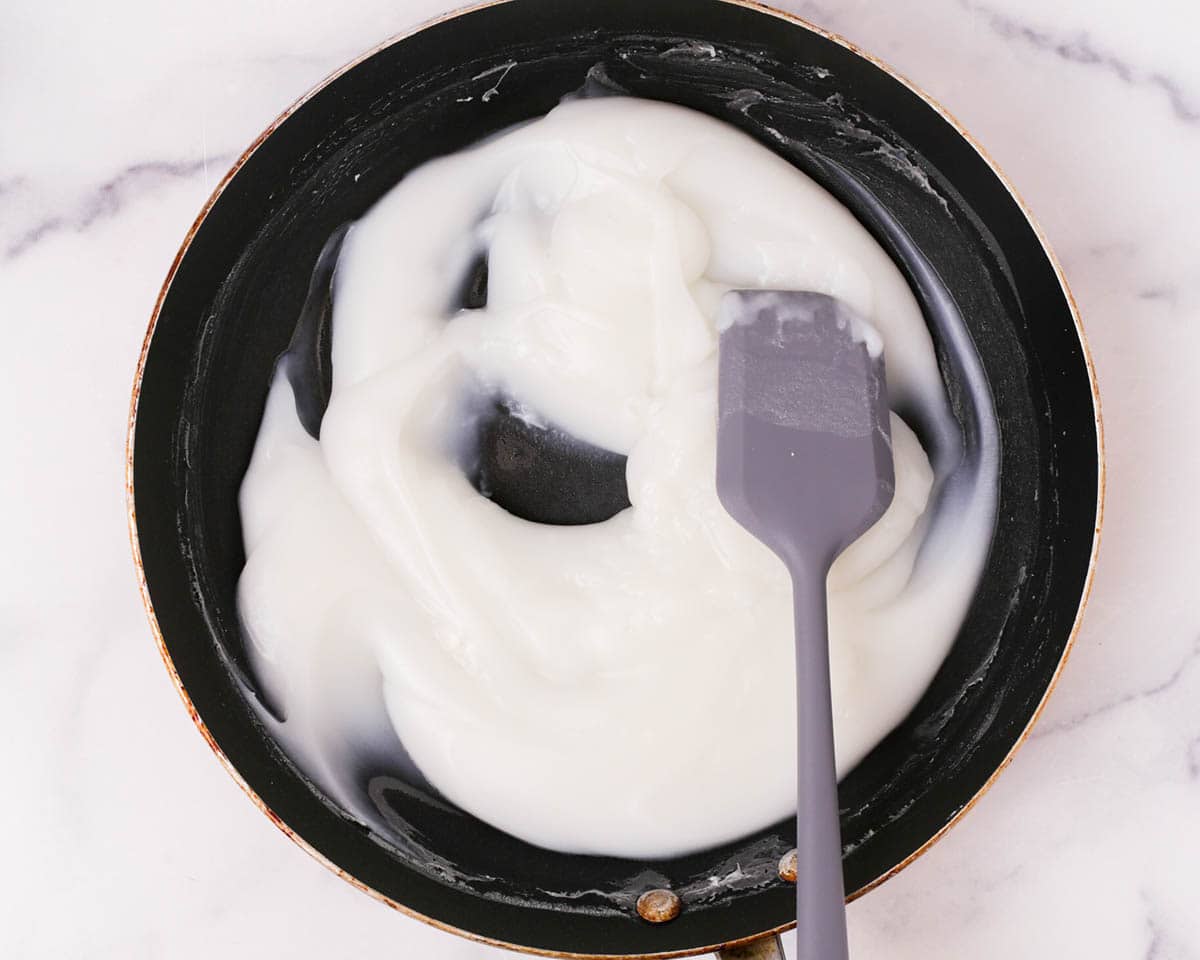
7. While the napa cabbages are salting, make the marinade. First, make the rice flour paste by whisking together the rice flour and water until well combined. Transfer the mixture to a pan or saucepan and cook over medium to medium high heat, stirring occasionally. Once the paste starts to thicken, stir constantly until the a thick, bubbly, slightly translucent paste forms. Transfer to a large mixing bowl and let cool.

8. In a blender, add the apple or pear, onion, garlic cloves, ginger, and saeujeot or fish sauce. Blend everything together until the mixture is well blended. Add half of the gochugaru to the mix and blend until well combined and as smooth as possible. Scrap down the sides as needed.
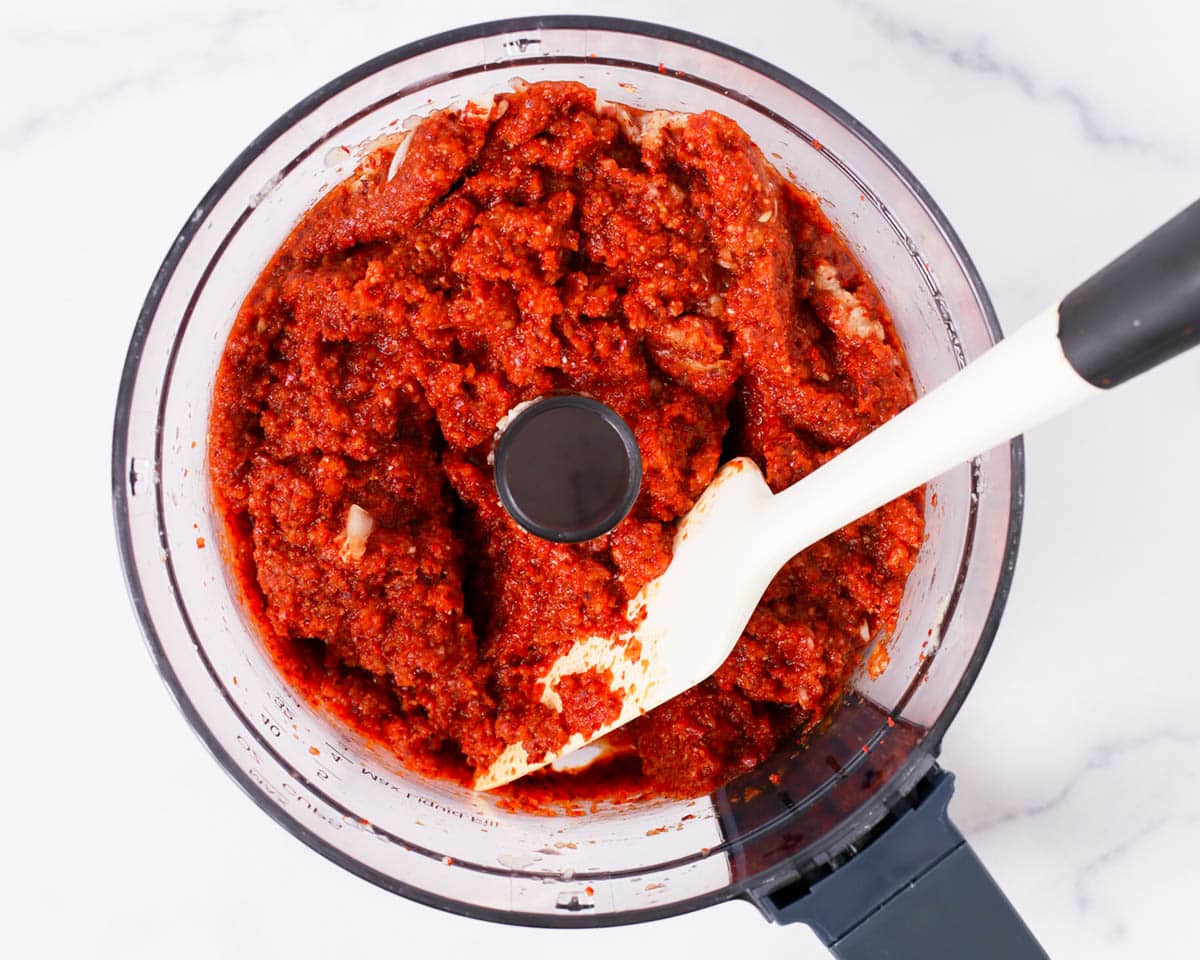
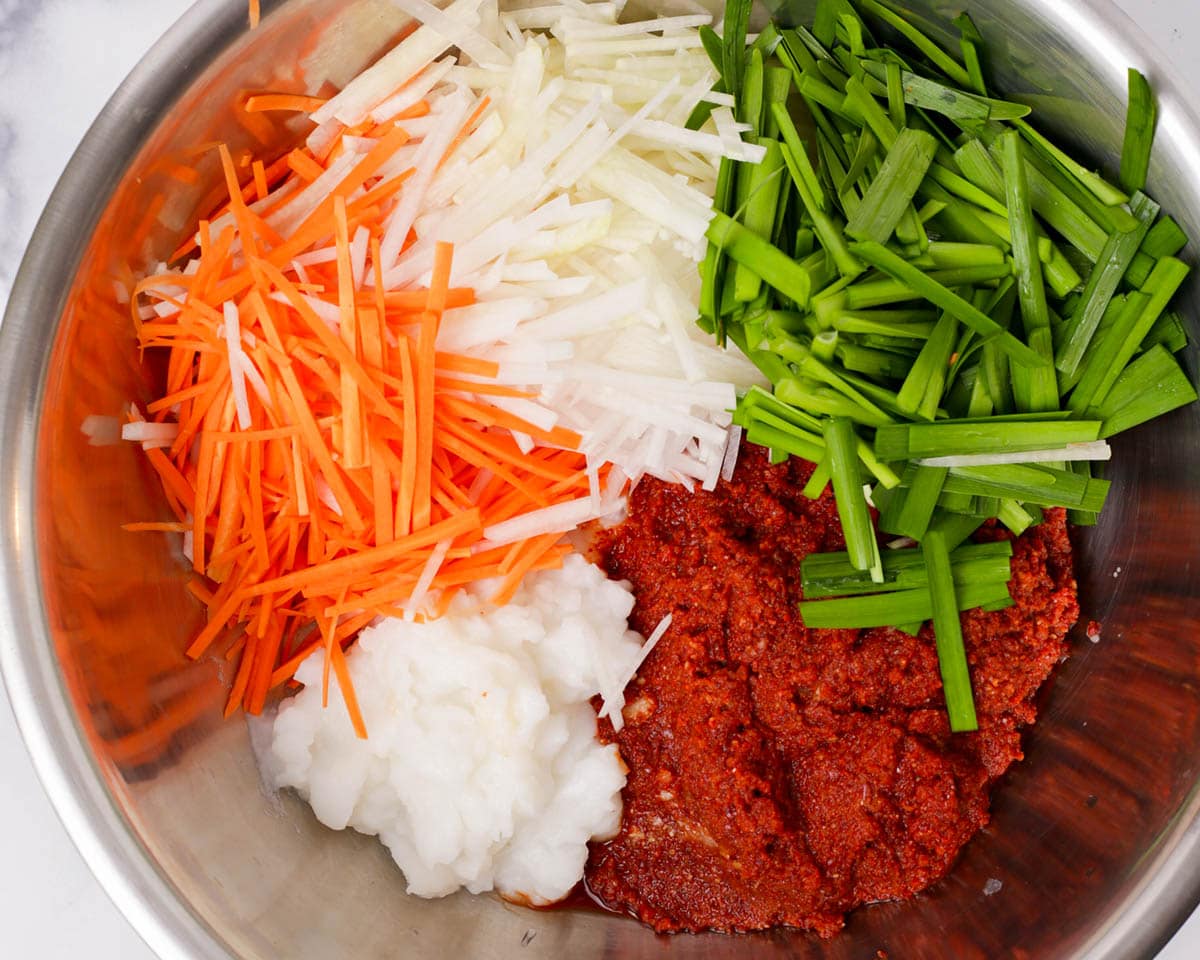
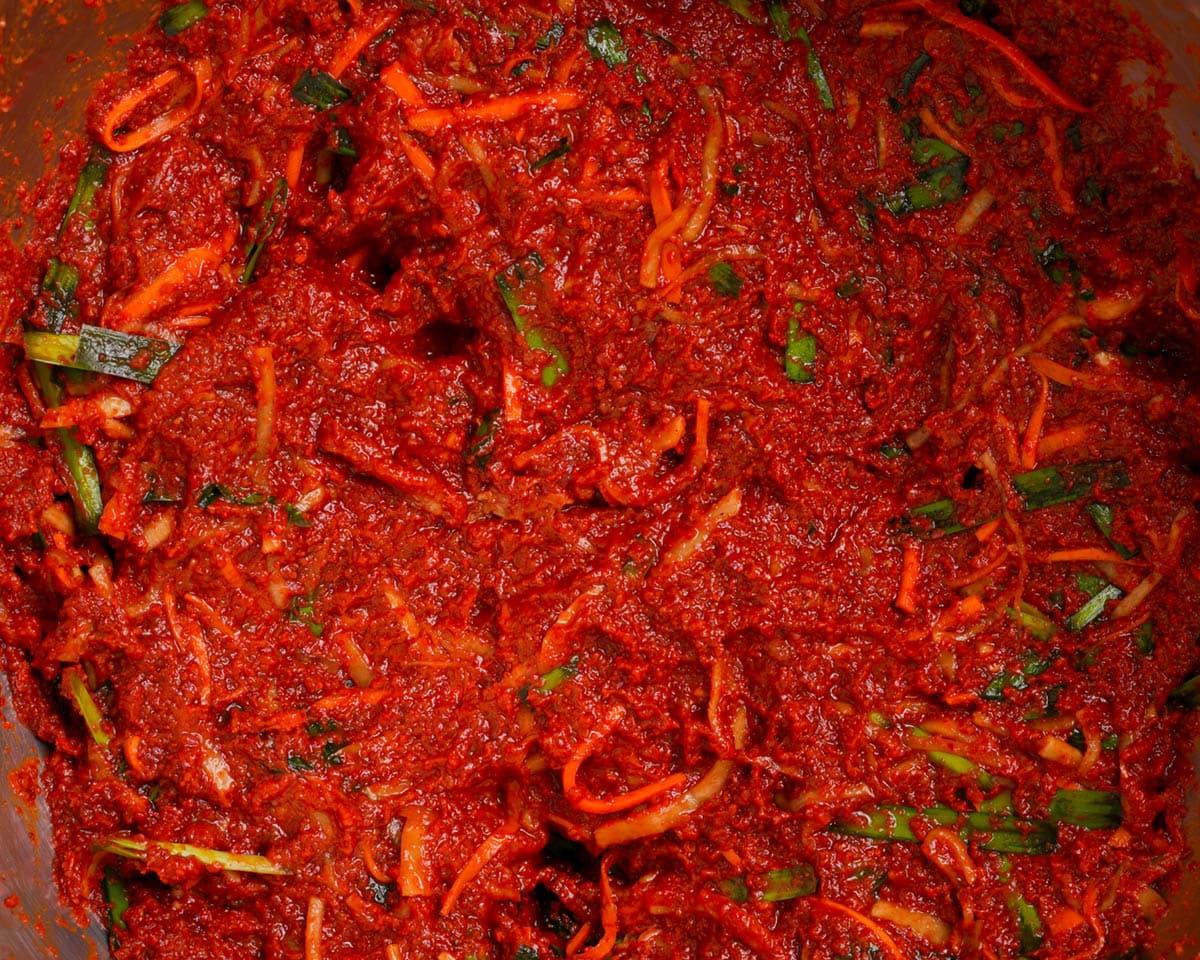
9. Transfer the mixture to the bowl with the cooled rice flour paste, along with the rest of the gochugaru, Korean radish, carrot, and Asian chives. Mix until evenly combined. Set aside until needed
Rinse the napa cabbage:
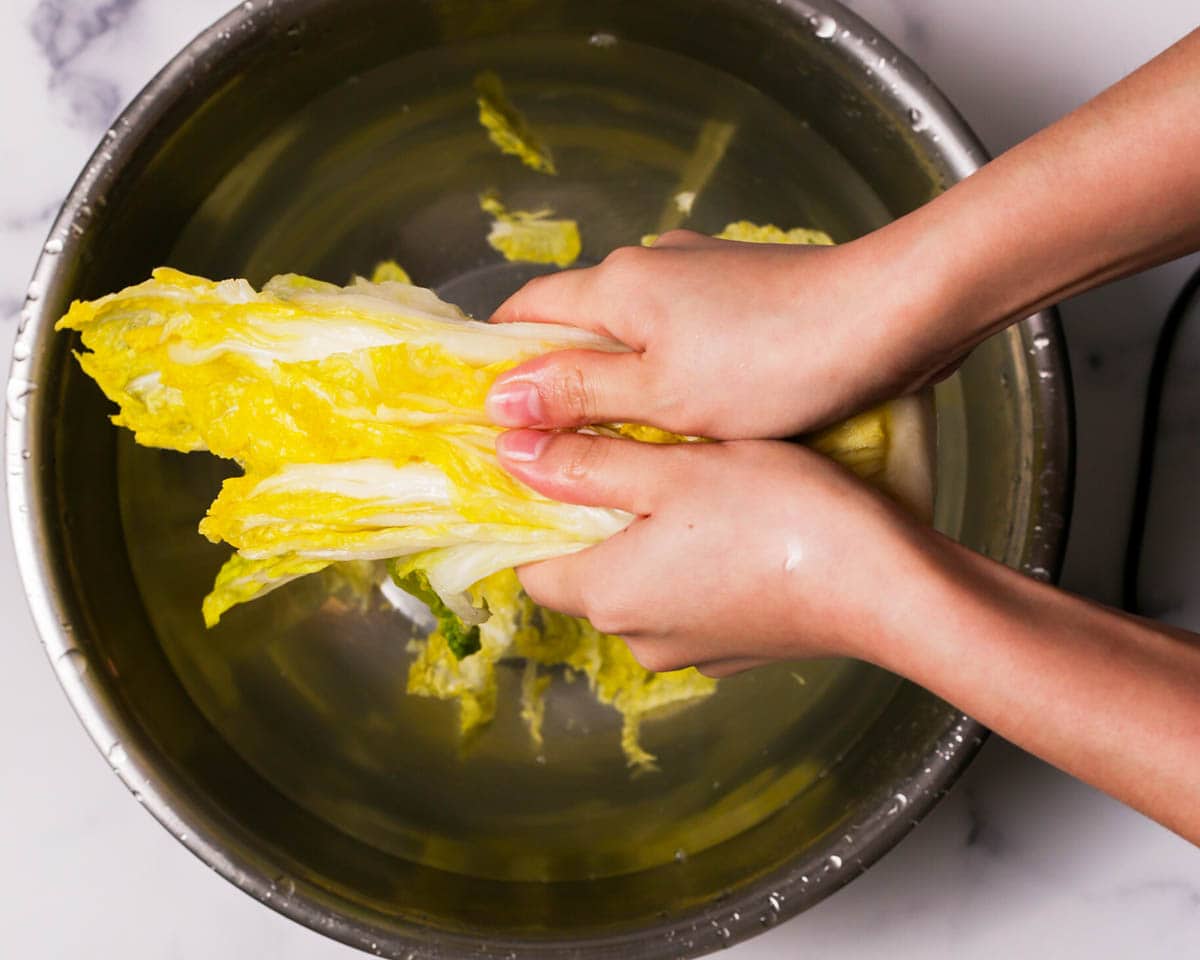
10. Once the napa cabbages are done salting, rinse the them with fresh water to remove excess salt. Make sure to get between each leaf.

🌟 Pro tip: We like to rinse our napa cabbage in a large bowl of water and repeating the process about 2 to 3 times with fresh water. We recommend tasting the cabbage after the final rinse to see if the cabbage require an additional round or two of rinsing.
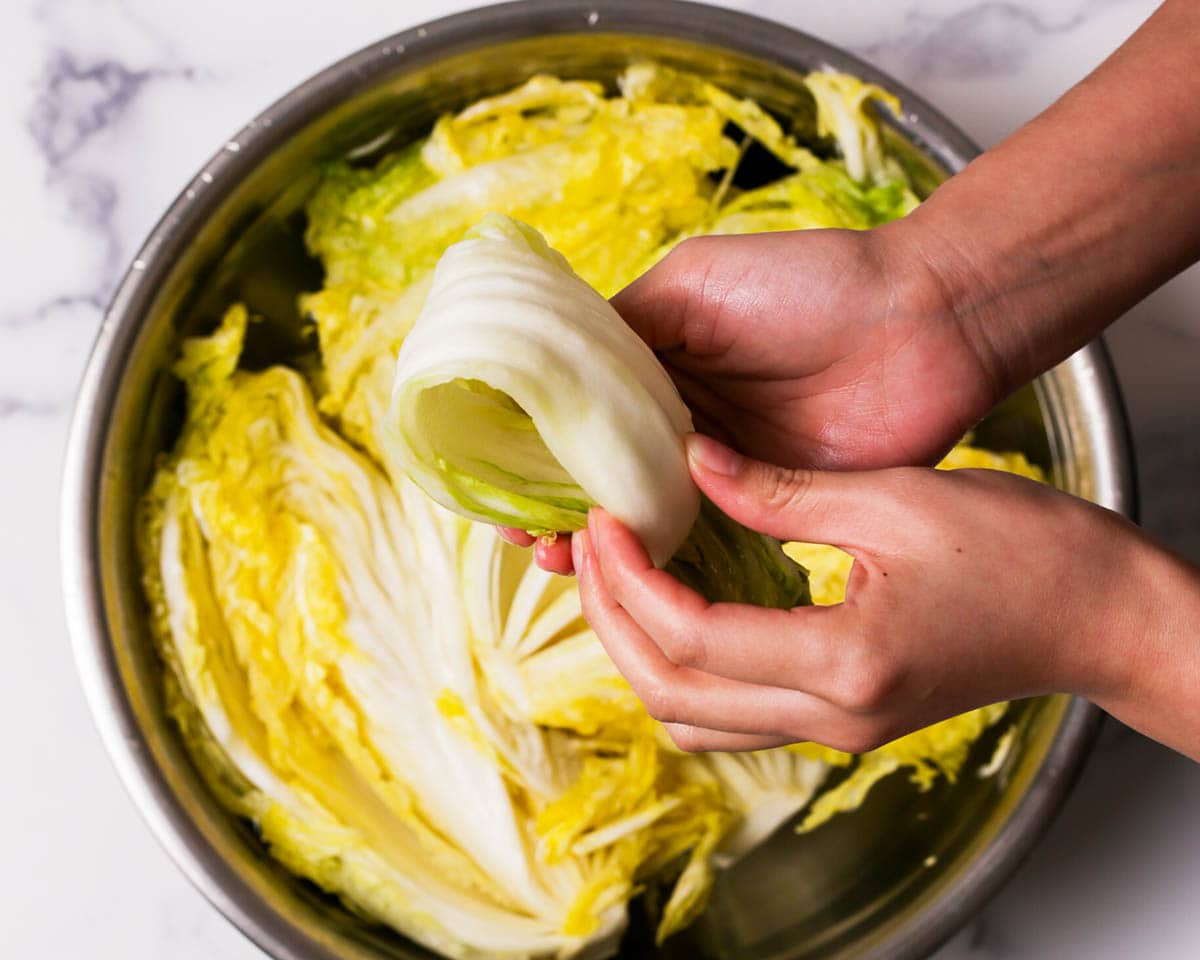
11. After the final rinse, gently but firmly squeeze each quarter of napa cabbage to remove most of the excess water, especially the leafy parts. But don’t squeeze too hard or the stems may get bruised and damaged. Removing the excess water helps to prevent the marinade from becoming diluted and watery.
Marinate the napa cabbage:
12. Working with gloved hands and one quarter of napa cabbage at one time, place the cabbage in the bowl of prepared kimchi marinade. Take some marinade and rub it on each leaf. Make sure to also leave some of the julienned veggies in between each layer too!
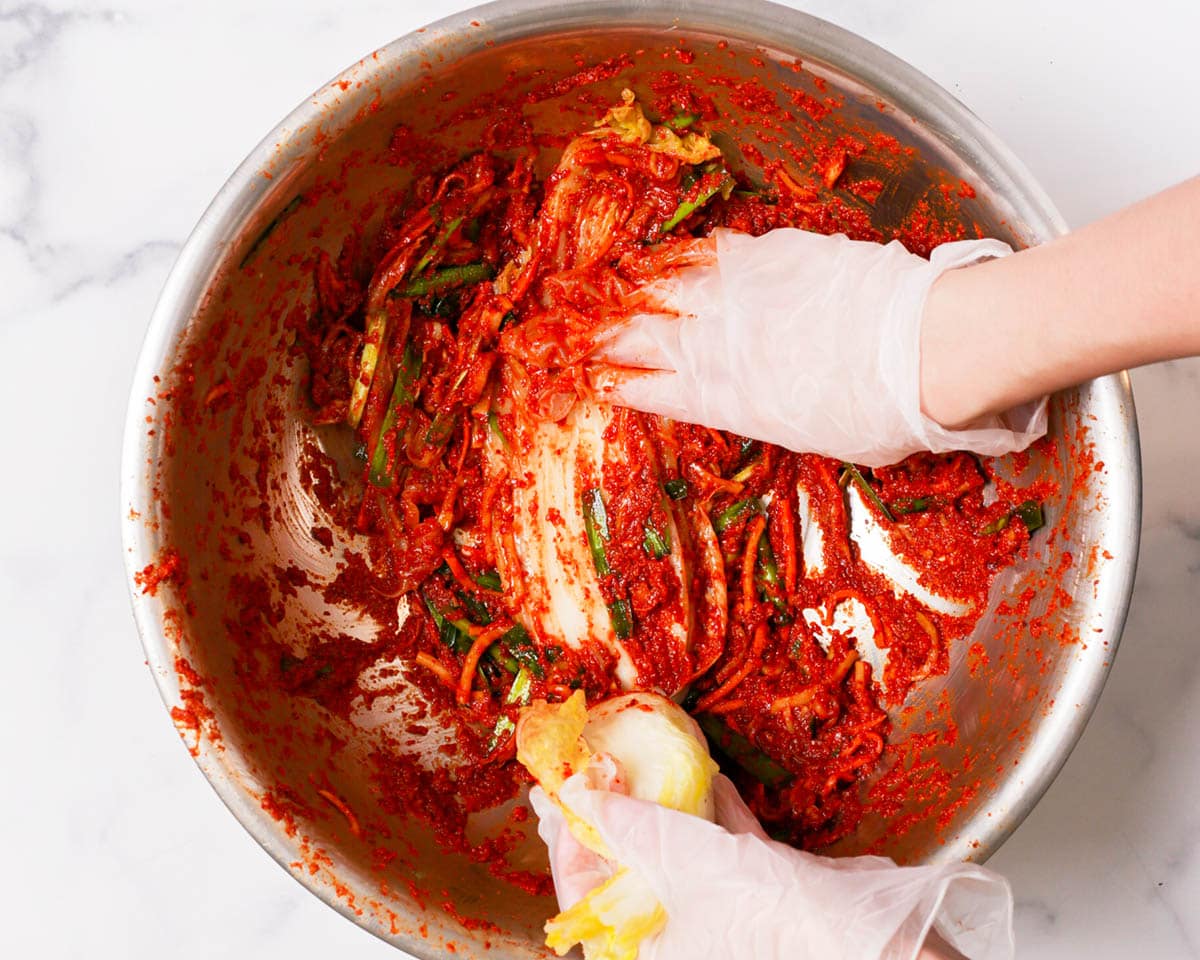
13. Once the entire quarter of cabbage has been rubbed down with marinade, fold the cabbage over itself to keep it tight. Repeat with remaining cabbage.

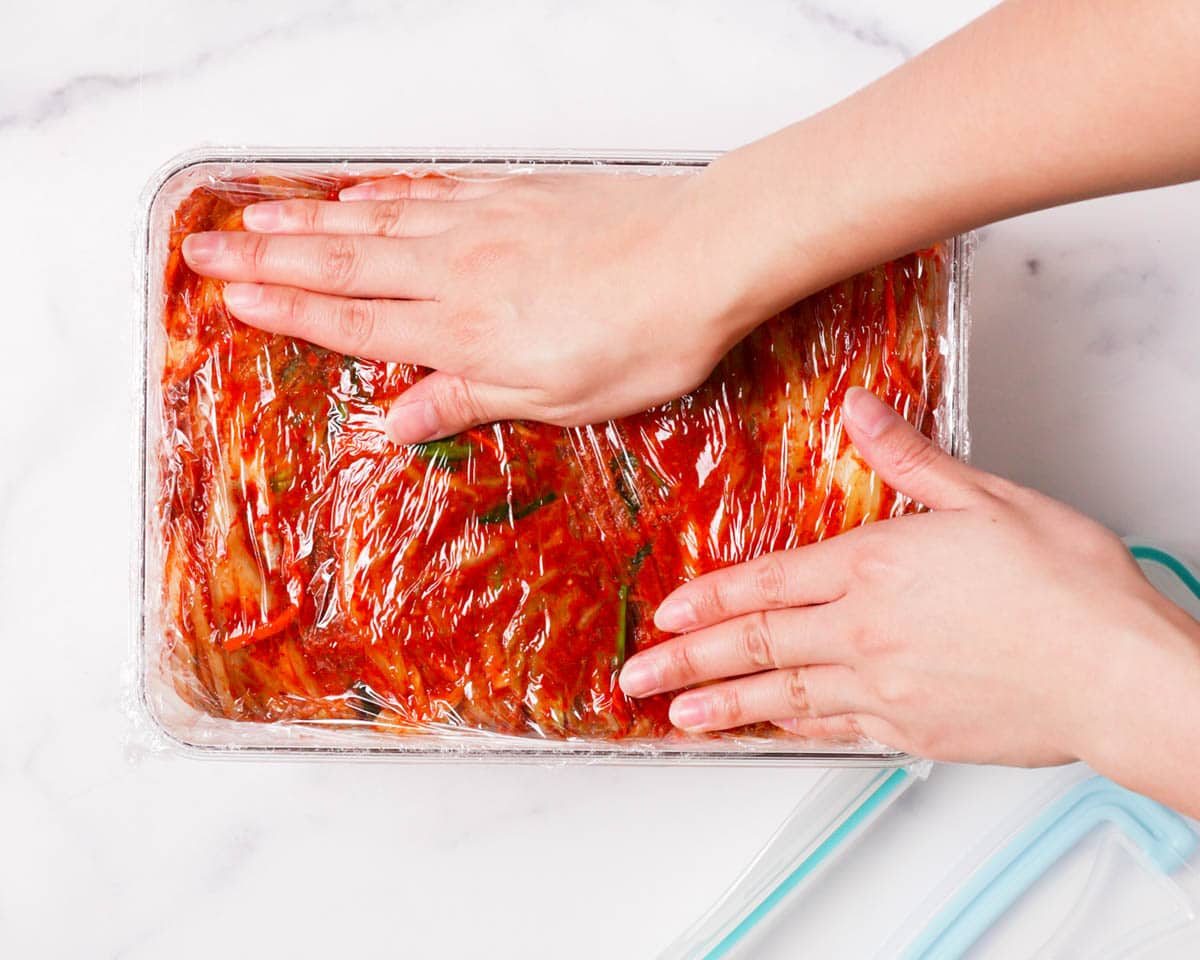
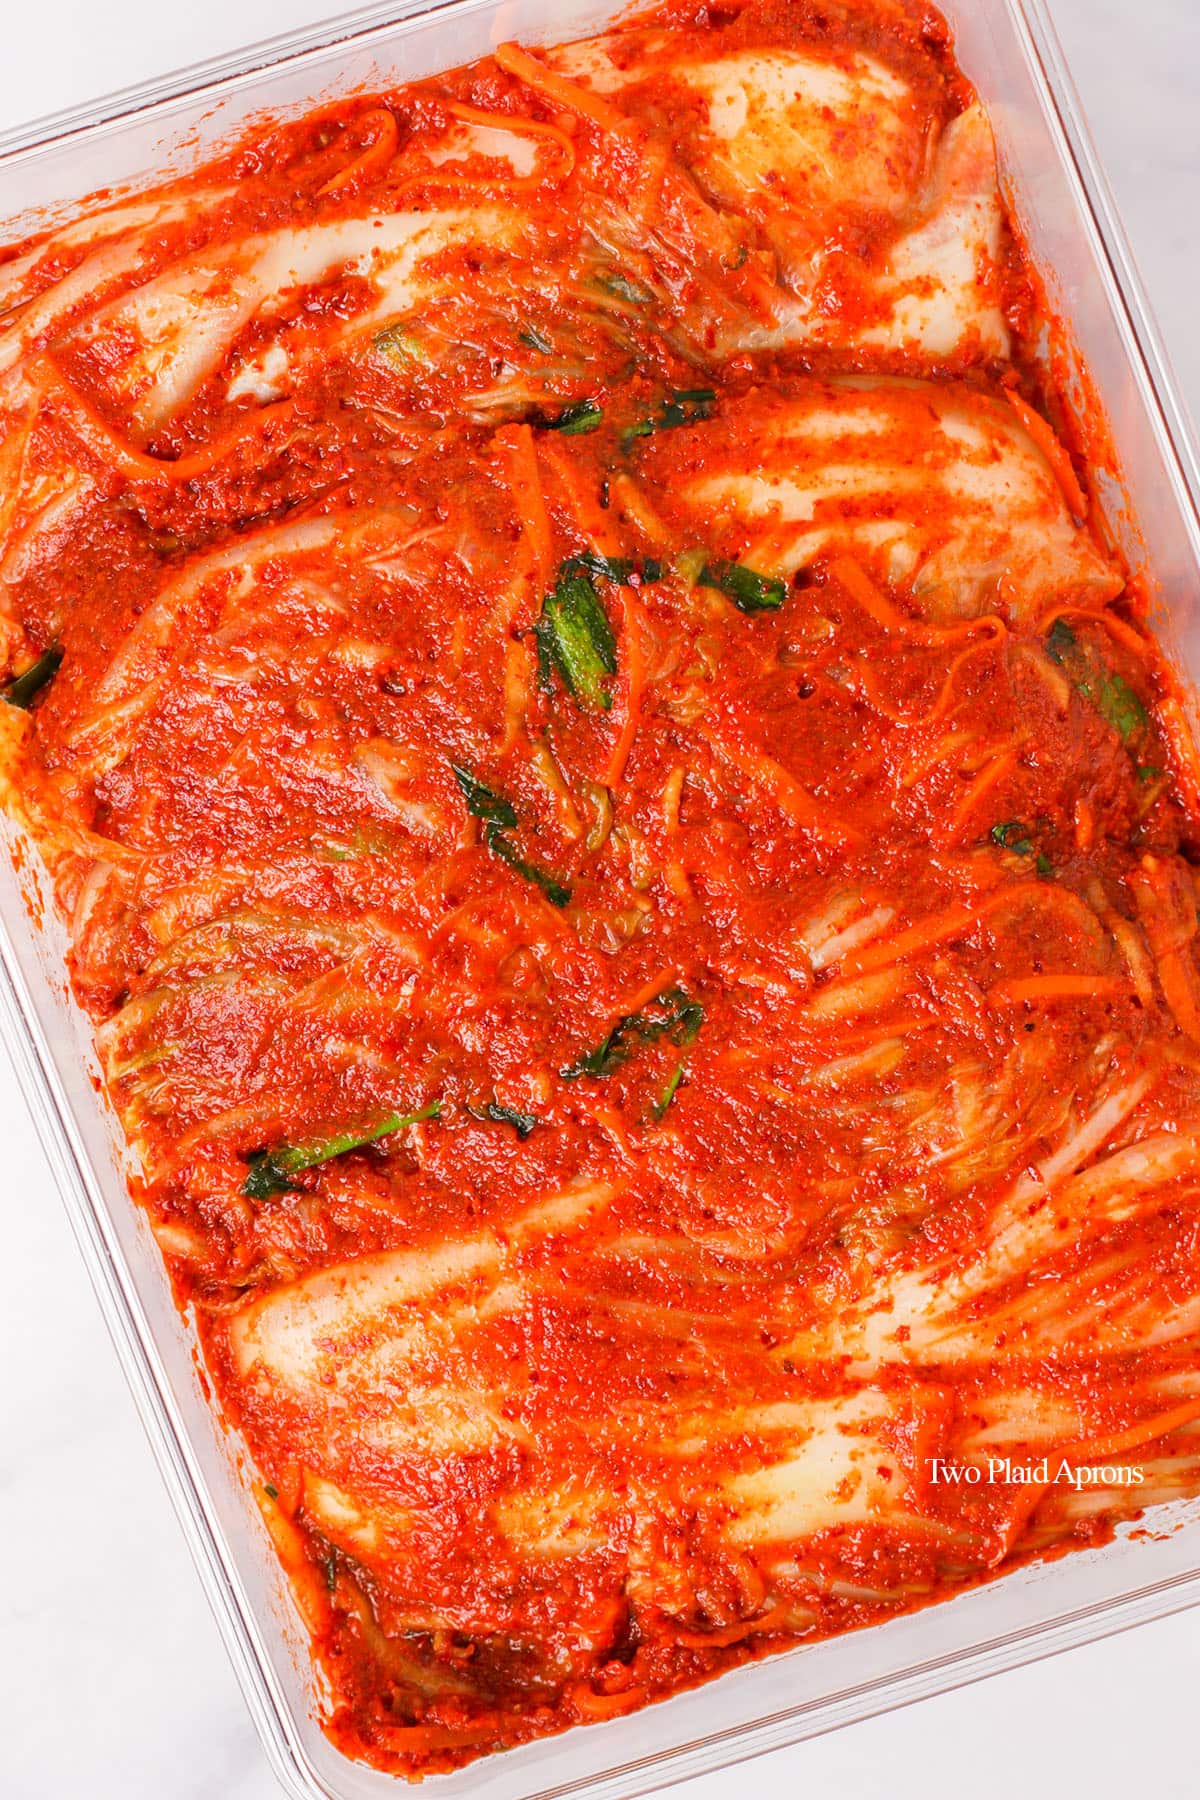
14. Pack the kimchi into sterilized glass jars or BPA free plastic kimchi containers. Make sure to pack the cabbage tightly into the container, but leave at least 1 inch of space between the top of the kimchi and the lid. As the kimchi ferments, it will release juices and produce gas. The extra room will help prevent the kimchi from popping off the and the juices from overflowing.
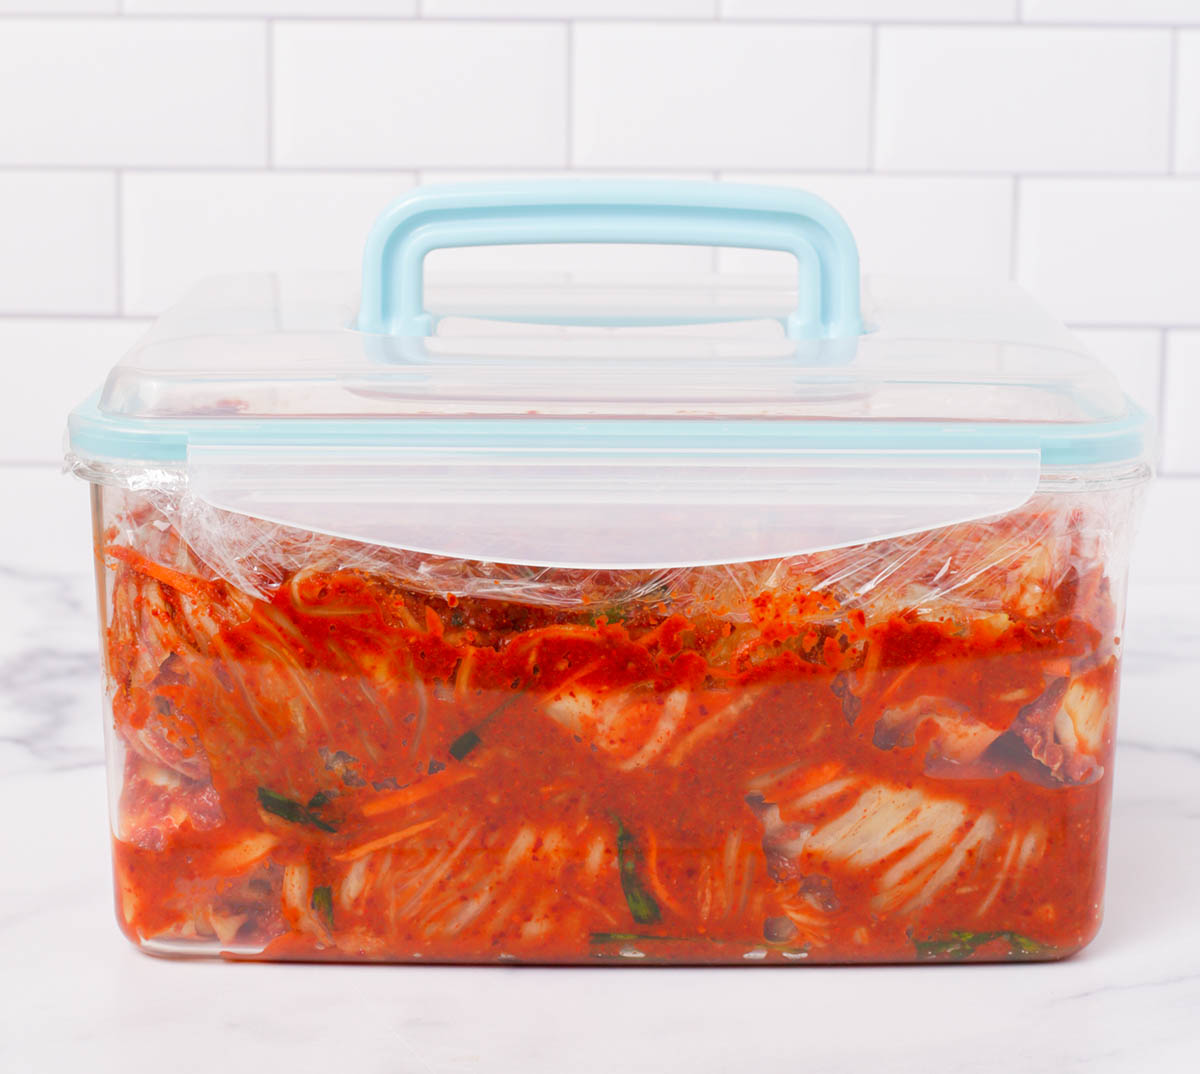
🌟 Pro tip: If storing in a kimchi tote, place a sheet of cling film on the kimchi. Make sure to tuck the cling wrap in and that the cling wrap is touching the kimchi. This helps to prevent excessive oxidation.
15. The napa cabbage kimchi can be enjoyed immediately after marinating, after chilling, or you can let it ferment until it reaches your desired fermentation stage before eating or used in cooking.
Recipe tips
- Use Kosher salt or coarse salt to salt the napa cabbage. Coarser salt is easier to sprinkle, and it's easier to gauge how much salt is used and control the saltiness.
- Wear disposable gloves when slathering the marinade onto the salted cabbages. The marinade will stain your hands and anything it touches.
- Use weights to help the napa cabbage salt faster. The weight helps to compress the cabbage, which ensure the leaves are in contact with the salt so that osmosis does its thing. We like to stack heavy books on a clean plate or bowl.
- Leave at least an inch gap in the kimchi container. The gap is to compensate for the expansion the kimchi will undergo during fermentation. The amount of juices will increase too. If you do not leave enough room or eat enough as the kimchi ferments, it will overflow and leak from the containers.
Storage
This kimchi can be enjoyed right away, but if you prefer it more acidic, like the store-bought ones, let it sit overnight at room temperature or for a day or two to speed up the fermentation process. Then, keep it refrigerated at all times. You can also transfer the kimchi to the fridge right away once you're done making it, if you prefer a slower fermentation and want to enjoy the taste of fresh kimchi for a few extra days.
Make sure the kimchi is stored in clean, sterilized glass jars. We often store our kimchi in the gallon glass jars we saved from store-bought kimchi or in quart size mason jars. You can also store kimchi in clean BPA-free plastic containers, but do let me warn you. The container will most likely be stained orange and will forever smell like kimchi. So make sure to use a container you want to dedicate to storing kimchi.
Lastly, make sure to press down on the cabbages and try to keep them tightly packed together. Do this every time the kimchi is used. This prevents the kimchi from being exposed to a lot of oxygen, which could cause it to oxidize and spoil sooner.
🌟 Pro tip: We also recommend double and triple wrapping the container in a few layers of plastic bag. This is especially helpful if you are storing the kimchi in the same fridge as other groceries. Otherwise, the smell will for sure permeate into everything.
How to sterilize jars
The easiest way to sterilize your glass jars or canning jars for your is by boiling them. Just bring a pot of water to a boil and gently submerge the jars into the water completely. Let them simmer for 10 minutes for altitudes of 1000 feet or less and add an additional minute per 1000 feet.
Alternatively, if you are using those gallon size jars, you can place the jar upside-down into a pot or pan of simmering water. Let the jars steam for about 15 minutes.
🌟 Pro tip: Place a rack at the bottom of the pot or pan to prevent the jars from having direct contact with the heat and to precent the constant clanking.
Once they are done boiling or steaming, carefully remove the jars and let them cool and dry completely before using.
FAQ
Most kimchi are spicy. Usually, the spice level is around medium, and it's determined by the gochugaru. Most gochugaru are not super spicy, but if you prefer it extra spicy, you can blend some jalapeño or Serrano pepper into the marinade.
If the kimchi was properly salted, prepared, and stored, it should last up to 6 months, or even a year. Do note that, as the it ferments, it'll go from sweet, to kind of sour, and to very sour and bubbly. Sour and bubbly kimchi is perfect for jjigae (stews)!
It is not necessary to use carrots, radish, and the Asian chives for making kimchi, however, we highly recommend. The vegetables add extra flavor and sweetness. Also, both the Korean radish and Asian chives adds a very particular funkiness that gives kimchi its iconic funk.
Tasting the napa cabbage is the only way to know if the cabbage is salted enough. To taste the cabbage, take a piece and rinse it well with fresh water. The stem of the cabbage should taste well seasoned while the leaf should taste a little salty but not unbearable. Do note that the salting process preserves the cabbage. So the more salted they are, the longer they will last.
Kimchi can technically be preserved forever, if not, at least 6 months. However, it all depends on whether it was properly salted, prepared and stored. If your kimchi smells sour or tastes sour and fizzy, that is totally normal. That means it is fermenting well. However, if your kimchi is showing signs of molding or discoloration (turning really dark), it would be wise to discard it.
No. Gochugaru, or Korean red pepper flakes, have a very particular flavor that does not taste like regular red pepper flakes. We highly recommend against using regular red pepper flakes.
If you’ve made this recipe or any recipes from our blog, please tag us on Instagram using #twoplaidaprons! You can also tag us in your Instagram stories using @two_plaid_aprons. We would love to see your creations! It absolutely makes our day! 🥰
📖 Recipe

Kimchi (Napa Cabbage Kimchi)
Ingredients
For the napa cabbage:
- 8 pounds napa cabbage (usually each head is around 4 pounds)
- Kosher salt (about 2 cups, or as needed, for salting)
For the kimchi marinade:
- 1½ cup water
- ⅓ cup rice flour regular or glutinous
- 1 large apple cut into smaller pieces and discard core (fuji, honey crisp, gala) *see notes for Korean pear
- 1 large onion peeled and cut into smaller pieces
- 20 cloves garlic peeled (about 3oz/85g)
- 2 inch knob of ginger peeled and cut into smaller pieces
- ½ cup fish sauce or ¾ cup saeujot per ½ cup fish sauce *see notes
- 2 cups gochugaru (coarse) divided (also known as Korean red pepper flakes)
Additional veggies for the kimchi:
- 1 pound Korean radish peeled and julienned
- 6 ounces carrot peeled and julienned
- 4 ounces Asian chives cut into 1 inch pieces (discard about 1 to 2 inches the tough stem)
Instructions
Clean and salt the napa cabbage:
- Peel away and discard any undesirable outer layer leaves of the napa cabbage.
- With the napa cabbage laying on its side, quarter the cabbage long ways. You can also just cut the stem area of the cabbage and rip the rest of the cabbage open with your hand. Repeat with remaining napa cabbage.*Please refer to the post above for photo reference.*
- Trim away excess part of the cabbage core. Then, rinse and wash each quarter of the napa cabbage with water to remove dirt or grim. Make sure to pay extra attention to the outer few leaves. Drain the cabbages as best as you can.
- In a clean, sanitized area, salt each quarter of napa cabbage by sprinkling salt between each and every layer of leaves. Make sure to salt more generously around the stems. Repeat with all cabbages.
- Once all of the cabbages are salted, arrange and stack them in a large bowl. Cover and weigh down the cabbages with something heavy and let them salt for 1½ to 2 hours. Rotate the cabbages every 30 minutes, moving the ones on the top to the bottom.
- To check if the napa cabbage is done salting, rip off a small leaf of cabbage and rinse it with fresh water. Taste the cabbage. The cabbage will be very bendable and should taste well seasoned at the stem, while the leaf should be a littler saltier but not unbearable. If the cabbage does not taste salted enough, continue with the salting process for another 30 minutes to 1 hour, until the desired saltiness is achieved.
Make the kimchi marinade:
- While the napa cabbages are salting, make the kimchi paste. First, make the rice flour paste by whisking together the rice flour and water until well combined. Transfer the mixture to a pan or saucepan and cook over medium to medium high heat, stirring occasionally. Once the paste starts to thicken, stir constantly until the a thick, slightly translucent paste forms. Transfer to a large mixing bowl and let cool.
- In a blender, add the apple, onion, garlic cloves, ginger, and fish sauce. Blend everything together until the mixture is well blended. Add half of the gochugaru to the mix and blend until well combined and as smooth as possible.
- Transfer the mixture to the bowl with the cooled rice flour paste, along with the rest of the gochugaru. With gloved hands, mix the paste until well combined. Then, add the Korean radish, carrot, and Asian chives and mix well. Set aside until needed
Rinse the napa cabbage:
- Once the napa cabbages are done salting, rinse the them with fresh water to remove excess salt. Make sure to get between each leaf. *We like to rinse our napa cabbage in a large bowl of water and repeating the process about 2 to 3 times with fresh water. We recommend tasting the cabbage after the final rinse to see if the cabbage require an additional round or two of rinsing.*
- After the final rinse, gently but firmly squeeze each quarter of napa cabbage to remove most of the excess water, especially the leaves are. But don’t squeeze too hard or the stems may get bruised and damaged.
Marinate the napa cabbage:
- Working with gloved hands and one quarter of napa cabbage at one time, place the cabbage in the bowl of prepared kimchi marinade. Take some marinade and rub it on each leaf. Make sure to also leave some of the julienned veggies in between each layer too!
- Once the entire quarter of cabbage has been rubbed down with kimchi marinade, fold the cabbage over itself to keep it tight. Repeat with remaining cabbage.
- Pack the kimchi into sterilized glass jars or BPA free plastic kimchi containers. Make sure to pack the kimchi tightly into the container, but leave about at least 1 inch of space between the top of the kimchi and the lid. As the kimchi ferments, it will release juices and produce gas, so the extra room will help prevent the kimchi from overflowing.
- The napa cabbage kimchi can be enjoyed immediately after marinating, chilled, or you can let it ferment until it reaches your desired fermentation stage before eating or used in cooking. Feel free to cut the kimchi into smaller pieces when ready to enjoy.
Notes
- Fish sauce - Traditionally, saeujeot (Korean fermented salty shrimps) was used as the funky, salty seasoning for the kimchi marinade, but these days it has gotten quite pricey. So we opted to use fish sauce instead. If you'd like to use saeujeot instead, use about 1.5-2 tablespoons of saeujeot for every 1 tablespoons of fish sauce. Feel free to taste and adjust as needed.
- Apple or Korean pear - We recommend using juicy sweet apples, as they will add needed moisture to the kimchi marinade and sweetness. You could also use Korean pear instead. If using Korean pear, we recommend peeling the outer skin.
- Make sure to wear disposable gloves when applying the marinade onto the napa cabbage. The marinade can stain easily.


Cyndy says
Thanks for the recipe! My daughter's Korean friends from college were so surprised to hear that we make our own kimchi.
Mei says
Hi Cyndy!
Thank you so much for trying out our recipe and you are very welcome! It's always a nice treat to have homemade fresh kimchi. The kimchi tastes so much better, it's more budget friendly, and it's a great family activity! 🥰
Happy cooking!
Mei ❤️
Sasha says
How long should we ferment this?
Mei says
Hi Sasha!
Thank you for trying out our kimchi recipe! You can eat this kimchi as soon as you finish adding the marinade. However, if you want the kimchi to have more fermented, sour flavor, ferment the kimchi for at least 1 to 2 weeks. You can even speed the process up by letting the kimchi sit at room temperature for a couple of days (properly covered). The kimchi, if the salting process was completely properly, the kimchi should last at least 6 months and technically years...but it'll of course become very fermented and bubbly.
Hope this helps and answers your question!
Cook with love,
Mei ❤️
Sal says
This recipe is great I followed it fairly close I used pears from my tree and had to add one regular head of cabbage (I didn't buy enough Napa cabbage so slight substitute) very delicious recipe. Would definitely recommend.
Mei says
Hi Sal!
Thank you so much for trying out our traditional kimchi recipe! So happy you could find suitable substitutes in a pinch! That's what cooking is all about. We're also so jealous of your pear tree!
Happy cooking!
Mei❤️
Rosie says
Can I omit the fermented shrimp, I can’t find any locally, or can I substitute it for something else?
Mei says
Hi Rosie!
If you can't find fermented shrimps, you can use fish sauce instead, but you may have to adjust the amount of fish sauce used. You can make the kimchi marinate and add the same amount of fish sauce as the fermented shrimps and adjust from there. Taste as you go until you reach your desired saltiness =) Hope this helps!
Mei ❤️
Lucile says
Thanks for the recipe! I have tried it for my Christmas presents. I am just concerned about one thing : my kimchi is not covered in brime/liquid. It's been left alone for 2 weeds, and I thought it would get covered in time but it is not... Is it OK or should I do something? Is it edible? I have always read that to be well fermented, it as to be well covered up by liquid...
Also, I've made quite big jars. Is it OK to take time to eat it? I mean once open how many weeks can it lasts?
Thank you a lot!
Lucile
Mei says
Hi Lucile!
Thanks for trying our kimchi recipe! The most important step in making kimchi is the salting process. As long the cabbages are properly and well salted, the kimchi will be fine. One recipe of the marinade should be enough for 2 heads of napa cabbage. When the kimchi is first prepared, there shouldn't be a lot of liquid. However, as the kimchi ferments, liquid will release from the cabbages. Even then, there shouldn't be so much liquid/brine that it entirely covers all of the cabbages, unless you made extra marinade.
Kimchi can be eaten as soon as it's finished or you can let it ferment for more pungent and acidic flavors. To accelerate the fermentation process, you can let the kimchi sit at room temperature for one to two days, then refrigerate. If properly stored, kimchi can last quite a few months, if not longer (even after opening). If the kimchi is getting more sour than you'd like, you can always freeze it for cooking (like kimchi jjigae)
I hope this answered your questions =)
Best,
Mei ❤️
Kim says
I really like your comment on rinsing the cabbage after the salting process. I find store bought kimchi to be too salty and unedible. I want to try your recipe. My question is how much sauejeot to add. Your recipe calls for 1/2 cup of fish sauce and you suggested 2 tablespoons of fish sauce for sauejeot. Does this mean half sauejeot so I would add 1/4 cup sauegeot? Thanks you in advance.
Mei says
Hi Kim!
Thank you for bringing the note about saeujeot to our attention! We have updated the notes to make more sense.
You are correct about the substitution. If you wish to substitute all of the fish sauce, we recommend using about 1/4 cup of saeujeot. Of course, if you feel like the marinate needs to be a bit saltier or less salty, feel free to hold back a little or use a little more =)
Happy kimchi making!
Mei ❤️
Kathryn Kij says
I normally don't do comments, but I had to say I'm working on this recipe right now and I'm so excited to try this Kimchi! I have been drooling over your youtube short for months as I finished up my first kimchi I made before I knew anything about making really good kimchi. It was made with a packet I got at the local Asian market, and it tasted like kimchi, but very mediocre. I can't wait! This is going to be on a whole new level!
Mei says
Hi Kathryn! Thank you so much for trying our recipe and for all the love and support! We are super excited for you and would love to know how your kimchi turned out!
Mei ❤️
Thao says
Hi!
Is it normal that my kimchi is overly salty? I only used saeujot and I wanted to make a big batch of kimchi so I doubled everything. Thanks in advance!
Mei says
Hi Thao! Your kimchi shouldn't be super salty. When you tasted it, was it the marinade or the cabbage that's salty?
Mei ❤️
Tatyana says
Hello,
Thank you for sharing your recipe. I like my kimchi a little sweet. Is it okay to add sugar or honey to make it a little sweeter?
I'm planning on making kimchi soon using your recipe!
Thank you
Mei says
Hi Tatyana! To be honest, we've never had kimchi that's sweet. You could definitely add more sugar to the marinade and the kimchi will taste a bit sweeter while fresh, but once the kimchi ferments, the additional sugar will make it more acidic. Would love to hear how it turns out if you try!
Mei ❤️
Eslam says
I made this recipe last night but I didn't have any ginger or apples so I added some ginger powder at the end and a little bit of sugar, but I feel like I'd like my kimchi a bit less salty and spicy. Is there anything I can do for that and is it OK that I didn't add apples or ginger?
Mei says
Hi Eslam! We're so happy you gave this recipe a try! We like to use sweet fruits to make the sweetness more natural, but sugar is totally fine (it's to help the kimchi ferment well). As for the ginger, it's mostly for flavor, but dry ginger powder has a different flavor than fresh ginger. So your kimchi may have a slightly different taste. As for the saltiness, you can definitely reduce the fish sauce or saeujeot a little bit (like a couple tablespoons). However, we don't recommend making the kimchi marinade super under-salted because salt is important in the fermentation process and the flavor of the kimchi after fermenting. Most of the saltiness will come from the cabbage salting process. So make sure to rinse well and don't over salt it. Lastly, for the heat, it really depends on the gochugaru you use and , may be kind of surprising, the garlic. Different brands of gochugaru and its freshness can vary in spice level. You can add a little less than our recipe instructs, but the color may not be as vibrant. You can also reduce the amount of garlic used by a few cloves. Also, the kimchi will mellow out in saltiness and spice as it ferments. Hope this helps!
Mei ❤️
Mica says
Hi Guys, thank you for such an easy & detailed recipe to follow. My kimchi fermenting baby is happily sitting on my kitchen worktop. I think I’ve made it a bit hot 🥵 but time will tell 😃 & if I have I’ll know better for next time.
Thanks 🙏🏼
Mei says
Hi Mica! We're so happy to hear that our recipe instructions are helpful and that your kimchi is happily fermenting! It's such an exciting (and delicious!) process.
The spiciness will mellow out slightly as it ferments, so hopefully it won't be too spicy by then =)
Mei ❤️
Diane Lawrence says
I love this recipe so definitely gonna try it! Are the ingredients for 2 napa cabbages? Does x1 equal 2 cabbages and x2 equal 4?
Mei says
Hi Diane! Generally speaking, each single recipe is about 2 heads of napa cabbage, but sometimes it could be more or less. It really depends on the size of the cabbage. So if possible please go by weight. One recipe uses about 8 pounds or 3.63 kilograms of cabbage. Hope this helps =)
Mei ❤️
Remz says
Hey guys, since last year I’ve been obsessed with your Kimchi recipe. It really is the perfect Kimchi recipe. My gut actually calls me out if I go too long without eating it, it’s an amazing probiotic and goes well with almost everything! We love it! Thank you for sharing it with all of us.
Mei says
Hi Remz! So glad to hear that you guys have been enjoying it and that kimchi has been making a positive change in your health =)
Mei ❤️
Julia says
Thank you so much for this recipe!
I really love kimchi and couldn't find any normal one to buy in my country so decided to make it myself. I spent many hours searching for a perfect recipe of a homemade kimchi, I wanted it to be authentic and with ingredients that I can possibly find in my country (it may be hard to find asian products especially in smaller cities). And just then I found your recipe and it was a perfect match!
Already made it 4 times and will be making more. My family and friends loved it!
Thank you so much for all your hard work on recipes!🫶🏻
Already bought ingredients for my next experience in asian cuisine 😋
Mei says
Thank you for trying our kimchi recipe, Julia! So happy to hear that everyone's been enjoying your homemade kimchi =)
Here's to making many more delicious dishes!
Mei ❤️
Monique A Stump says
I thought I left a comment/question? If I did, please omit this one. I've made numerous kimchi recipes in search of the 1 and think this might be it. It certainly has the spice level I'm looking for, but it's missing that tang I have to have. In my research online it says to simply let it sit for a couple days to build its acid level. As the expert, I'm hoping you can either confirm or advise me otherwise on what to do as I may have easily overlooked something. This is by no means a criticism as much as a personal observation. Thanks ever so much for taking the time to share your talent/skill with us eager to learn.
Mei says
Hi Monique! Thanks for dropping by and for trying our recipe! To answer your question, it is true that the acidity that kimchi is known for comes from being fermented. Freshly made kimchi, doesn't have that tang. It'll take about a couple of weeks to a month for the kimchi to ferment and get the tanginess you're likely used to. To speed up the fermentation process, you can leave the kimchi out at room temperature (not in direct sunlight) for a few days, then move it into your fridge to let it continue fermenting. Just make sure your fridge isn't super cold because it will slow down fermentation. You can taste the kimchi during this entire process to see how fermented/tangy it has become. Do use clean utensils each time to prevent contamination. Hope this helps!
Mei ❤️