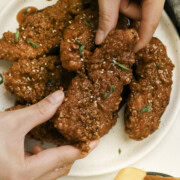


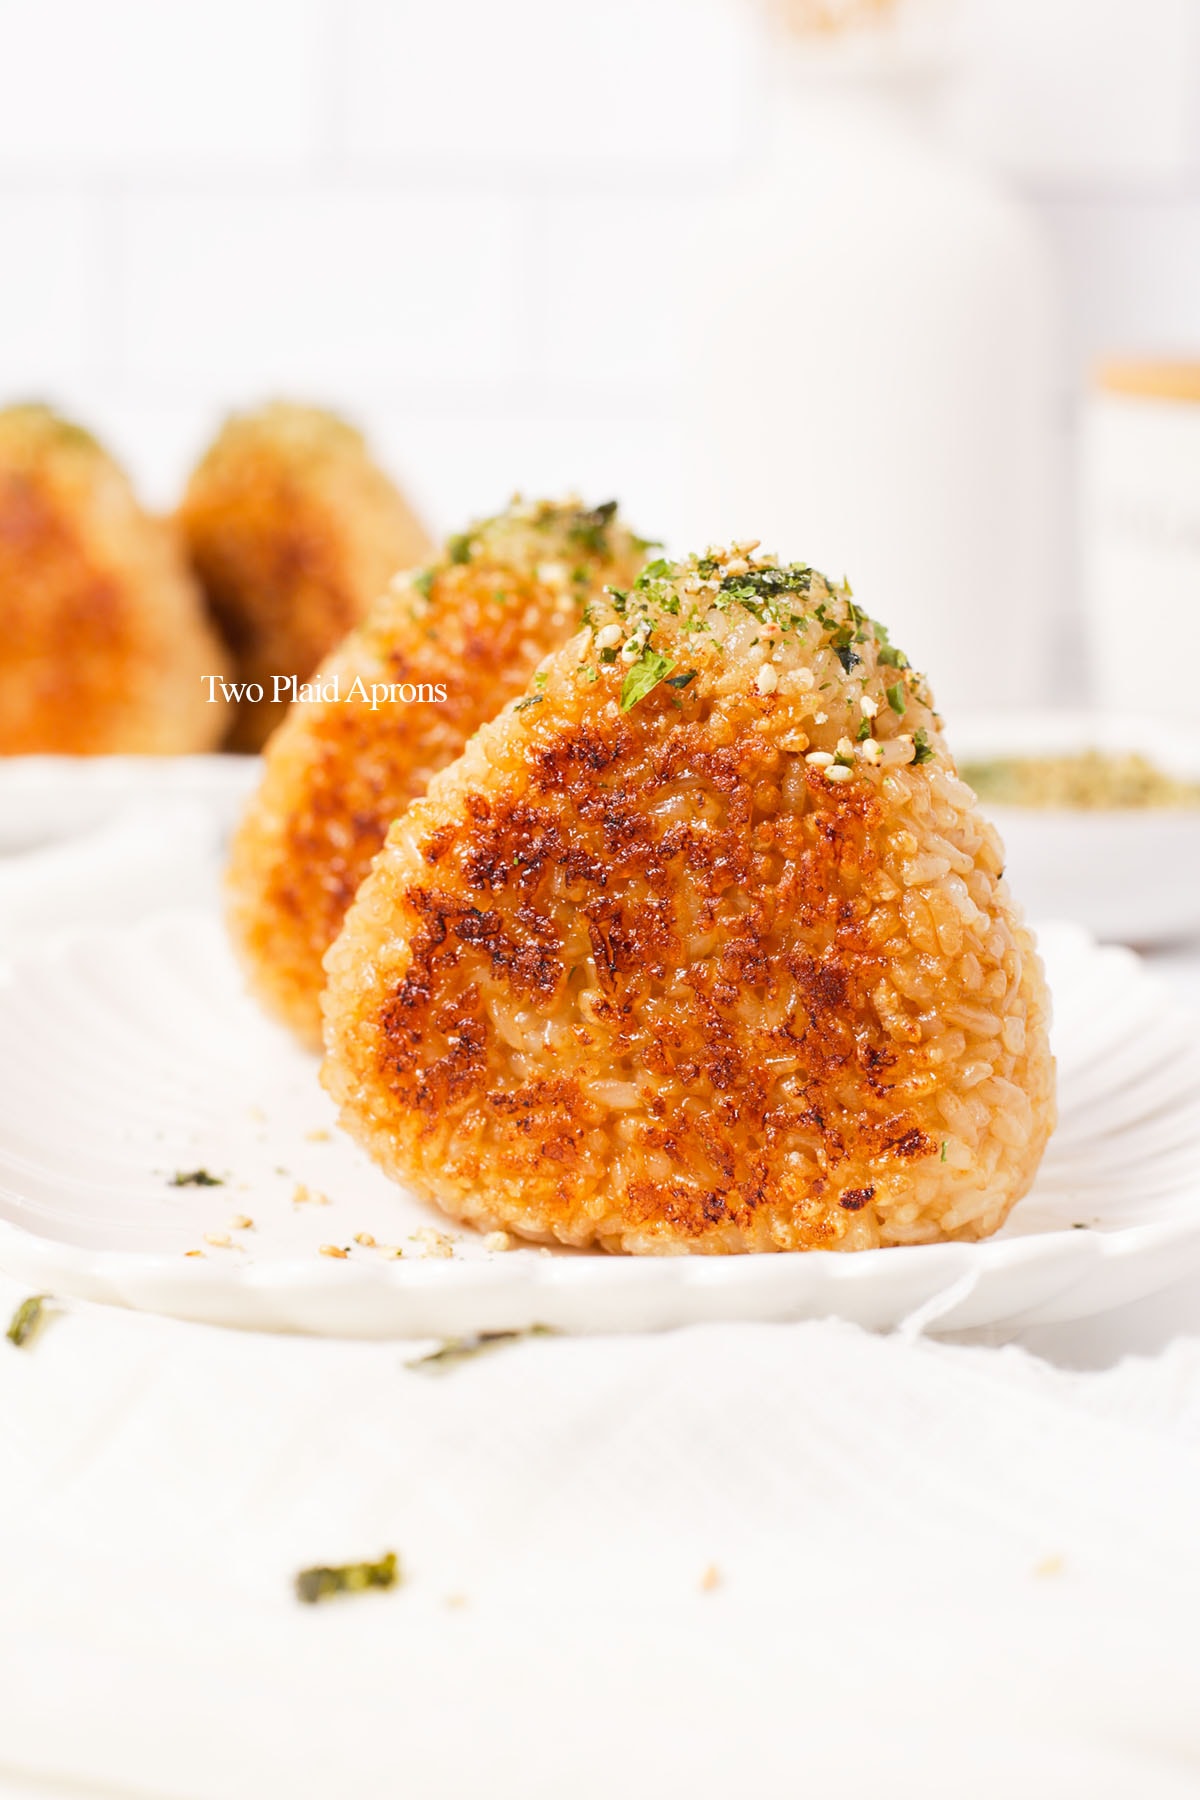
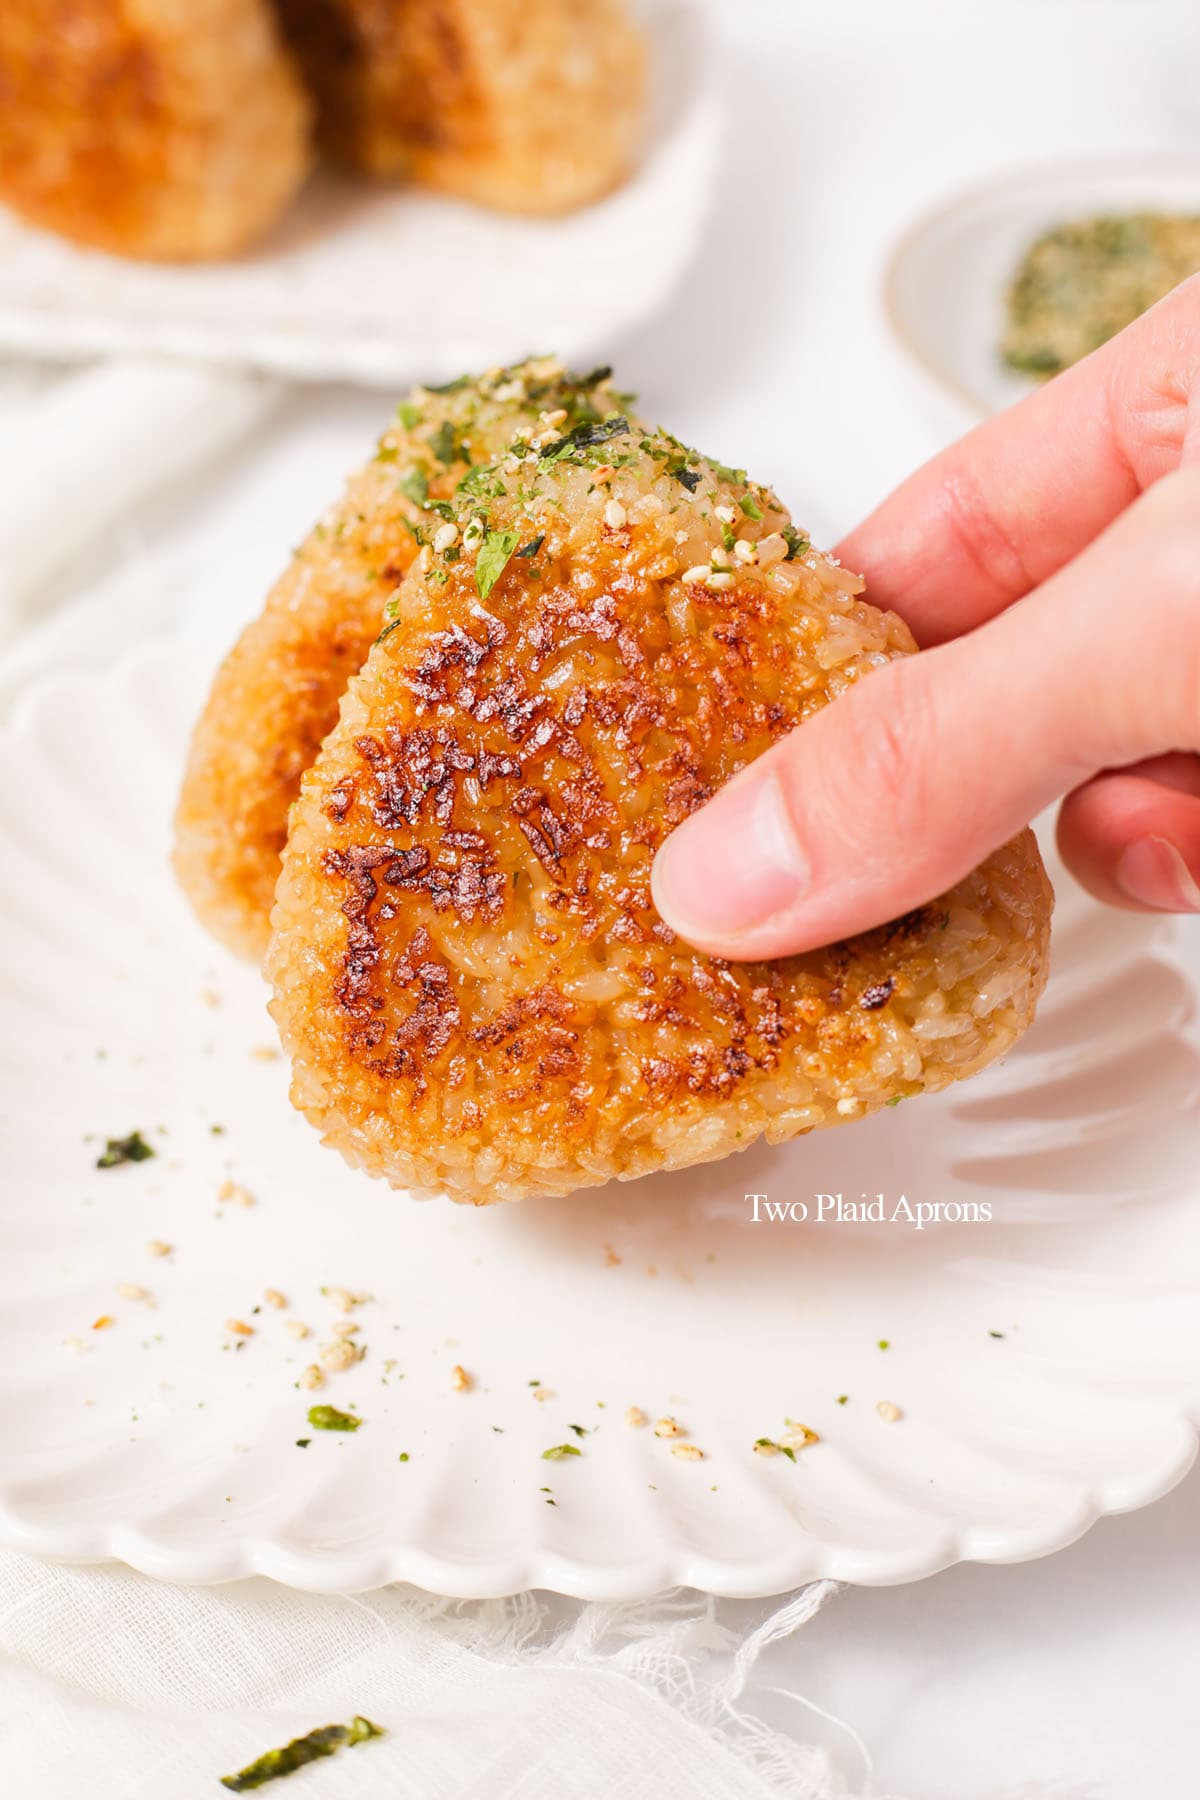
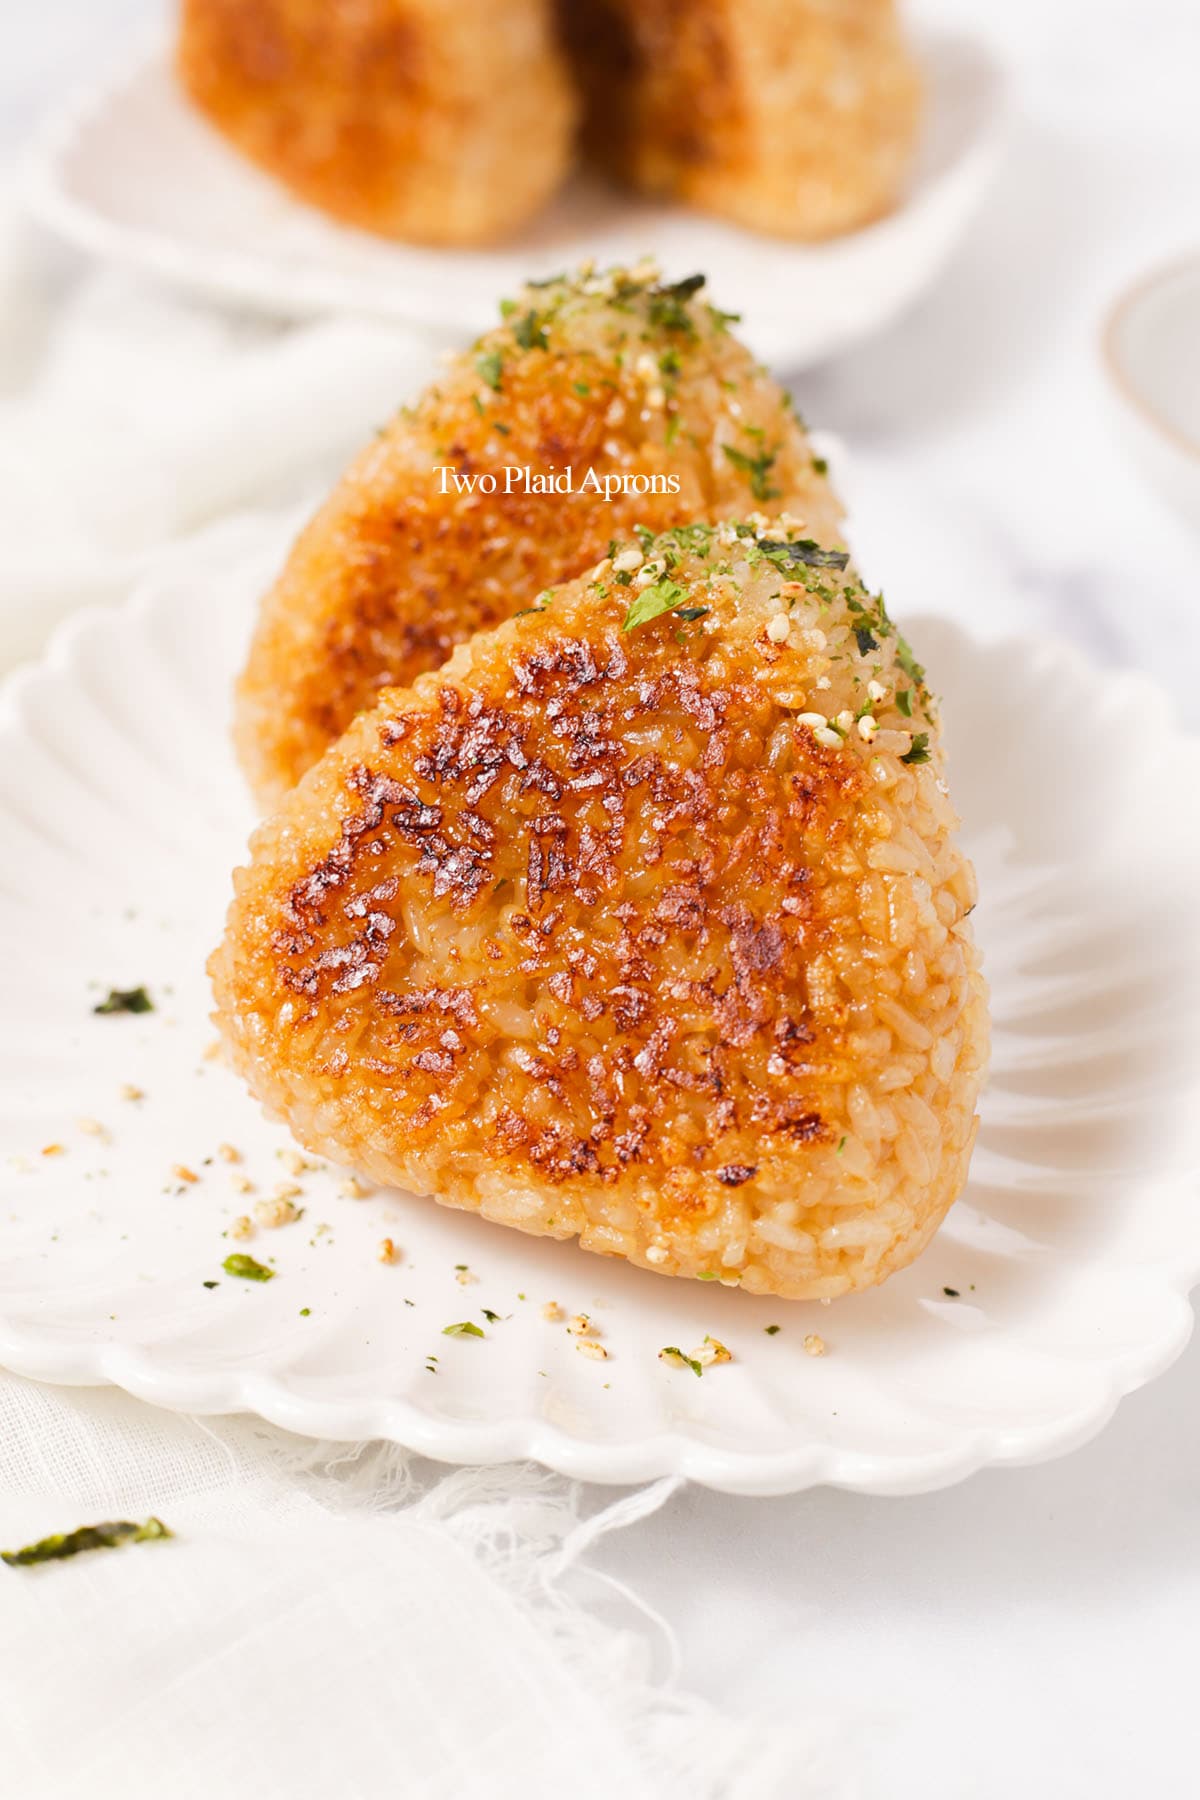
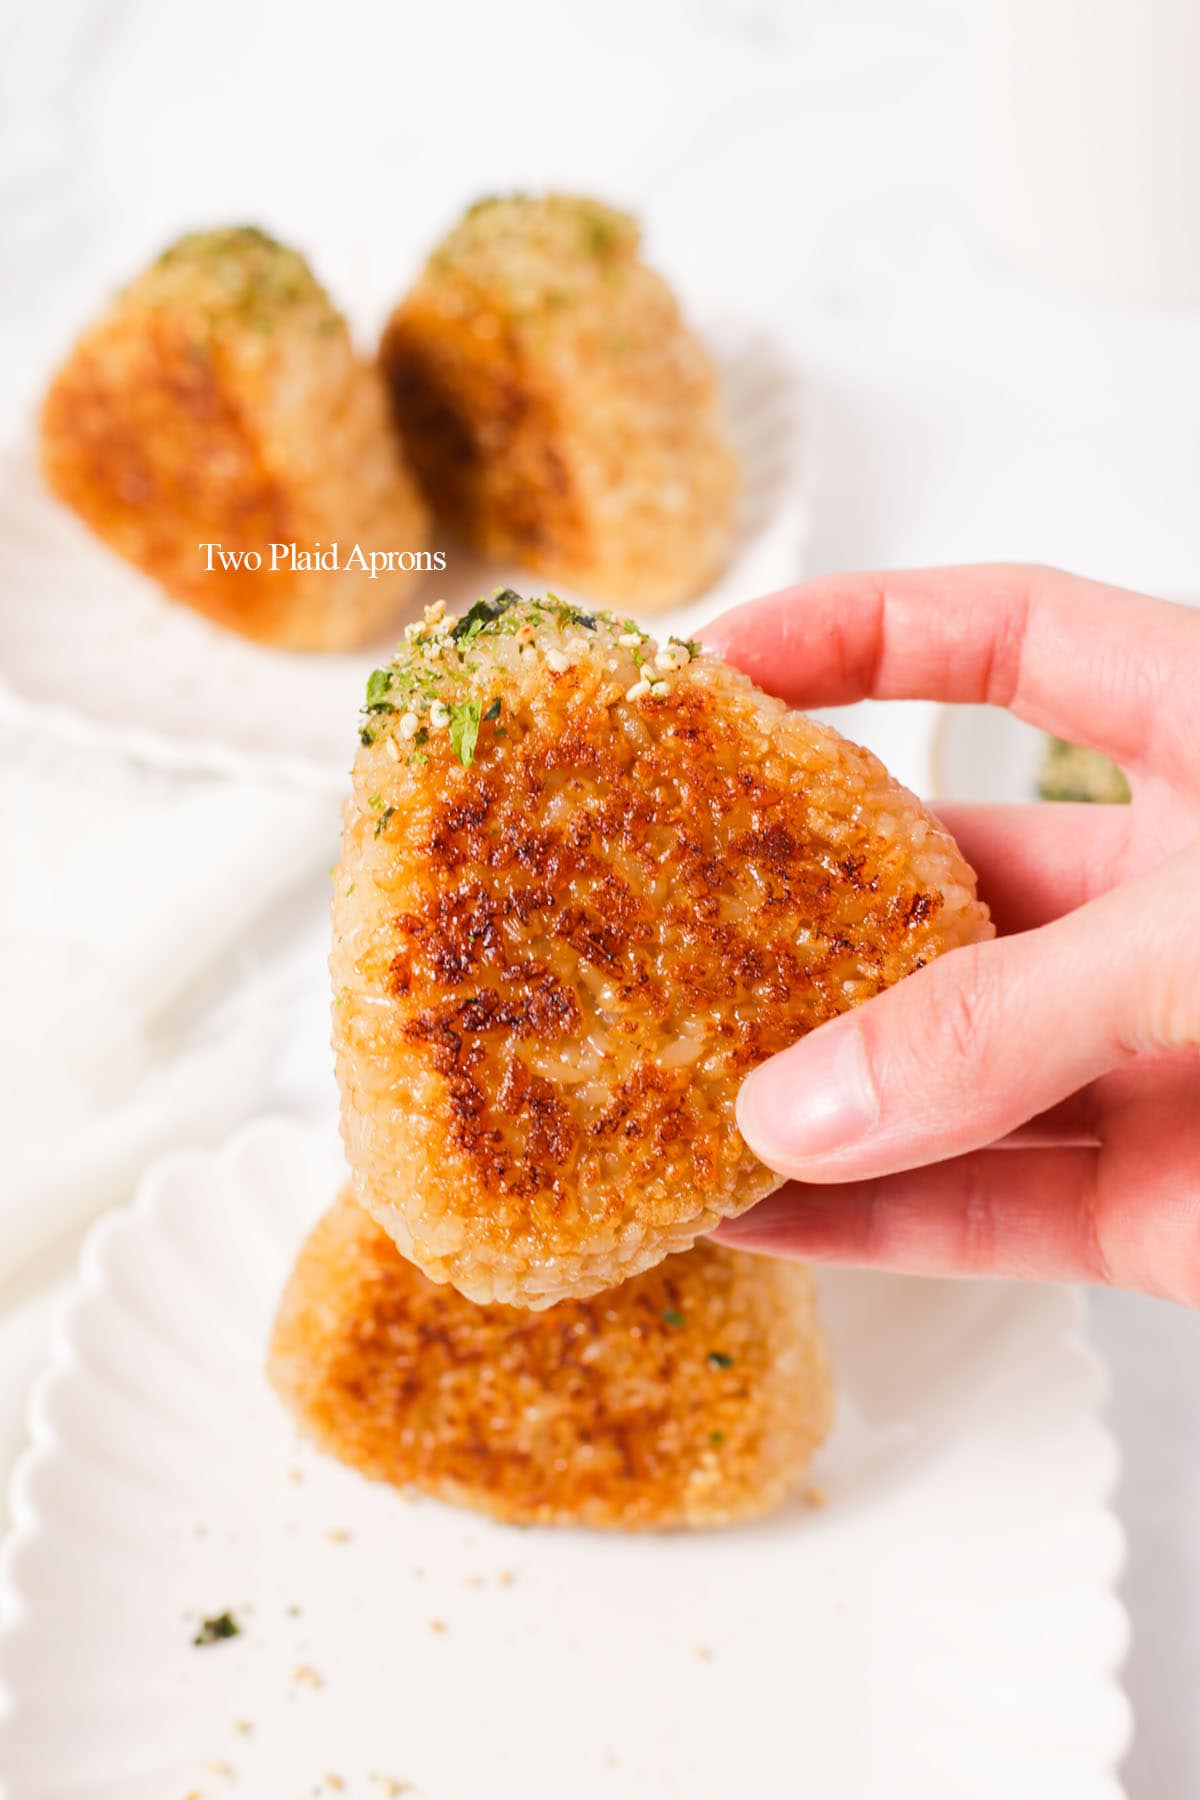
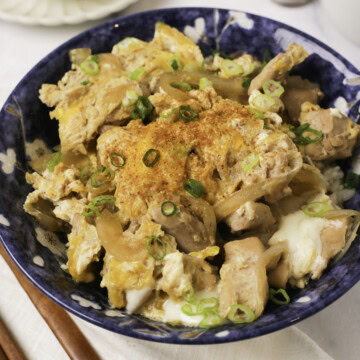
Yaki onigiri (焼きおにぎり) or Japanese grilled rice balls are a quick and easy snack or lunch that you can make in 15 mintues! Unlike our spicy tuna onigiri, yaki onigiri are pan fried so that they are crispy on the outside but soft and fluffy on the inside. Enjoy these grilled rice balls with some miso soup to complete this light meal!
If you’ve made this recipe or any recipes from our blog, please tag us on Instagram using #twoplaidaprons! You can also tag us in your Instagram stories using @two_plaid_aprons. We would love to see your creations! It absolutely makes our day! 🥰
Jump to:
Ingredient notes
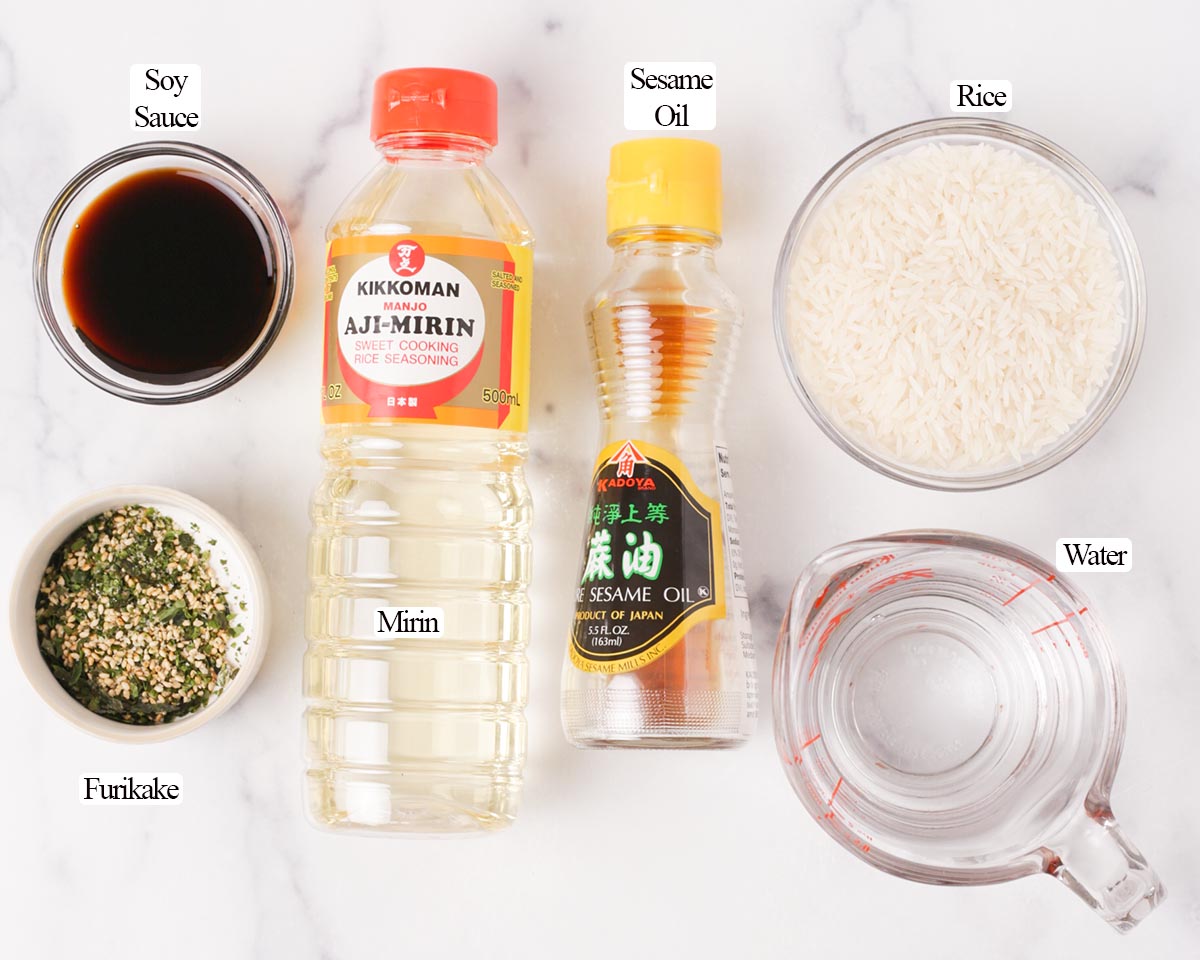
Please scroll down to the recipe card for the ingredient quantities!
- Sushi rice- Medium grain and short grain sushi rice are best for making onigiri because they contain enough starch and become sticky after cooking, which is very important for shaping and keeping the rice ball together.
- Soy sauce - For seasoning the rice. We used light sodium soy sauce, but regular soy sauce is great too. A lot of recipe make yaki onigiri without seasoning the rice, which is perfectly fine. However, if you prefer your yaki onigiri seasoned like us, we highly recommend adding some soy sauce.
- Toasted sesame oil (optional) - Just a small amount of sesame oil will add a nice nutty, toasted flavor to the rice.
- Sauce for brushing - Feel free to use just some soy sauce or your favorite teriyaki sauce or even unagi sauce.
- Furikake (optional) - For garnish if you wish, and it also adds a little extra flavor.
How to make yaki onigiri
Please scroll down to the recipe card for the full recipe and instructions!
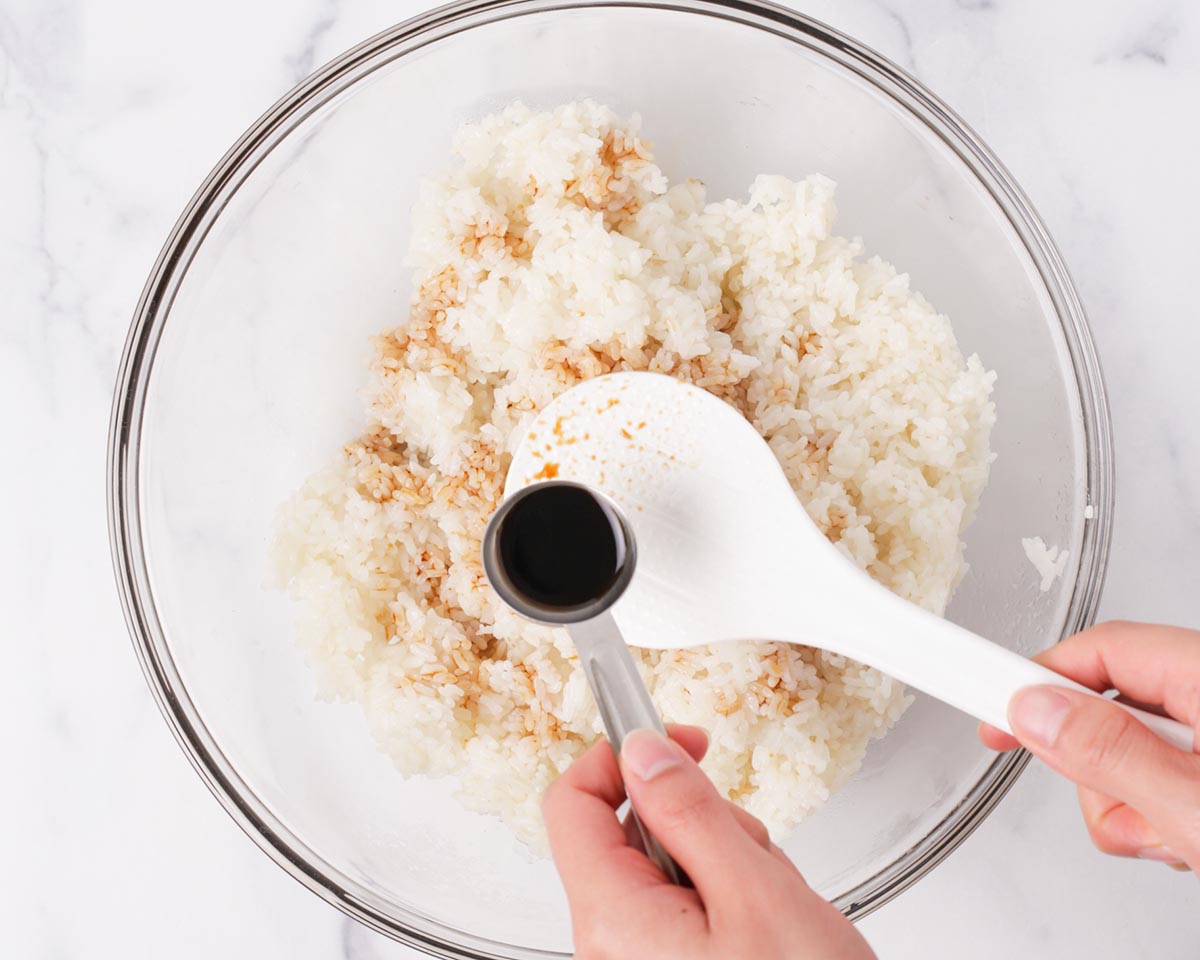
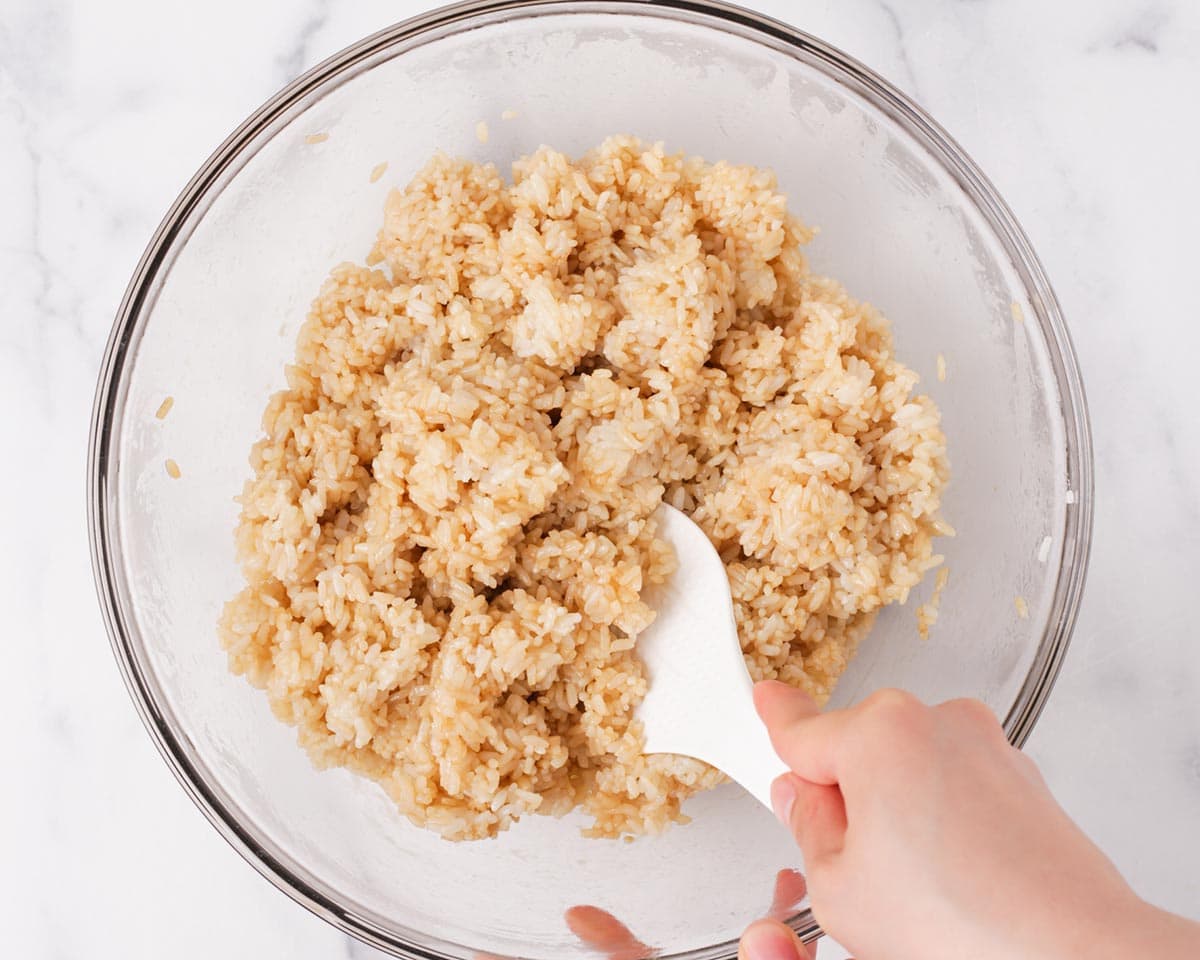
1. Season the rice. Cook the sushi rice using your preferred method. While the rice is hot, drizzle in the soy sauce and sesame oil. Fluff until the seasonings are evenly combined and the rice looks roughly similar in color.
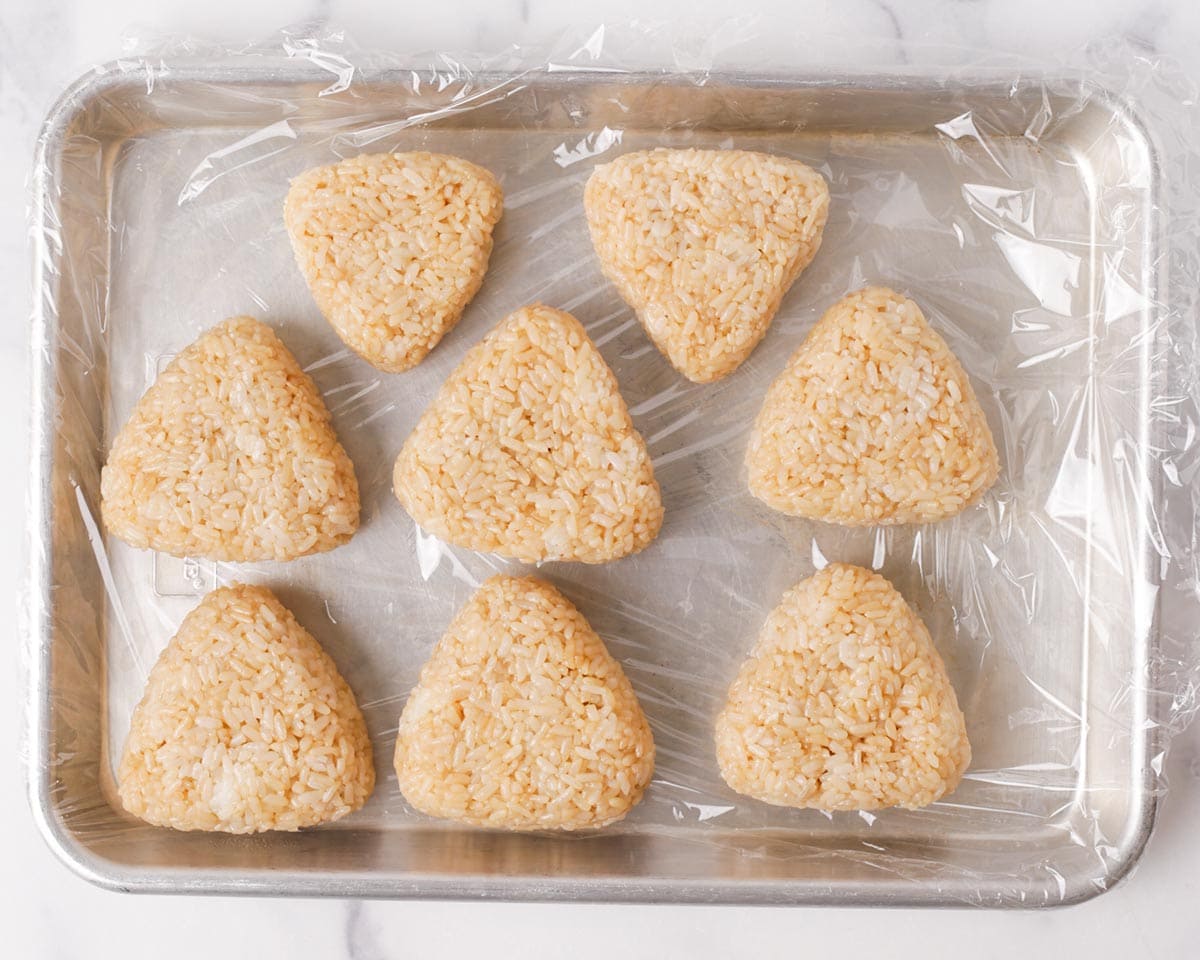
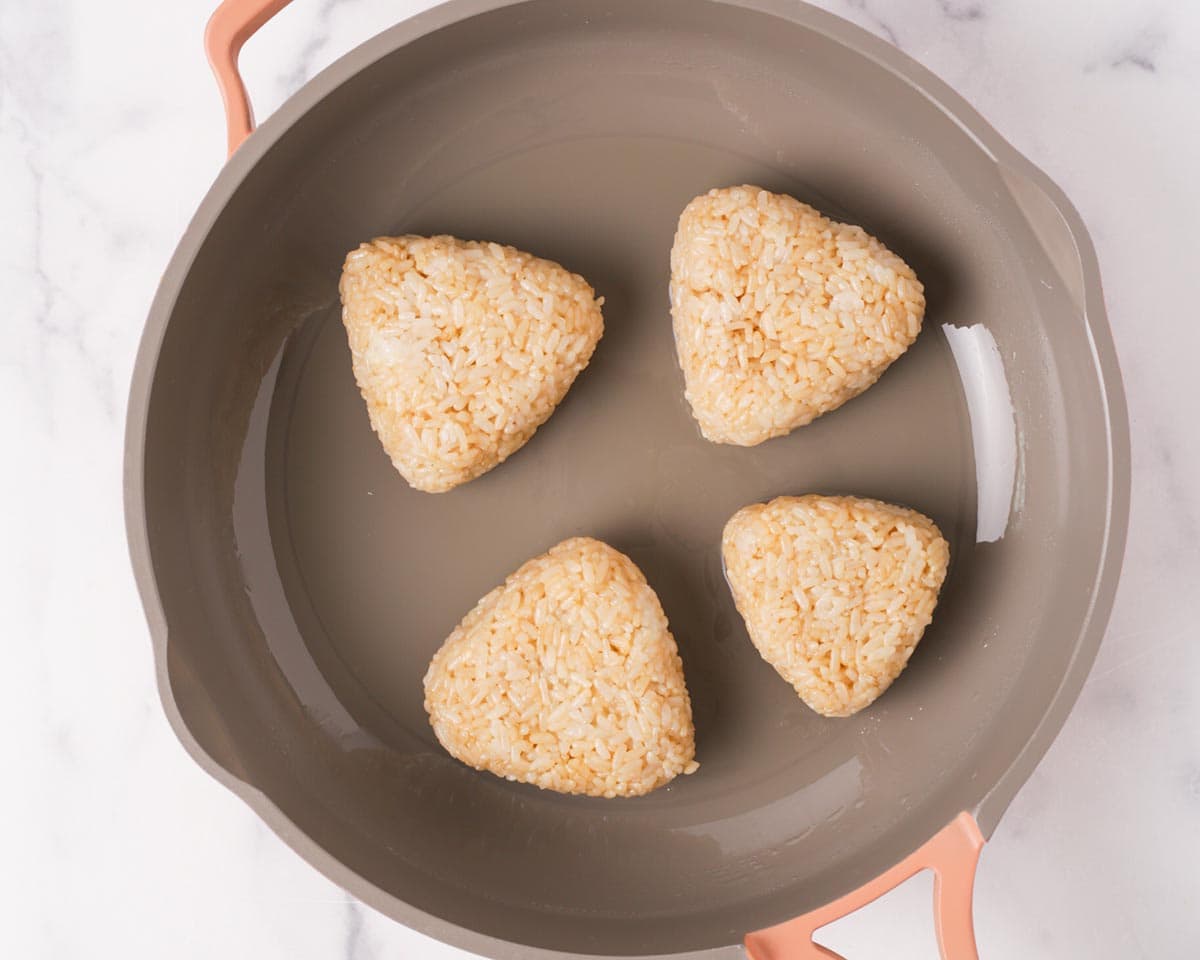
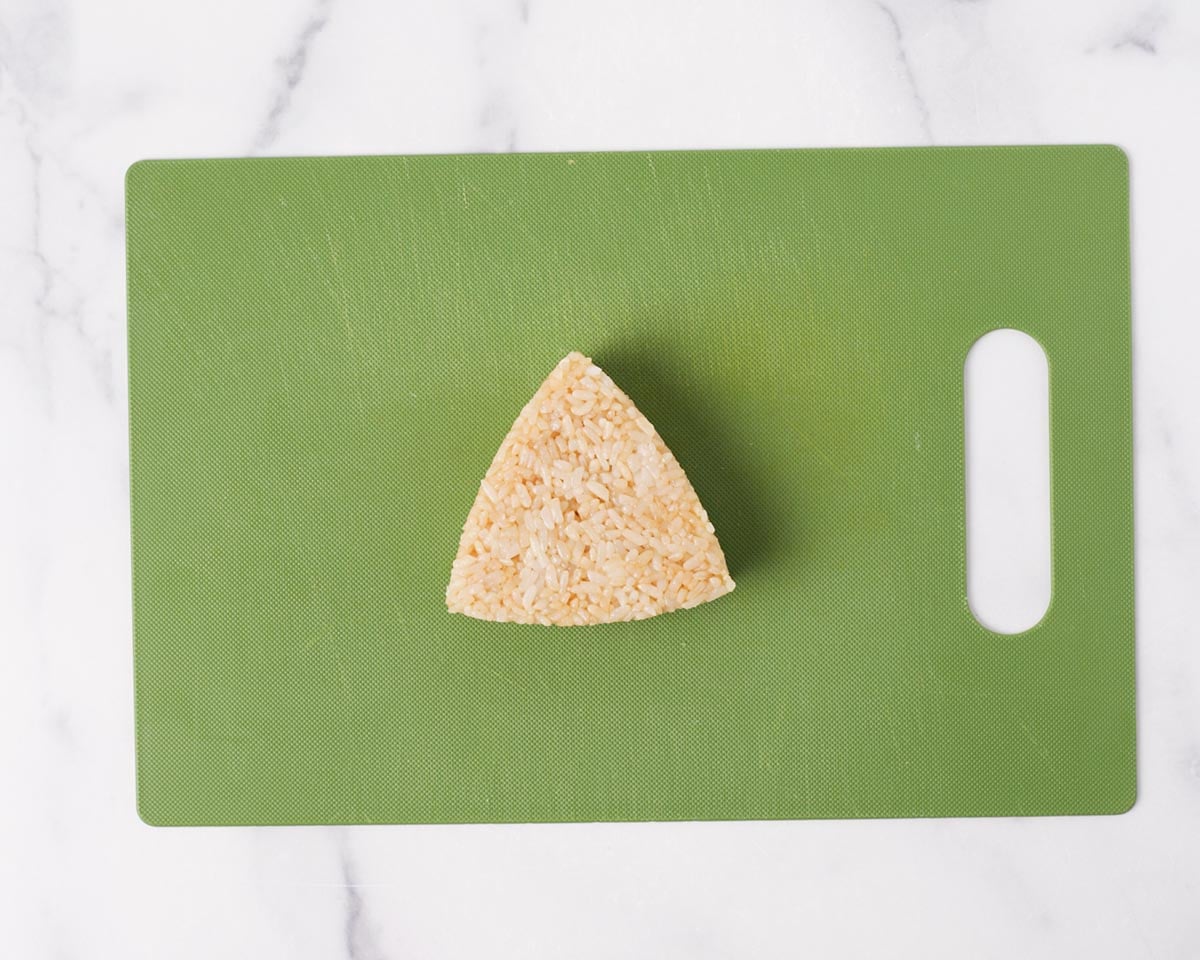
2. Shape the onigiri. Divide the seasoned rice evenly and shape by hand or use an onigiri mold. If you'd like to add a filling, add about 1 tablespoon of filling now. Repeat with remaining rice.
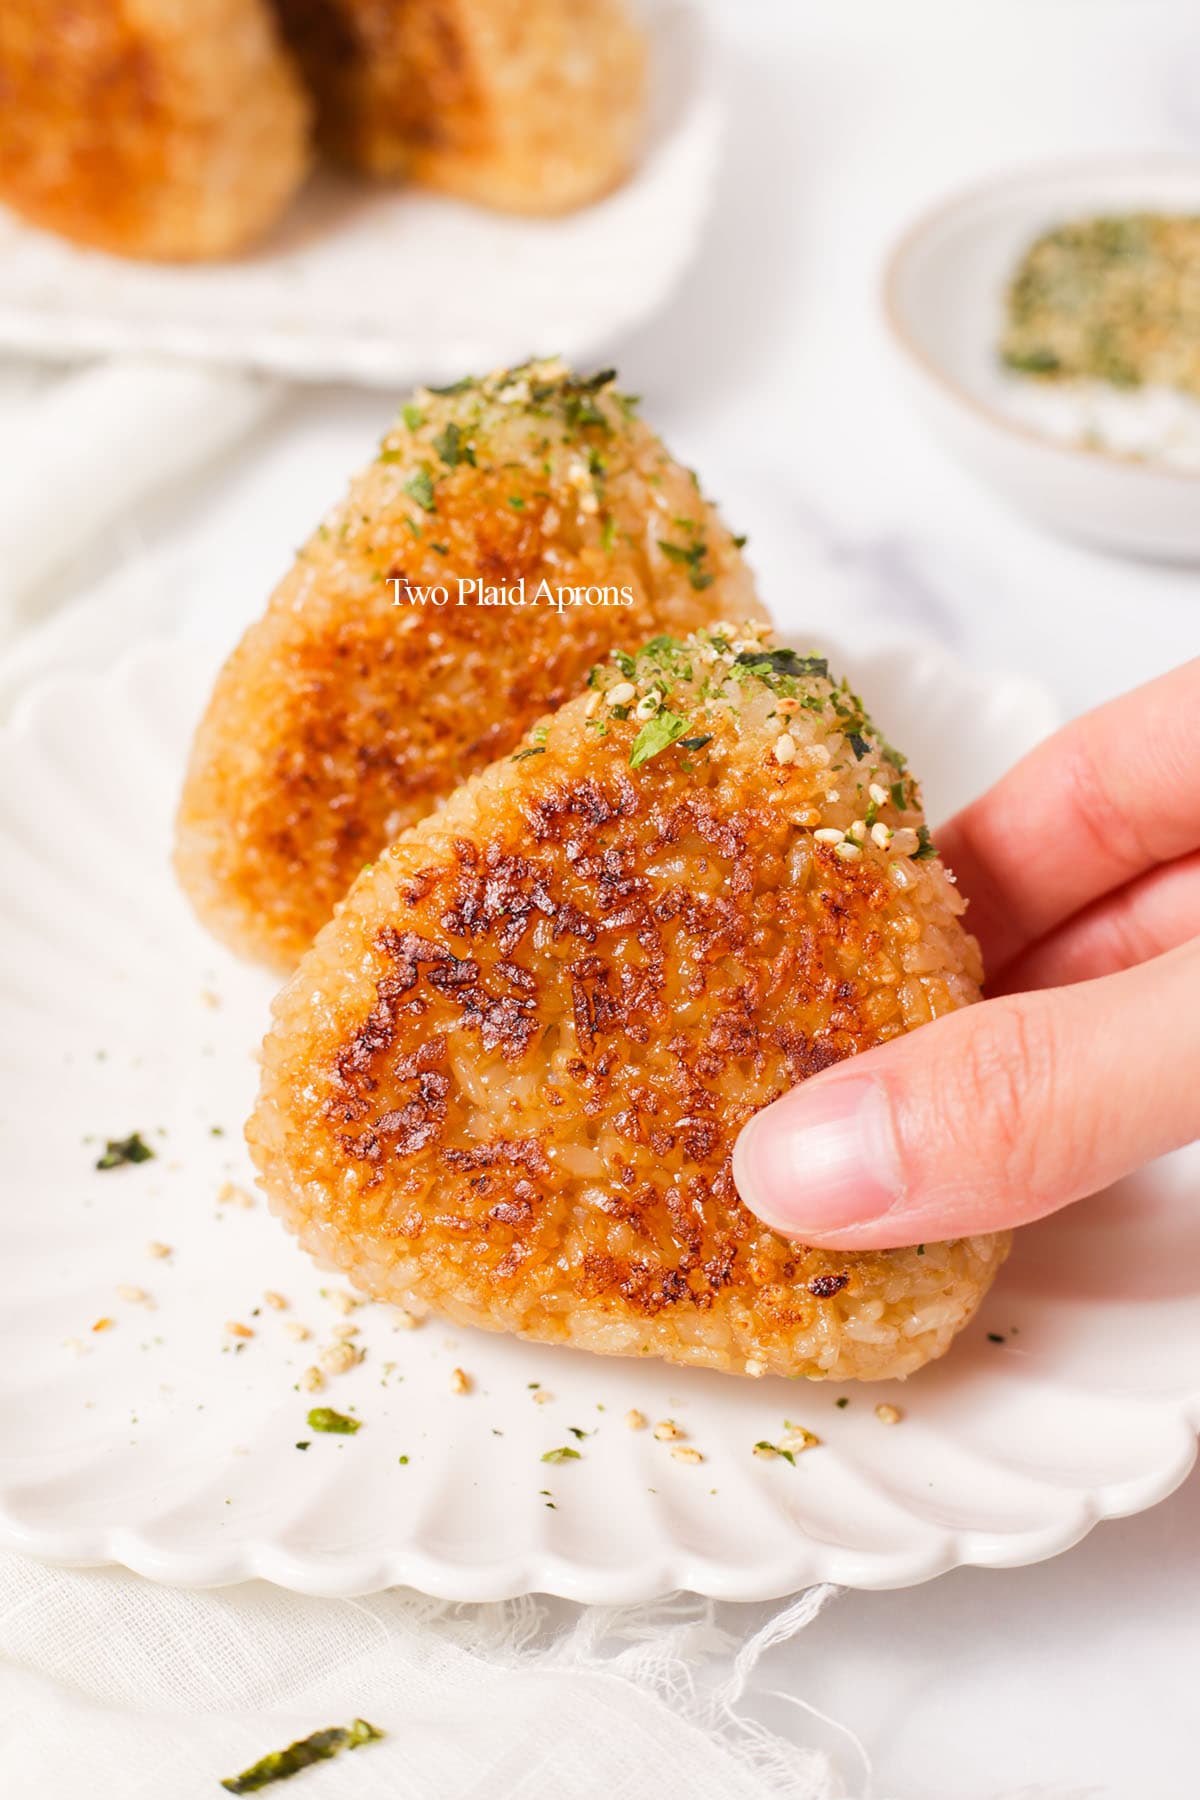
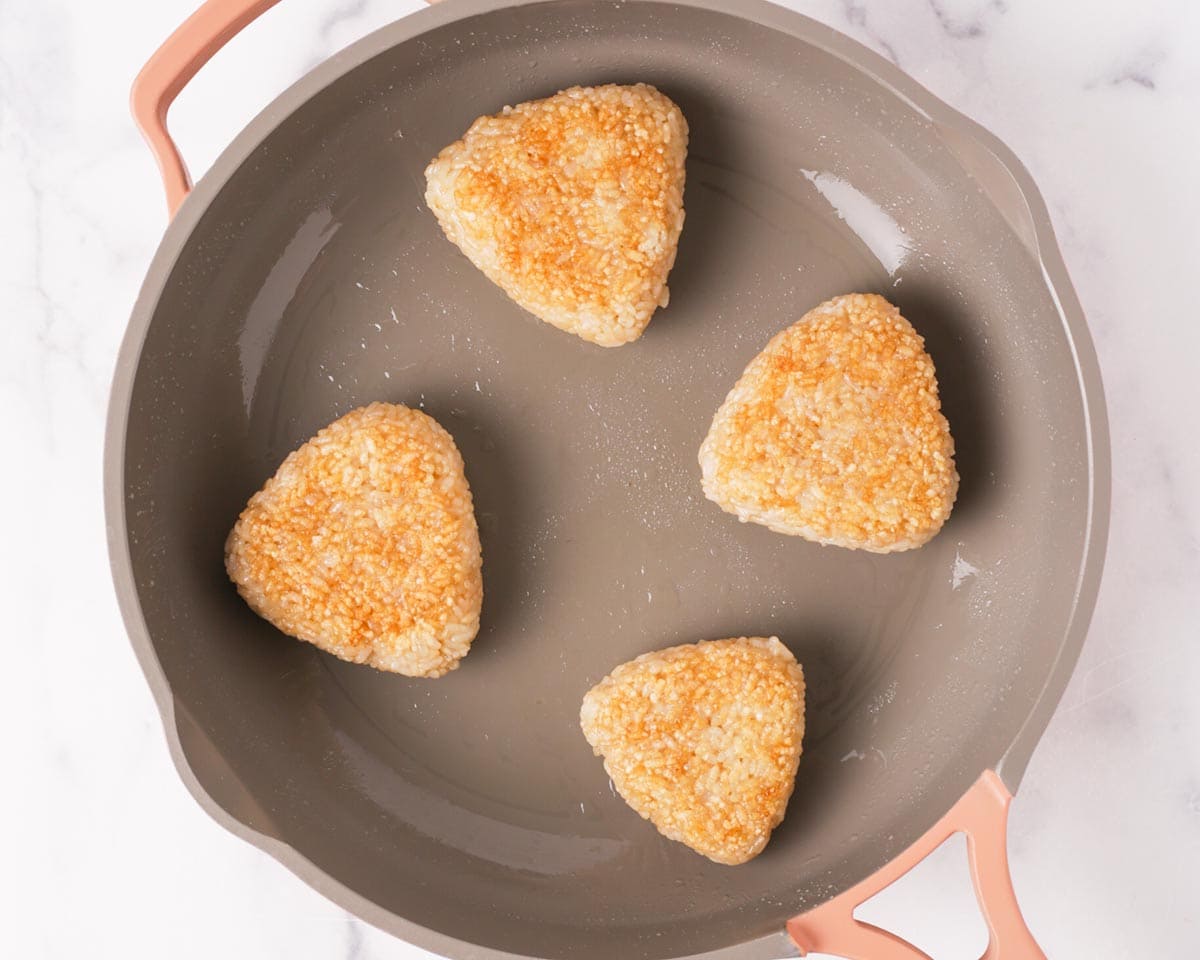
3. Pan fry the onigiri. In a pan over medium heat, add enough oil to lightly coat the bottom of the pan. Once the pan is hot, arrange the onigiri in the pan, triangular side down. Pan fry both sides until golden brown and crispy, about 3 to 4 minutes per side.
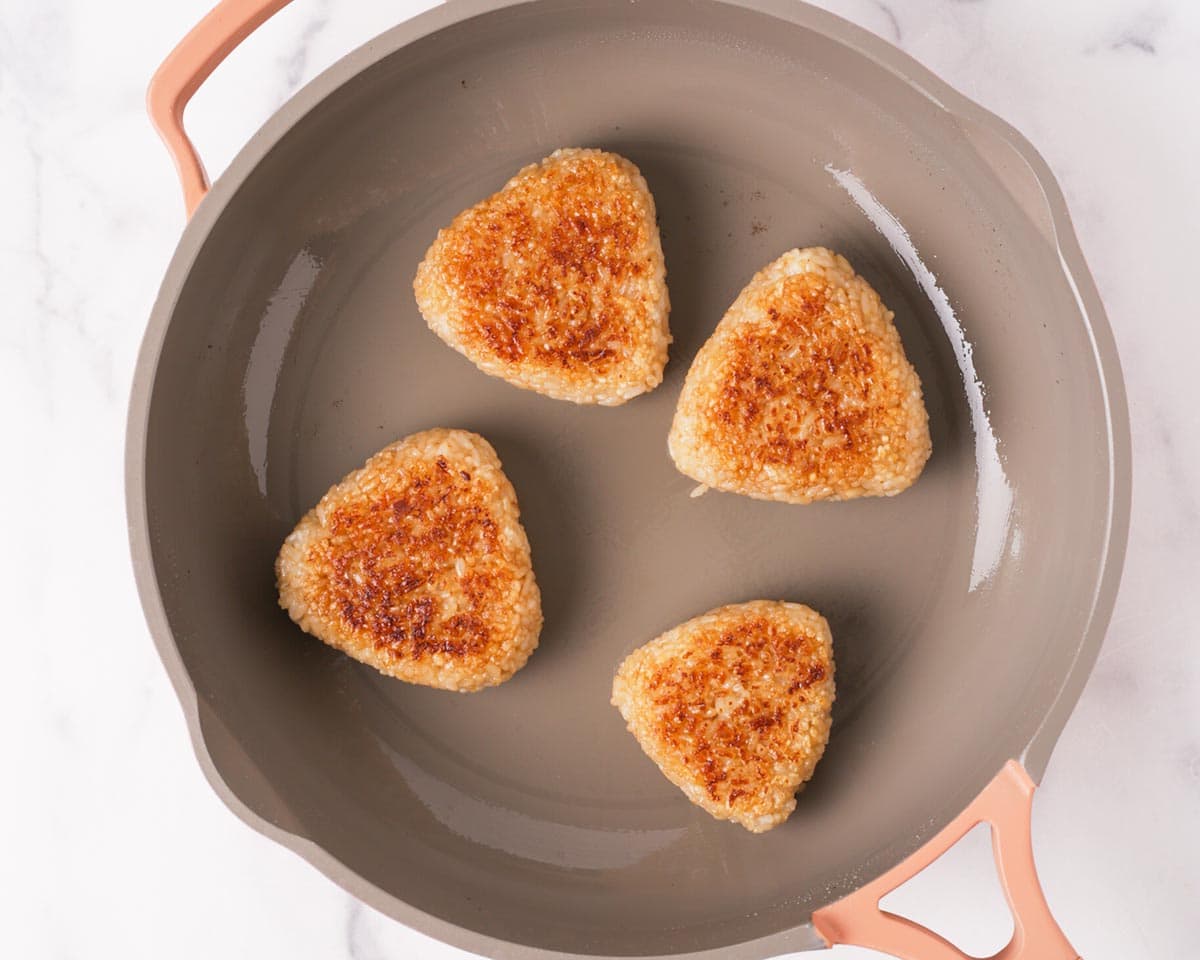
4. Brush on sauce. When both sides are golden brown, reduce the heat to low. Brush the yaki onigiri with soy sauce or your desired sauce. Flip and pan fry for about 15 to 30 seconds more and do the same on the flipped side.
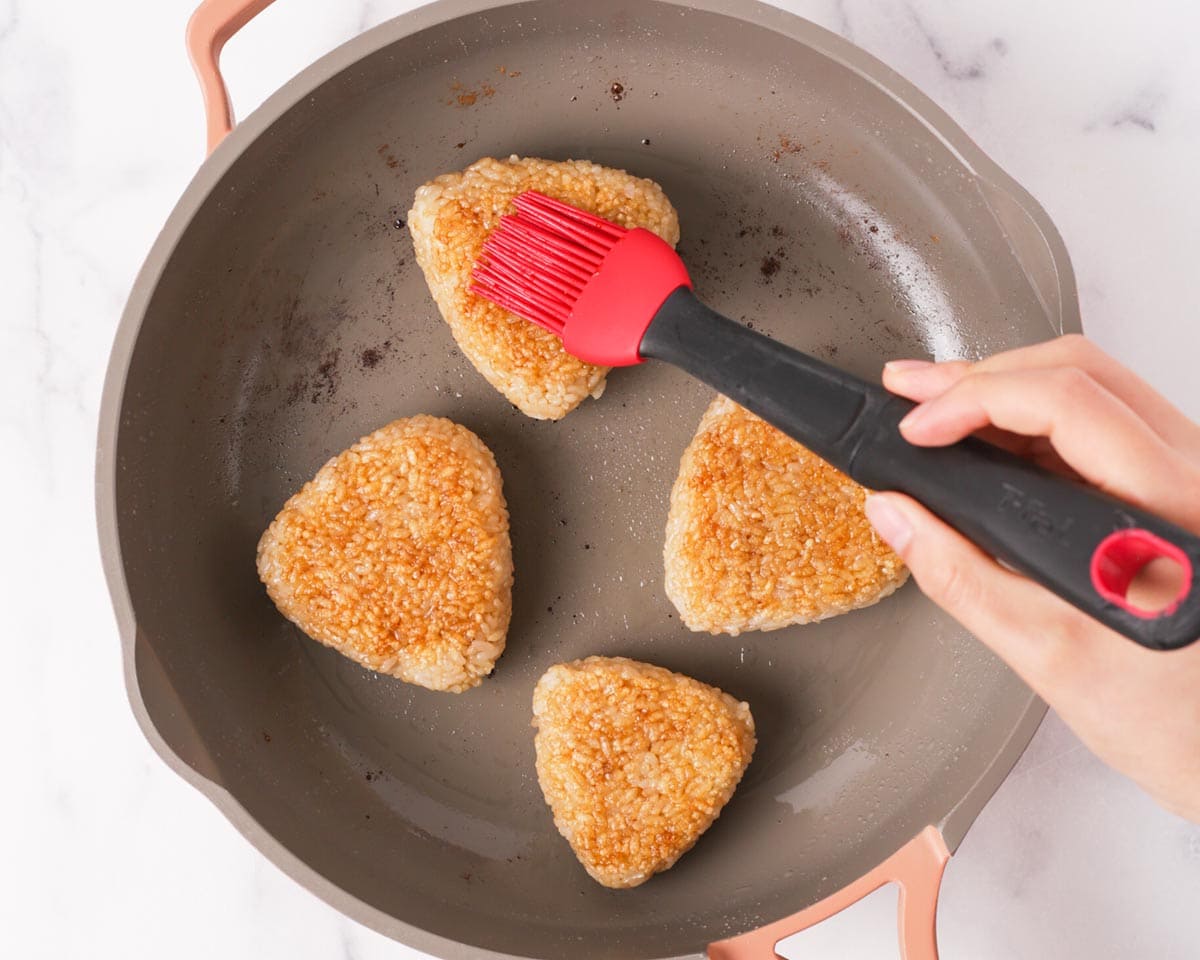
🚨 Caution! Make sure to keep a watchful eye on the onigiri once the sauce is brushed on to prevent burning. The key is to turn the heat to low. If the pan is really hot, allow the pan to cool for a moment before flipping and pan frying the saucy side of the onigiri.
5. Garnish. Dip the tip of the yaki onigiri in some furikake or just sprinkle some furikake on top if you wish. Serve and enjoy while hot.
How to shape yaki onigiri
Shape by hand:
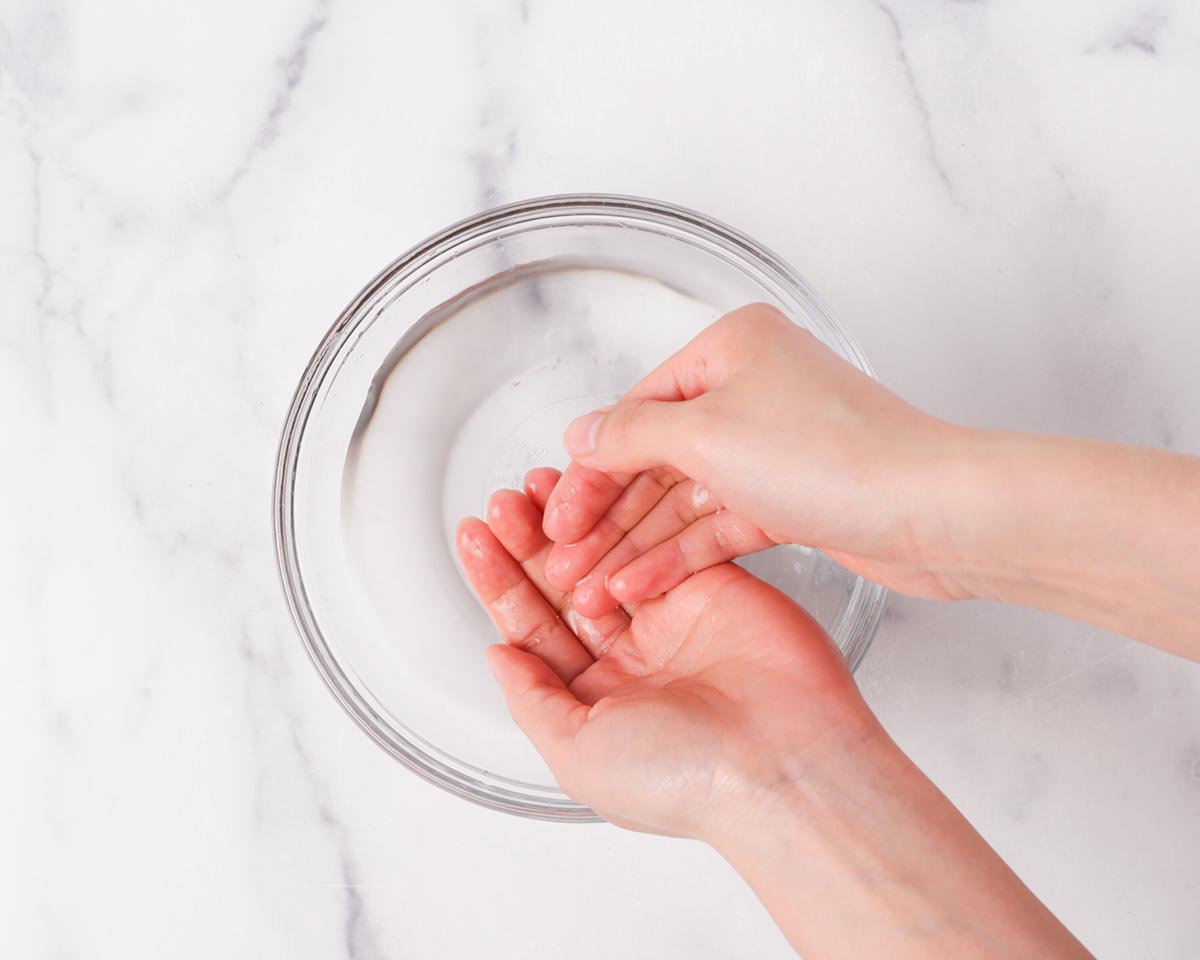
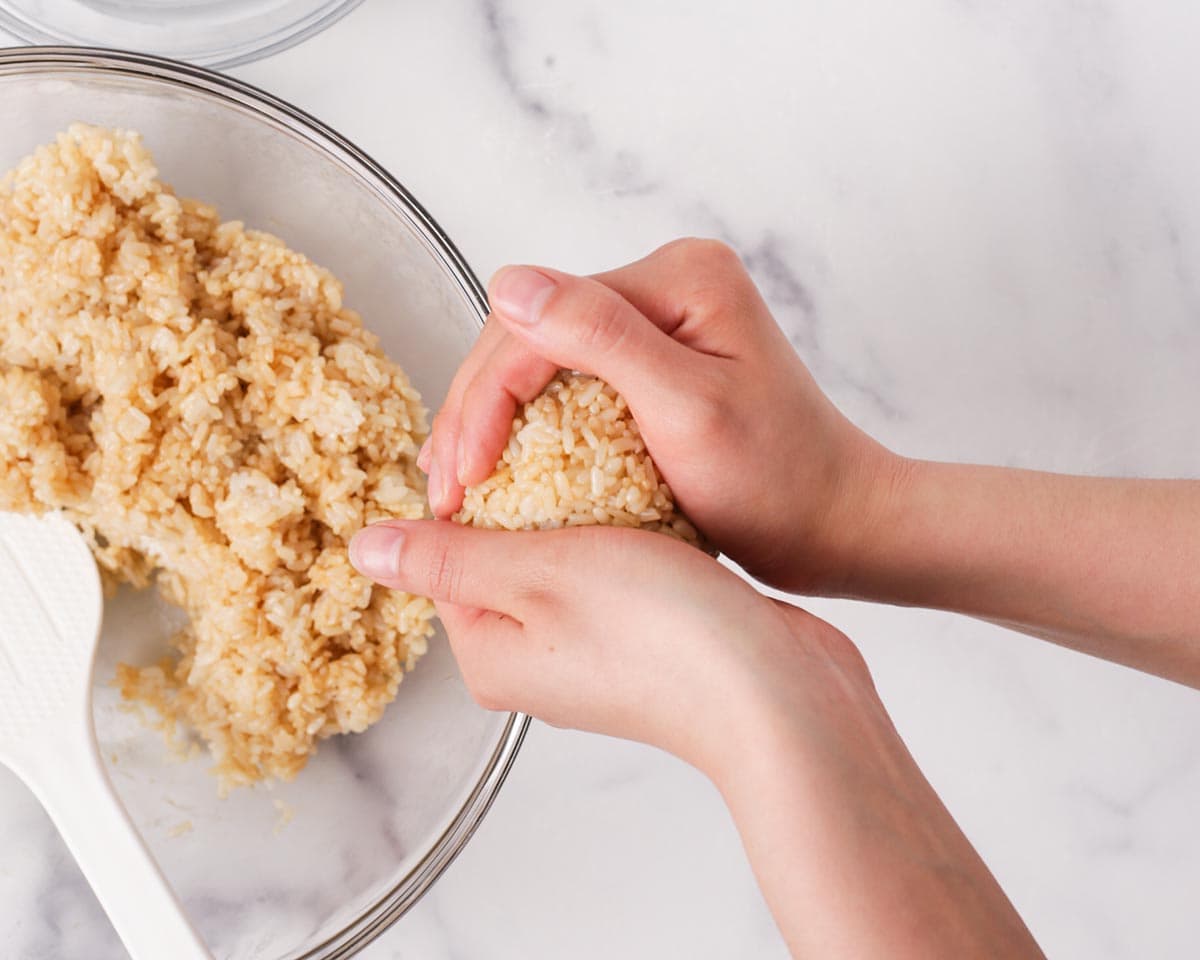
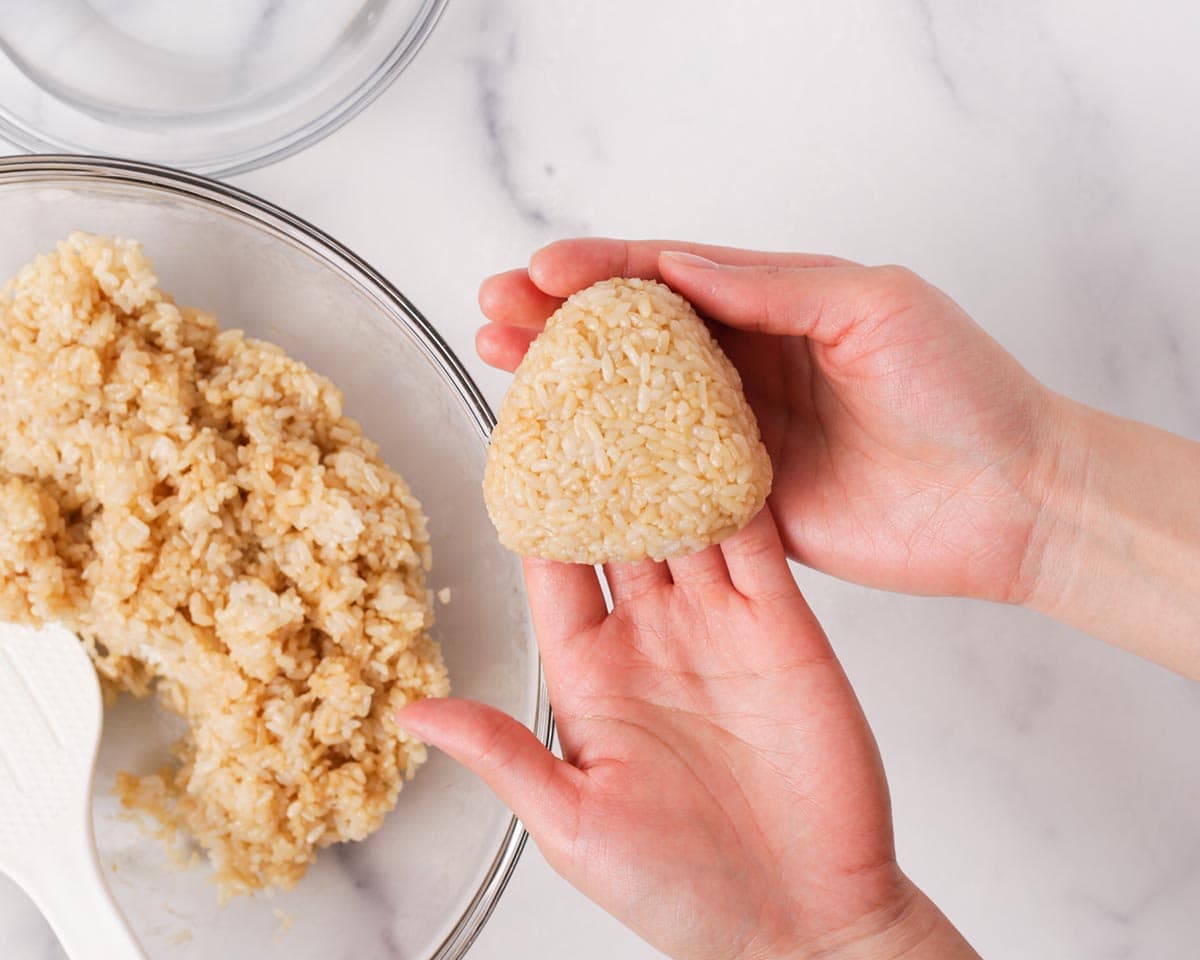
1. Wet your hands and place a portion of seasoned rice in your hand. If you wish to add a filling, place about 1 tablespoon of it in the center and wrap the rice around it. Roughly ball up the rice.
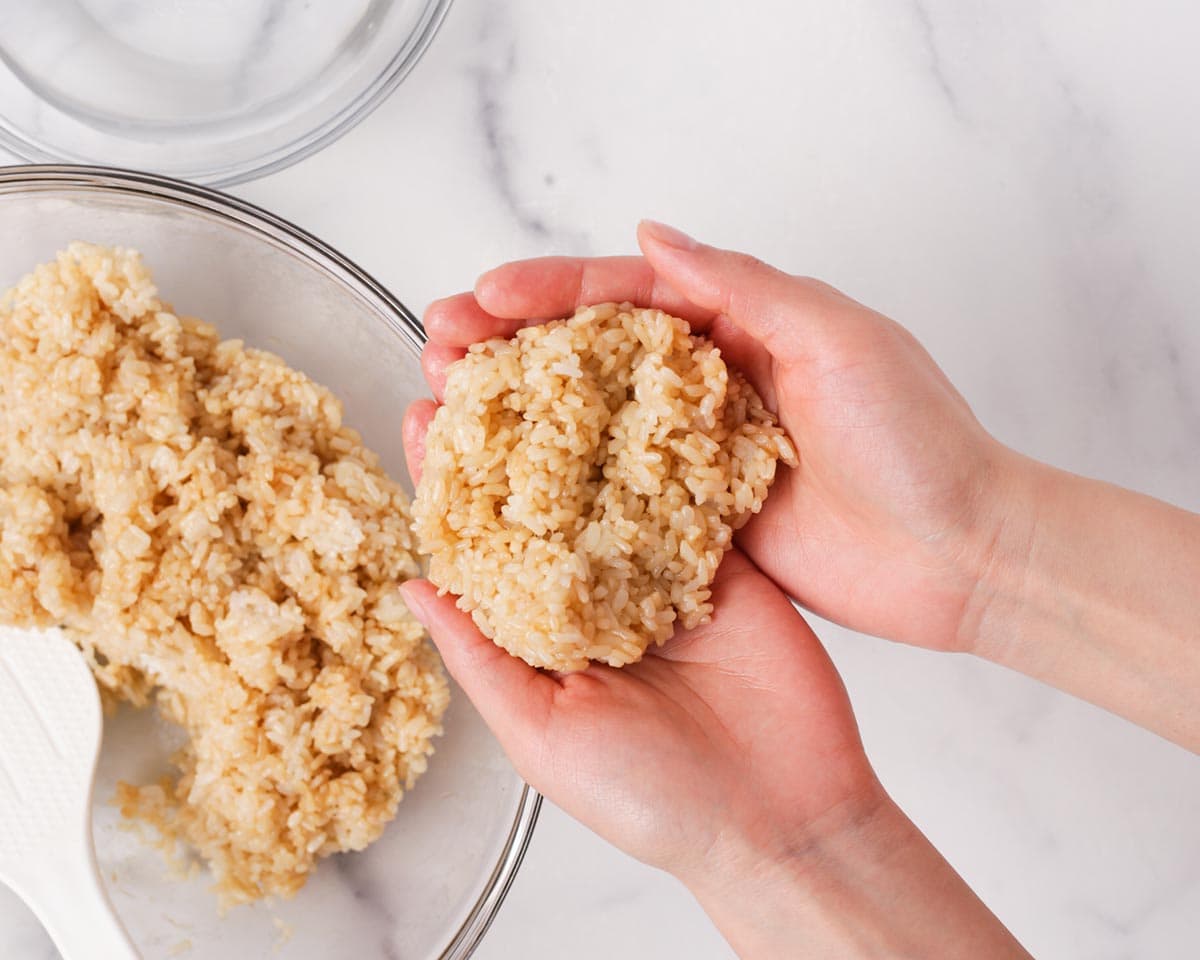
2. Use both hands to firmly press the rice ball into a triangular shape with a cupping, covering motion. Turn and repeat the motion until a triangular shape forms. Smooth out the shape if needed.
Shape with mold:
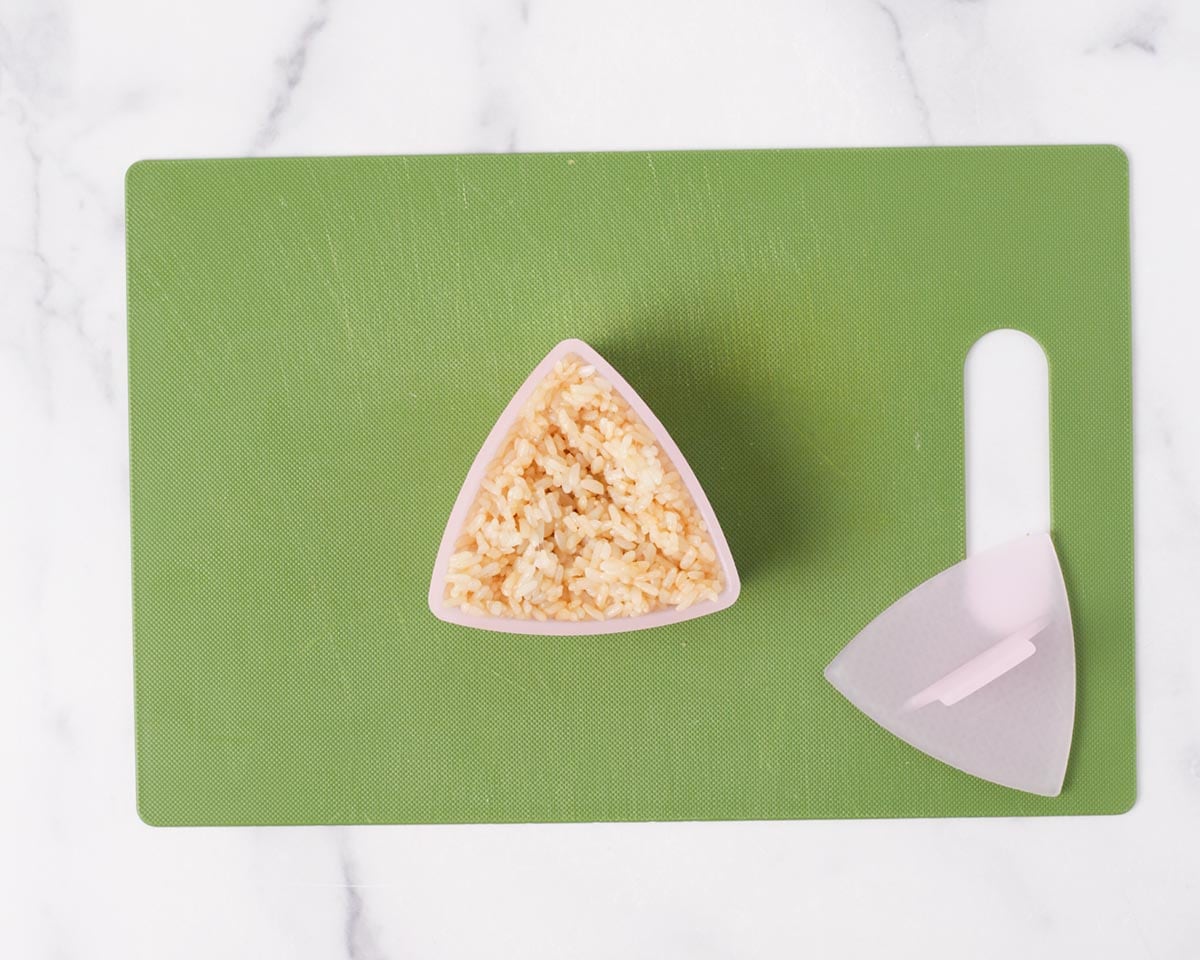
1. Place an appropriate amount of rice into the onigiri mold. If adding a filling, place only about half of the rice. Then, make a slight indentation with your finger and place about 1 tablespoon of your desired filling. Add the remaining half of the rice to the mold.
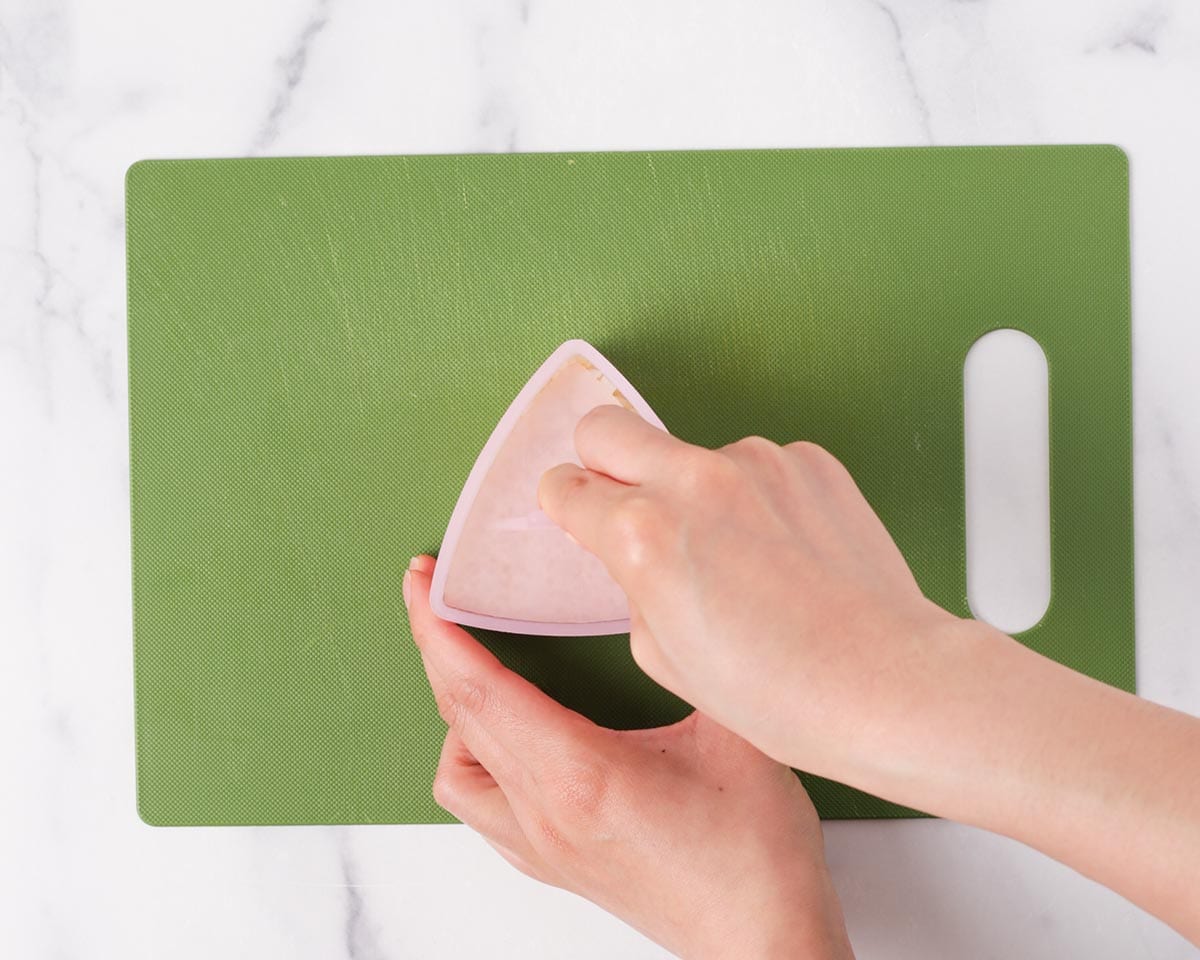
2. Use the presser that comes with the onigiri mold to firmly press down.
Filling ideas
If you're looking for some filling ideas, these are some of our favorites:
- Spicy mayo tuna - Drain some canned tuna well and mix with mayo and sriracha. If you want a recipe guide, try the filling for our spicy tuna onigiri recipe.
- Spicy kani - Also known as imitation crab salad. For a simple version, shred up some imitation crab meat and mix with kewpie mayo and sriracha.
- Plain kani - Just the imitation crab meat.
- Spam and cheese - Check out our spam yaki onigiri for a savory, cheese addition!
- Salted salmon
- Fish roe
- Teriyaki chicken
- Unagi
- Karaage - Japanese fried chicken
Recipe tips
- Use warm rice. Onigiri is much easier to shape and stick together when the rice is hot or warm.
- Wet hands in between each onigiri, if shaping by hand. Wetting your hands will prevent the rice from stick to your hands. However, don't overdo it or you may get a soggy rice ball instead.
- Decrease the heat to low after brushing on the sauce to prevent burning.
Storage and reheating
Yaki onigiri are best enjoyed freshly made for the best texture. If there are leftovers, let the onigiri cool completely before storing in an airtight container. The onigiri will be good for up to 3 to 4 days.
To reheat leftover onigiri, either wrap the onigiri individually with cling film or place as many as desired in a microwavable container with a lid. Microwave until hot. Let cool before enjoying! Do note that reheated yaki onigiri will not be crispy on the outside like freshly made ones.
FAQ
We do not recommend making yaki onigiri in the air fryer because air frying will not yield the same texture as pan frying. The rice tends to become hard and dry rather than crispy.
It is best to use medium grain or short grain sushi rice for making yaki onigiri.
We do not recommend using long grain rice as they do not contain enough starch, which is essential for shaping the rice.
Yes. You can use old rice to make yaki onigiri. Just make sure the rice is hot before using. The best way to reheat old rice is to microwave the rice in a microwave safe container with a lid.
📖 Recipe

Yaki Onigiri (Grilled Rice Balls)
Ingredients
- 2 cups cooked sushi rice hot (medium or short grain rice)
- 1 tablespoon soy sauce light sodium or regular
- ½ teaspoon toasted sesame oil (optional)
- Oil as needed for cooking (any neutral oil)
- Soy sauce for brushing (or your favorite sauce)
- Furikake (optional for garnish)
Instructions
- Season the rice:Into a mixing bowl, add the hot, cooked sushi rice. Drizzle the soy sauce and sesame oil around on the rice and fluff the rice in a slicing motion until the rice looks mostly even in color.
- Shape the rice balls:Divide the seasoned rice into four even portions. Wet your hands and ball up one portion of rice. Using both hands, firmly compact the rice and shape the rice ball into a triangle. Repeat with the remaining rice and wet your hands in between making each rice balls.*Please refer to the post above for step by step photo reference.*
- If shaping with a mold, scoop the rice into the mold and firmly press to make a shape the rice ball. Repeat with remaining rice.*Different molds can hold different amount of rice. So if need be, adjust the amount of rice to use according to your mold.*
- Pan fry:In a pan over medium heat, add enough oil to lightly cover the bottom of the pan. Once the oil is hot, arrange the onigiri (rice balls) in the pan, triangle side down. Cook the rice balls on both sides until golden brown and crispy, about 3 to 4 minutes per side. You can also pan fry the edges too if you'd like.
- Brush on sauce:When both sides of the onigiri are golden brown, reduce the heat to low. Then, brush each side with soy sauce or your preferred sauce and pan fry for an additional 15 to 30 seconds, until crispy again.*Make sure the heat is on low and don't pan fry for too long after the sauce is brushed on to prevent it from burning.*
- Garnish the yaki onigiri with furikaki if you'd like and enjoy while warm!
Notes
- Use the rice while it's hot or warm. It's much easier to mold because the rice is sticky when warm and also the rice will absorb the seasonings better.
- If you prefer something sweet and savory, brush on some teriyaki sauce (like this homemade one for our Japadog recipe) or unagi sauce instead.

Comments
No Comments