This classic pumpkin pie has the perfect flakey pie crust and a silky, smooth pumpkin filling that's absolutely necessary as your next holiday dessert!
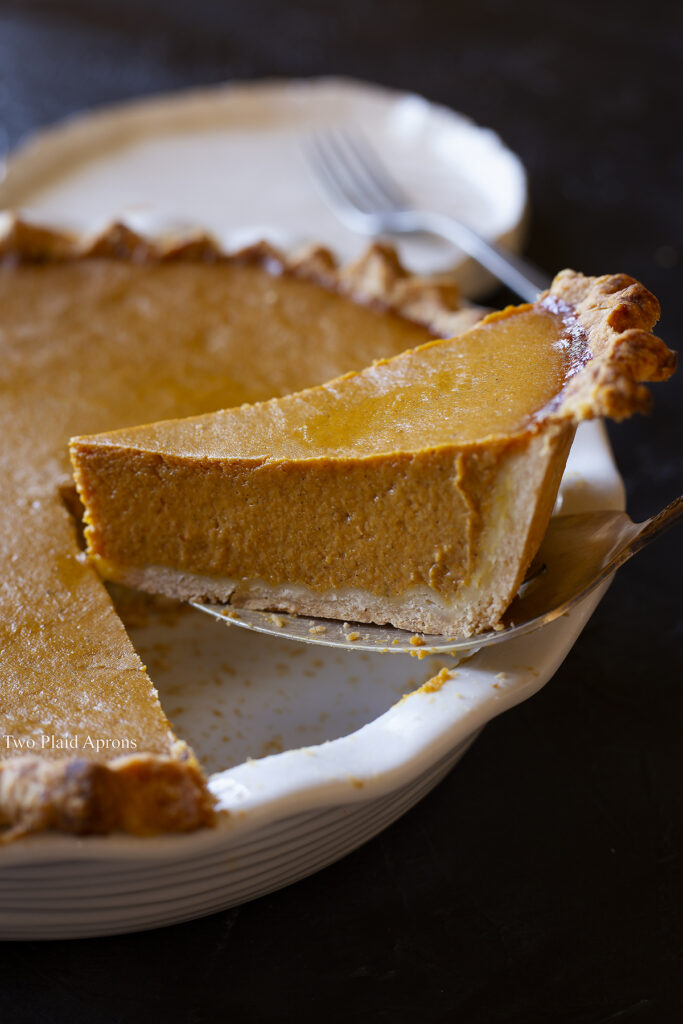
Silky smooth pumpkin pie filling
I remember that once upon a time when I first attempted pumpkin pies, I tried making it with an actual pumpkin. Not pumpkin puree. Boy, did that process made pumpkin pie a pain. And needless to say, I was not equipped with a great blender back then, so my pumpkin puree did not turn out as smooth as I'd liked. So, I highly recommend using can pumpkin puree for a silky smooth pumpkin pie filling.
The other factor that can alter the smoothness of pumpkin pies is baking the pie at too high of a temperature or if the pie is over-baked. Although pumpkin pies aren't as finicky as cheesecakes, the pumpkin filling still needs a gentle baking temperature because it is a custard-based filling. I recommend baking the pumpkin pie at 350F.
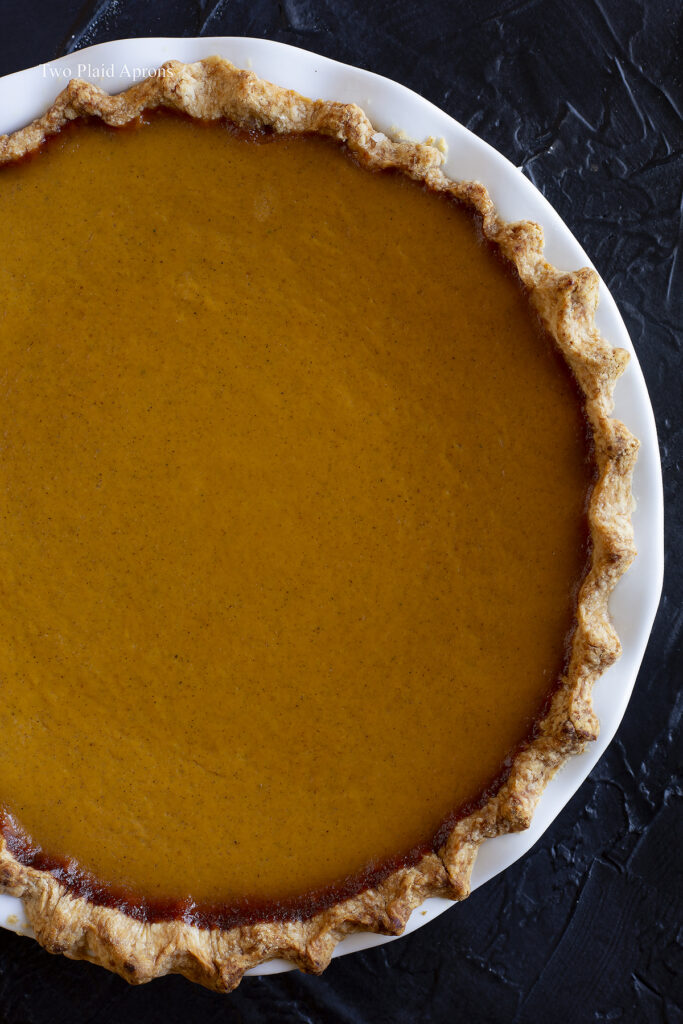
Cooking the pumpkin pie filling to intensify the flavor
Believe it or not, we found that cooking the pumpkin puree with the sugars and spices gave our pumpkin pie a more intense and aromatic flavor. The cooking process not only help infuse and intensify the spices in the filling, it also cooked out a small amount of extra liquid in the pumpkin puree, which concentrates the pumpkin flavor.
The telltale signs of a properly baked pumpkin pie
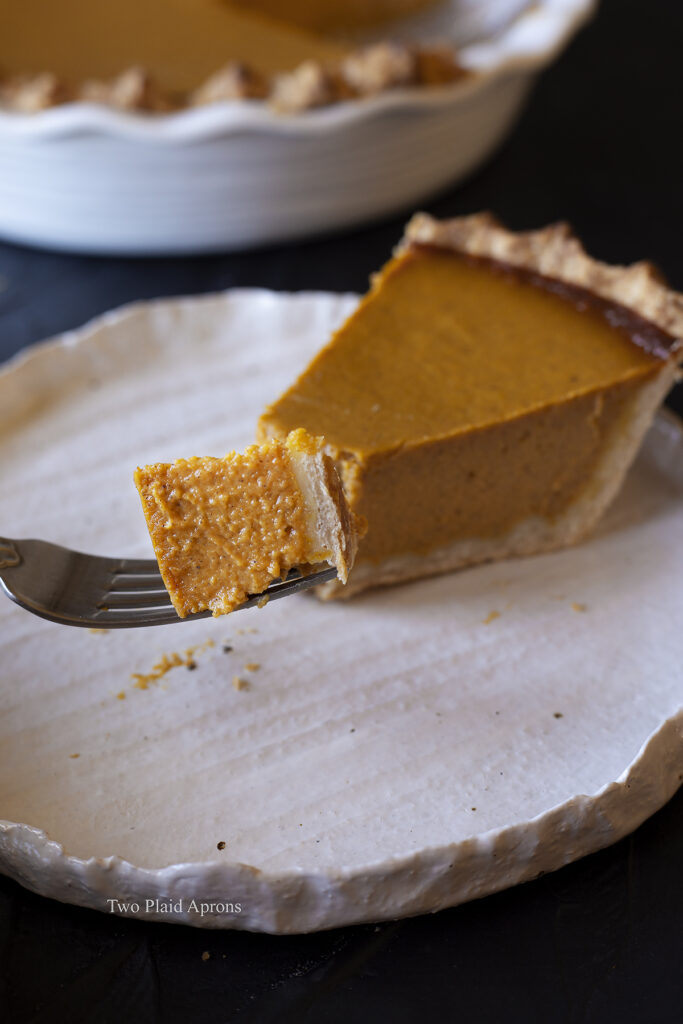
Like many other custard-based baked goodies, pumpkin pies can sometimes be kind of deceiving in terms of knowing when they're baked through. What I look for when deciding if my pumpkin pie is done baking is the puff around the edge and the jiggle of the center. When pumpkin pies are close done, you'll see that the edge of the pie filling will be puffy while the area in the center looks a little dipped in and slightly jiggly. That is the sign to remove it from the oven! However, if you have any slight bit of doubt in this method, you can always insert a knife into the filling, about 1-2 inches from the edge. If it comes out clean, the pie is ready to be removed and cooled.
It's all about the temperature
The perfect pumpkin pie should be silky smooth and without cracks on top. And after some trial and error, we found one of the most common reasons for cracked pumpkin pies is baking at a temperature that's too high. Too high baking temperature cooks the surface of the pie faster than the rest of the filling, causing cracks when the filling puffs up.
Besides baking at the right temperature, we also found that baking the pumpkin filling when it's already warm decreases the chance of the pie filling cracking. Because the filling is already warm, there's less drastic temperature difference between the center of the pie and the edge of the pie. This helps the pumpkin filling cook more evenly, which prevents cracks.
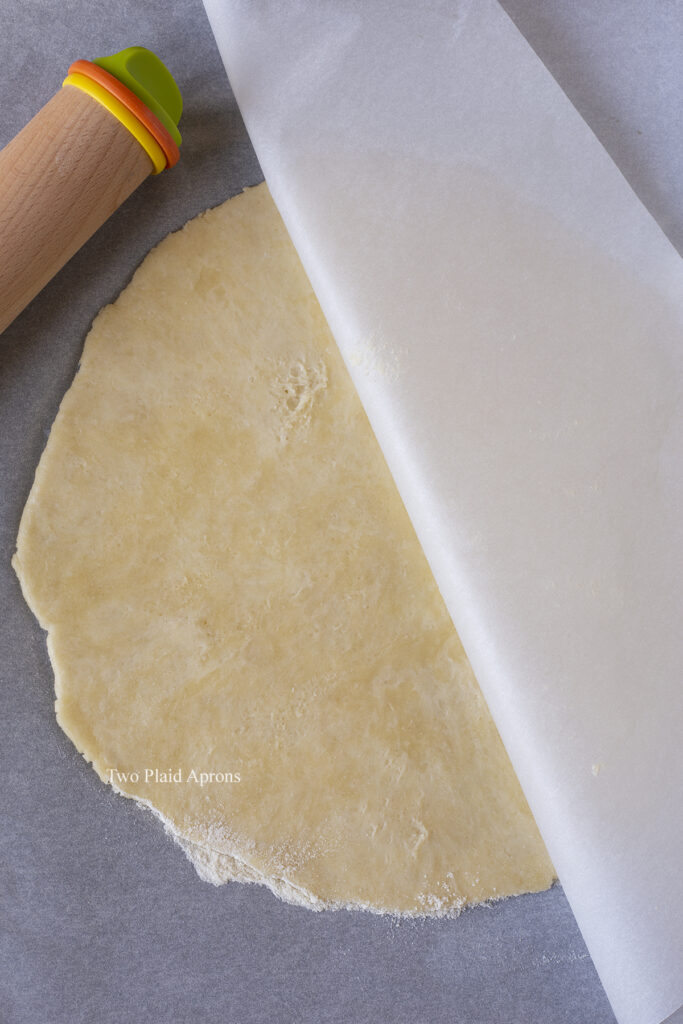
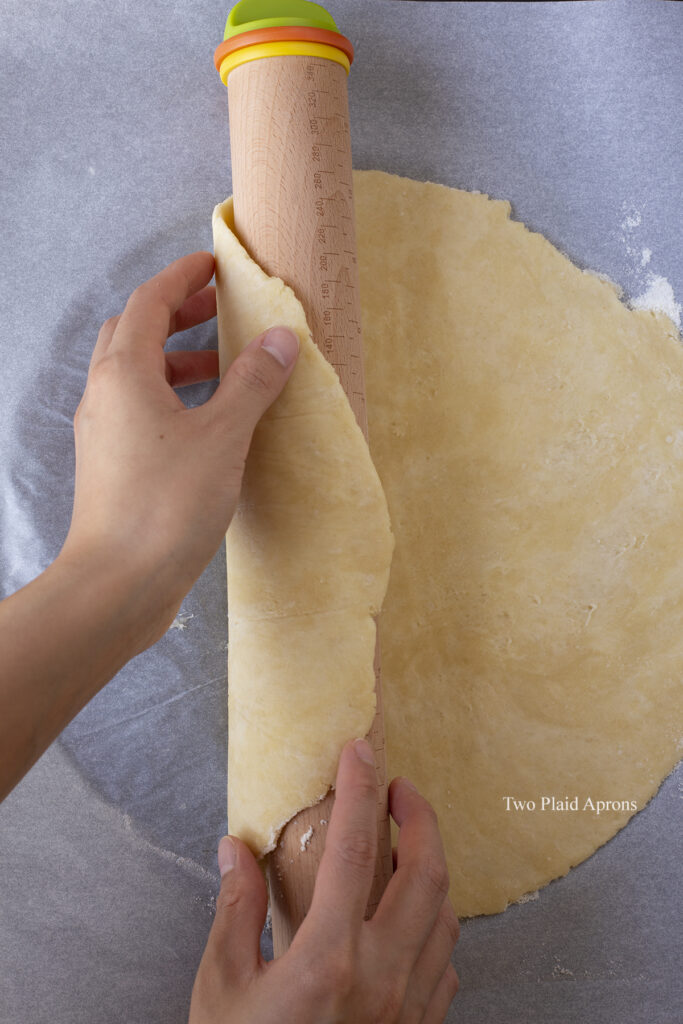
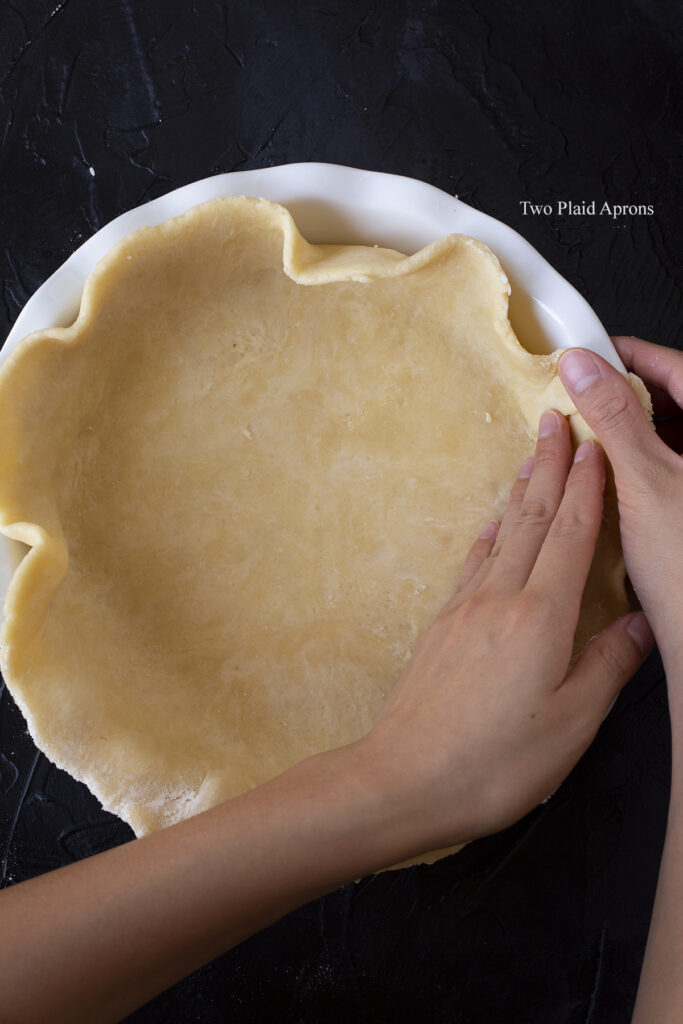
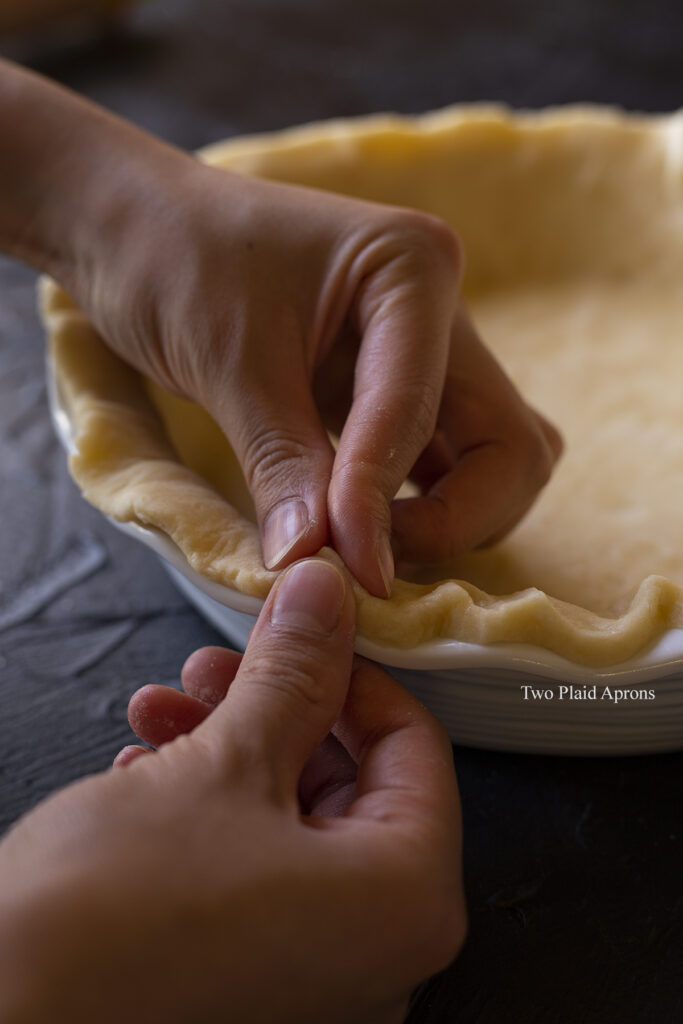
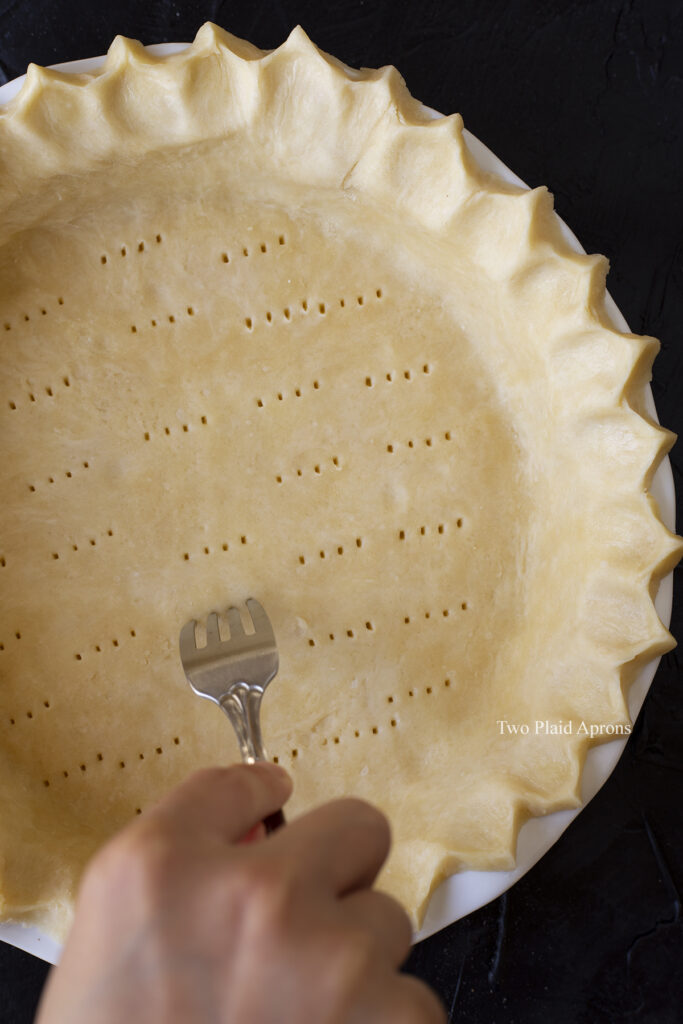
I like to roll my dough between parchment paper so that there's less mess. Use a rolling pin to help you carry the dough to your pie dish. Mold the pie dough to your pie dish and flute the edges. Use your thumb and finger to flute the crust by pinching and pushing. I like to dock the bottom of the pie dough to keep the dough from puffing.
Perfect flakey pie crust
The perfect pie should be accompanied with the perfect flakey pie crust. To make the most perfect pie crusts, it all starts with cold butter. When the crust gets baked, the cold butter melts and creates steam which "leavens" the dough, giving it flakey layers. So make sure to keep the butter as cold as possible, work with the dough as fast as you can, and use cold water for the dough.
The other important factor in making the most perfect pie crust is to never overwork the dough. Overworked pie doughs will result in tough crusts that will ruin your pie. When making pie doughs, add the cold water to the blended flour and butter and mix just enough to bring the dough together. The dough will be a bit on the drier side and looks kind of shaggy. Simply compact the dough together and give it a couple of good kneads to form the dough into one disc. Then, chill it right away!
Blind baking pie crust and why it's necessary
The third most important step to making perfect flakey pie crust is blind baking it! What is blind baking? Blind baking is simply the process of pre-baking the pie crust before filling it with pie filling. Now, is it necessary? Our thought? Absolutely! Blind baking cooks the crust and prevents the crust from becoming soggy after the filling is added. That is essential for a crispy crust.
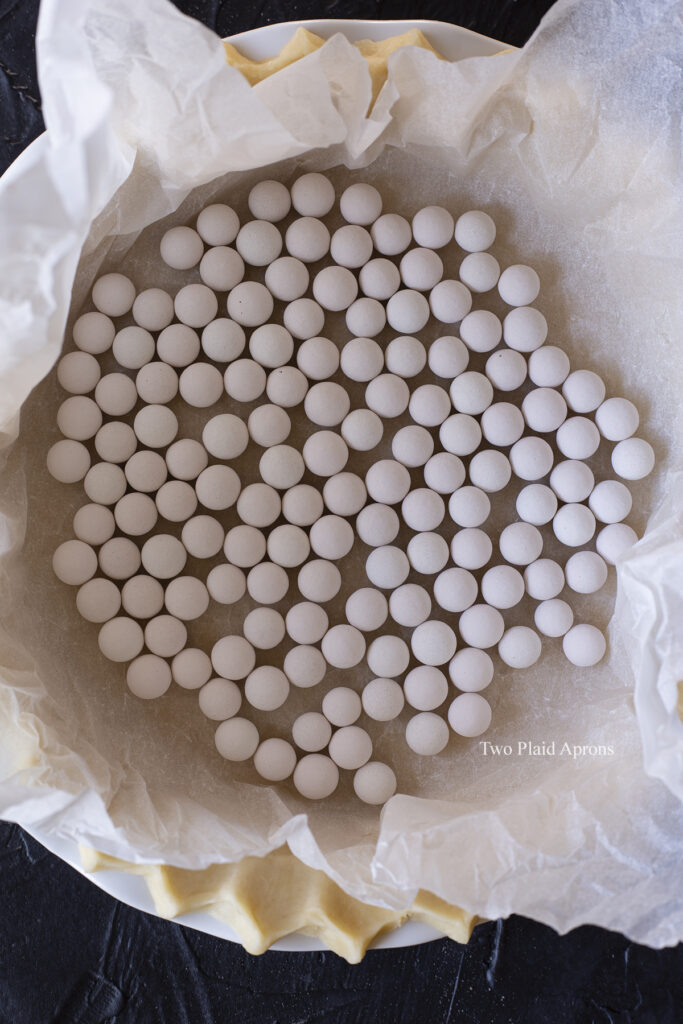
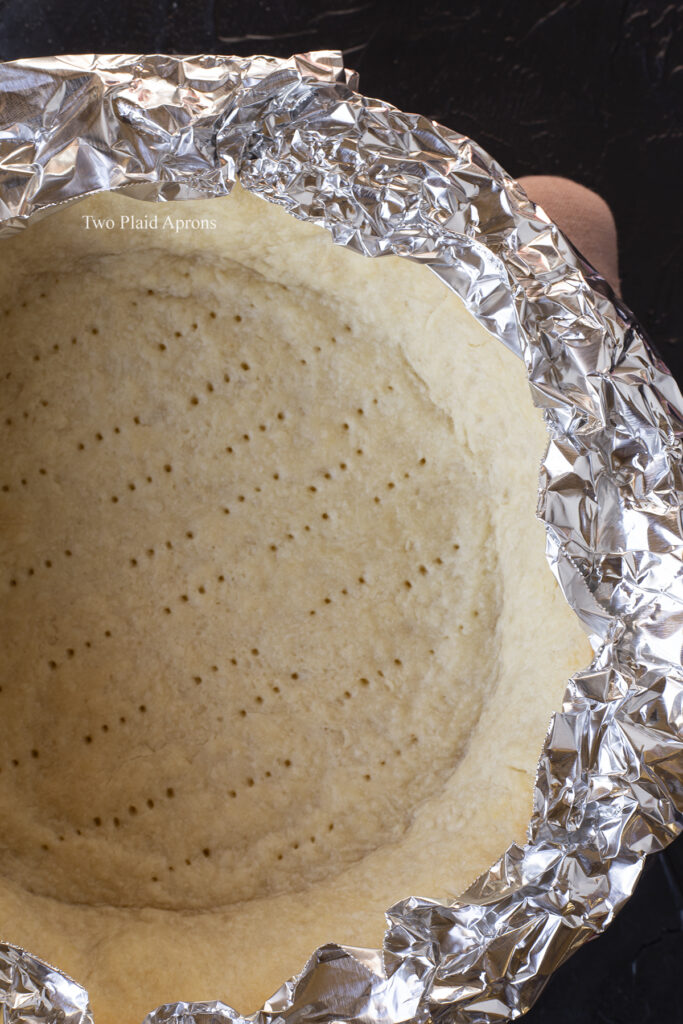
Ceramic baking beads are handy and reusable for weighing pie doughs down. You can wrap the edge of the pies with foil to prevent too much browning.
My favorite handy gadgets for pie making
These are few of my favorite gadgets to use when it's pie season. They really make pie making easy peasy.
- Ceramic pie weights: These ceramic beads are the perfect tools for weighing down the bottoms of your pie crust to keep an even bake on them. The best part? These beads are reusable!
- Josephine Josephine's adjustable rolling pin: This rolling pin is my new FAVORITE toy! It makes everything that needs to be rolled out to a certain thickness hassle-free. There's 4 adjustable rings that you can choose to determine the thickness of your dough. And let me just say, never has rolling out pie doughs been easier! It's also great for cutout cookies as well!
- Parchment paper: Yes. I love, love, love parchment papers when I have to roll out doughs. The parchment paper keeps my work surface mess-free, and I can move my dough to wherever I want. The parchment paper is especially handy to have when I want to quickly roll out a butter-based dough and popping it into the fridge to chill.
- Aluminum foil: Foil is great to have around when you want to keep your baked goodies from getting too much colors, like the edge of the pie crust when blind baking.
Make your own pumpkin spice blend
If you happen to have ground cinnamon, ginger, nutmeg, and either allspice or clove in your pantry, but not pumpkin spice, you can make you own pumpkin spice blend! Not only will it be cheaper, you can customize your blend to have more cinnamon flavor or kick it up with some spicy ginger. You can really customize it to your preference.
My go-to ratio of pumpkin spice blend is 2 teaspoons of cinnamon, 1 teaspoon of ground ginger, ¼ teaspoon nutmeg, and ⅛ teaspoon of either cloves or allspice.
If you're looking for other fall recipes, you may like these:
Bake with love!
Mei ❤️
If you’ve made this recipe or any recipes from our blog, please tag us on Instagram using #twoplaidaprons! You can also tag us in your Instagram stories using @two_plaid_aprons. We would love to see your creations! It absolutely makes our day! 🥰
📖 Recipe
Classic Pumpkin Pie
Ingredients
For the pie crust:
- 1¾ cup all-purpose flour (spooned & leveled)
- 1½ Tablespoon granulated sugar
- ¼ teaspoon kosher salt
- 12 Tablespoon unsalted butter , cold (or 1½ stick)
- ⅓ cup cold water (you may need a little less in warm, humid weather, or a little more in cold, dry weather)
- 1 egg ,beaten (optional for egg wash)
For the filling
- 15 ounce pumpkin puree
- ½ cup brown sugar , packed (light or dark)
- ¼ cup granulated sugar
- ½ teaspoon kosher salt
- 2½ teaspoon pumpkin spice
- 1 cup heavy cream
- ½ cup milk , any
- 3 large egg , beaten
Optional garnish:
- ⅔ cup heavy cream
- 3 Tablespoon granulated sugar (or to your preference)
- Ground cinnamon (for dusting)
Instructions
For the pie crust:
- In a mixing bowl, mix together flour, sugar, and salt. Blend the cold butter into the flour until the butter pieces are around pea size.*You can blend the butter into the flour with either a fork, a pastry blender, a grater, or using a food processor.*
- Add the cold water to the flour and mix just enough until the dough comes together. The dough will look more on the shaggier side and not smooth, but just give it a couple of kneads and the dough should compact and hold itself together. However, DO NOT over knead the dough or it will result in a tough pie crust.*Depending on your environment, the amount of cold water may vary. If it's humid and hot, you may use a couple tablespoon less water. If the weather is cold and dry, then, you may need a couple tablespoons more.*
- Compact the dough into a disc, wrap it in plastic wrap, and chill the dough in the fridge for about 15 minutes or overnight.
- Preheat the oven to 400°F.
- On a clean work surface lightly dusted with flour, roll the pie dough out to a circular shape, about ¼ inch thick or just a touch thinner. Transfer the pie dough into a pie dish and gently mold the dough into the dish. Trim the excess dough from the rim of the pie dish and flute the edge of the dough by pushing and pinching with your fingers. Chill the dough in the fridge for about 5-10 minutes until the oven is preheated to 400°F.*Refer to the post for picture reference.*
- Brush the edge of the pie crust with egg wash if you wish. Dock the bottom of the pie crust will a fork and line the interior of the crust with a parchment and fill it with either beans or ceramic pie weights. Blind bake the pie crust for about 15 minutes then remove the parchment with the weights. Bake for another 5 minutes then remove the pie crust from the oven and let it cool at room temperature while you make the filling.*Crumbling the parchment paper before lining the pie crust makes it easier to work with. To prevent the edge of the pie crust from browning too much, you can use strips of foil to wrap around the edge of the pie crust.*
For the pie filling:
- Lower the oven temperature to 350°F.
- In a saucepan, combine the pumpkin puree, sugars, salt, and pumpkin spice. Heat the mixture over medium heat and stir occasionally until the spices are aromatic and the mixture is hot. Stir in the milk and cream and mix until well incorporated. Heat the mixture until warm to the touch. Take the sauce pan off the heat and briskly whisk the beaten egg into the pumpkin mixture.
- Pour the warm pie filling into the blind baked pie crust and bake the pumpkin pie for about 55-60 minutes until the edge of the filling is kind of puffy while the center is still slightly jiggly. Remove the pumpkin pie from the oven and let it cool completely at room temperature before refrigerating.*Keep the foil on the edge of the pie crust if you don't want the crust to become any darker. You can also check the doneness of the pie by inserting a knife 1-2 inches from the edge and the knife should come out clean. Over-baking the pie will result in some cracking.*
Optional garnish:
- Combine the heavy cream and sugar in a mixing bowl and whisk it to medium or stiff peak (when the whipped cream can hold its shape). Add a generous dollop of whipped cream to each wedge of pie and give it a light dusting of cinnamon on top. Enjoy!
Notes
- The pie crust can be made ahead of time and stored in the fridge, properly wrapped and covered, for 1 week. You can also freeze the pie dough for up to 2 months.






Comments
No Comments