Love azuki bean paste but not so much the wait? This Instant Pot sweet azuki bean paste recipe will cut your 12 hour wait time to under 1 hour! Plus, you'll still get to customize the sweetness and the consistency of your homemade azuki bean paste. It's a win-win!
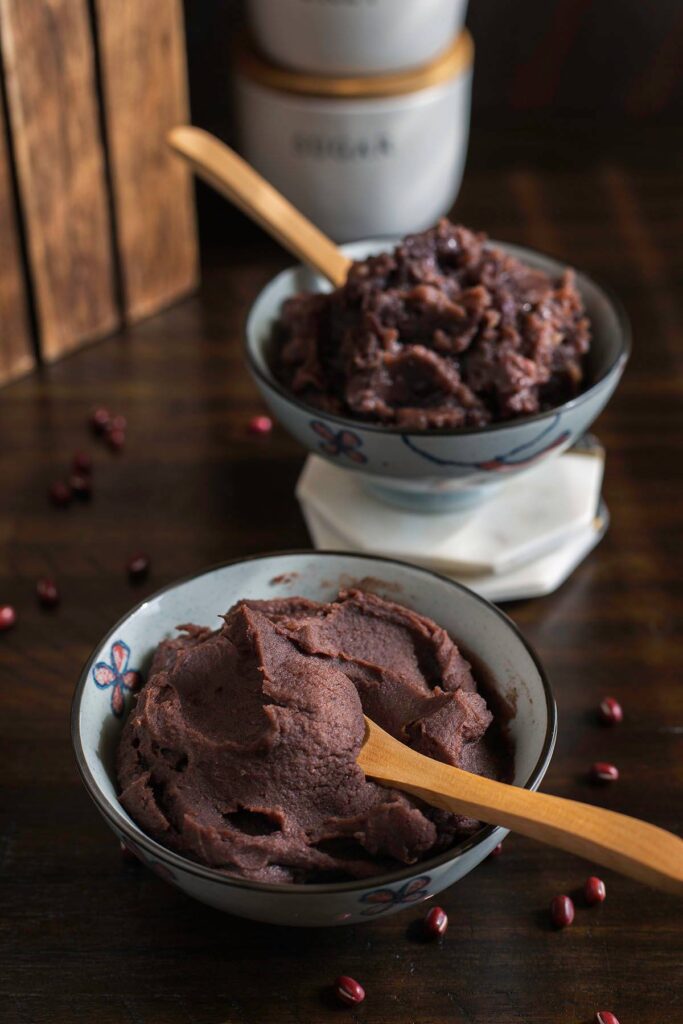
Growing up, I've always loved anything that has azuki bean paste, or more commonly known as red bean paste, as the filling. Whether it's those mochi sesame balls (芝麻球) at dim sum or the simple breads and pastries at the grocery store, you'd find me gobbling them up, lol. As I got older, I started to not enjoy the bean paste as much because they were sweeter than I'd like. But, oh do I miss the flavor of red bean paste! And that led to me making our own, homemade bean paste.
I love making azuki bean paste the traditional way, which is on the stovetop and took a bit of time. But if you guys know me, I tend to get spontaneous cravings and sometimes forgetful? Lol. And so came this Instant Pot version of red bean paste! It's sooo much faster! Under 1 hour. That is a twelfth of the regular time needed! Figured we had to share this awesome hack if you're ever in a pinch for time. Hope you guys enjoy it and find it helpful!
What are azuki beans?
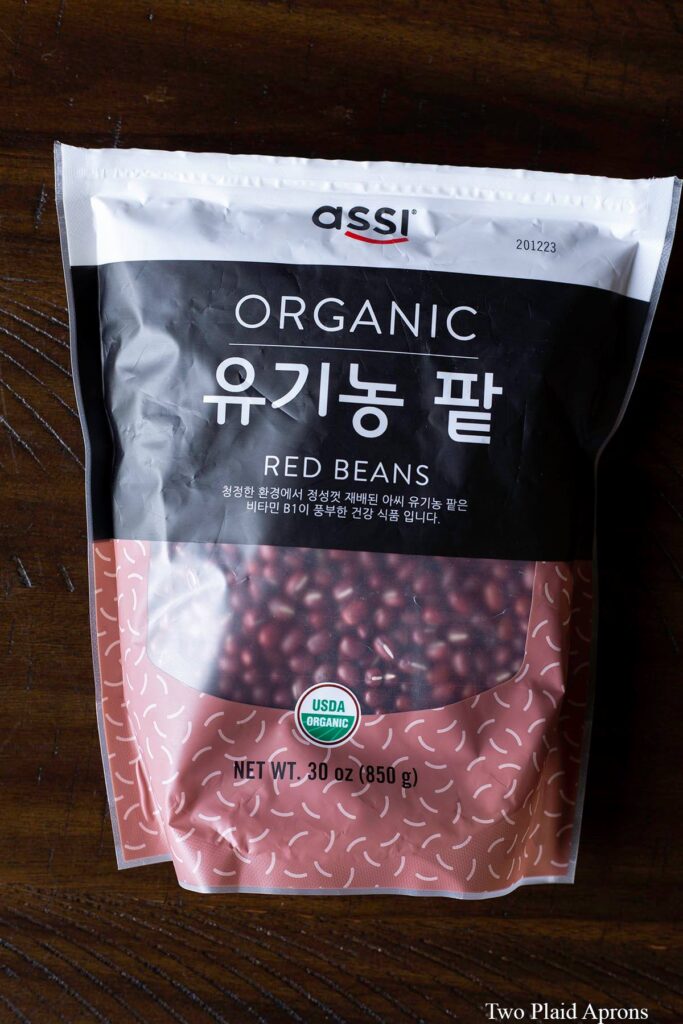
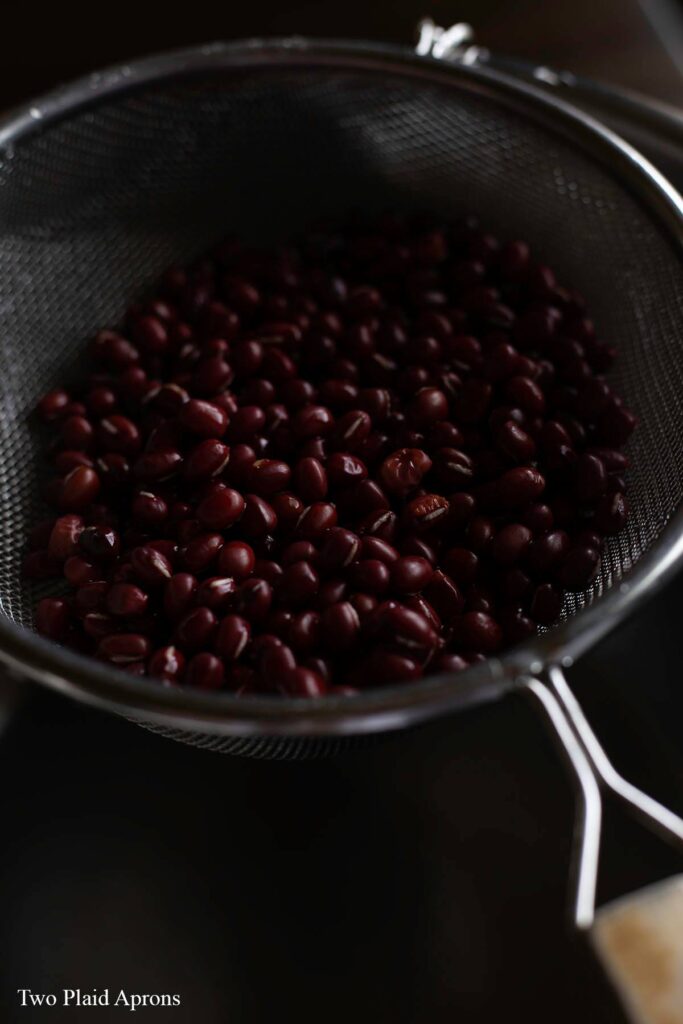
Azuki bean or also known as adzuki bean, aduki bean, red bean, and red mung bean, is one of the most popular beans used in East Asian cuisine. Unlike what is commonly known as red beans in America, azuki beans have a rich wine red color and are much smaller in size, roughly a little smaller than black beans. In Asian culture, these little red beans are often used in soups, stews, rice supplements, or made into dessert or a dessert counterpart.
Anko vs Tsubuan
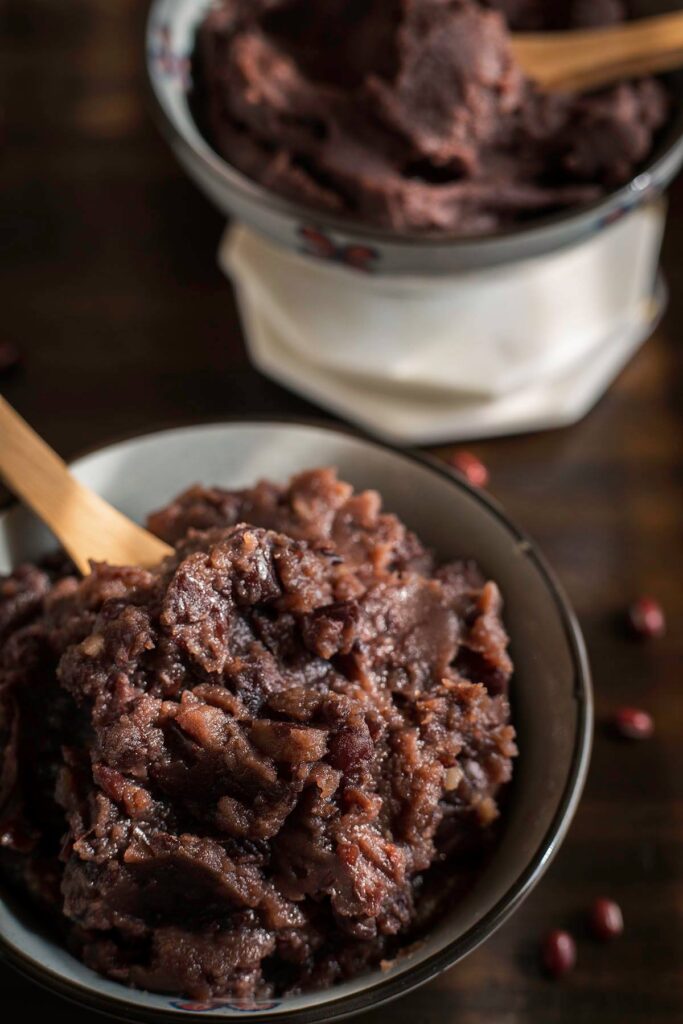
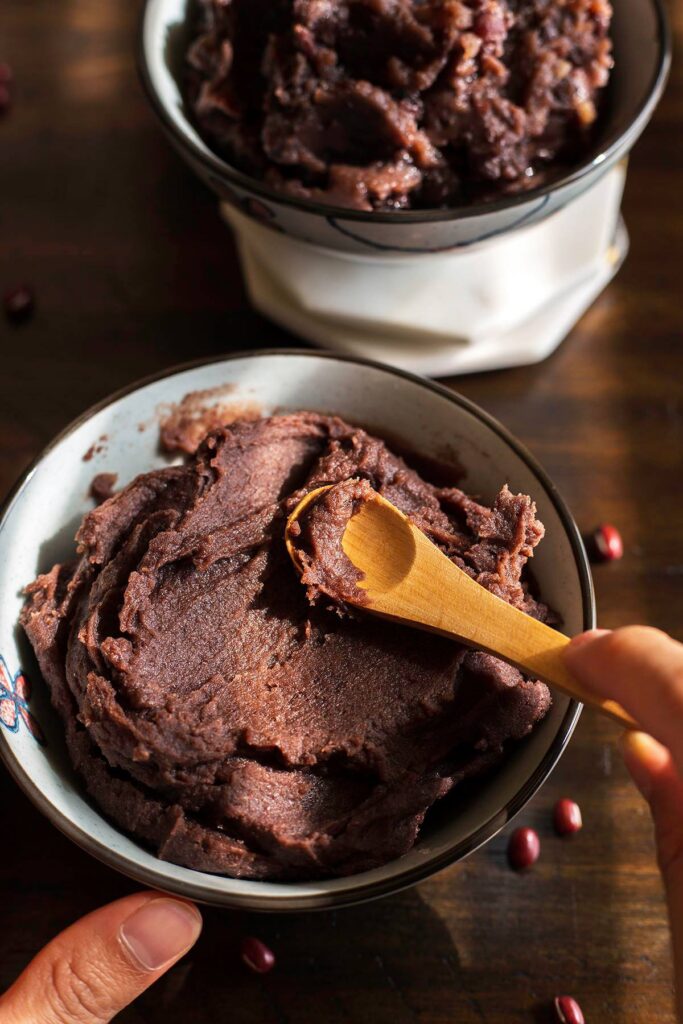
You've probably seen or heard about azuki bean pastes. Or maybe red bean pastes? But did you know there's two different forms of azuki bean paste? They are known as "anko" and "tsubuan" in Japanese translation. Anko, aka the fine red bean paste, is the most commonly seen red bean paste. This version of the bean paste is made by blending well-cooked azuki beans until its smooth. This is what you'd often find inside of Asian breads and pastries, like our wool bread with read bean paste.
The other version, or tsubuan, is the coarse, chunky version. This red bean paste is made without blending the beans. The bean paste is left chunky and sometimes more moist than anko. Tsubuan is often served in a dessert soup or topped on desserts like taiyaki or patbingsu (aka Korean shaved ice).
Anko are your classic smooth, fine pastes, commonly used for breads and pastries. Tsubuan is your coarse, chunky red bean paste...great as toppings!
Instant Pot magic
Normally, red bean paste requires at least 8 to 12 hours of soaking time in order to reduce the cook time to about 1 hours. Which, is not bad at all, since majority of time isn't active cooking. But...sometimes, if you're like us, who forgets to soak the azuki beans ahead of time or have sudden cravings for some red bean pastries, forget about an overnight, we need the red bean paste one-the-fly! Now, the good news is, if you've got an Instant Pot (the savior of almost all time consuming cooking), you're in luck!
Instant Pot can reduce the total time for make azuki bean paste to less than 1 hour. And that's no soaking at all! Mhmm. Isn't it nice?! All you've got to do clean the beans then pop them into the Instant Pot with the vent sealed and the setting on normal, 25 minutes, high pressure, "Pressure Cook." It's easy-peasy!
The proper thickness for azuki bean pastes
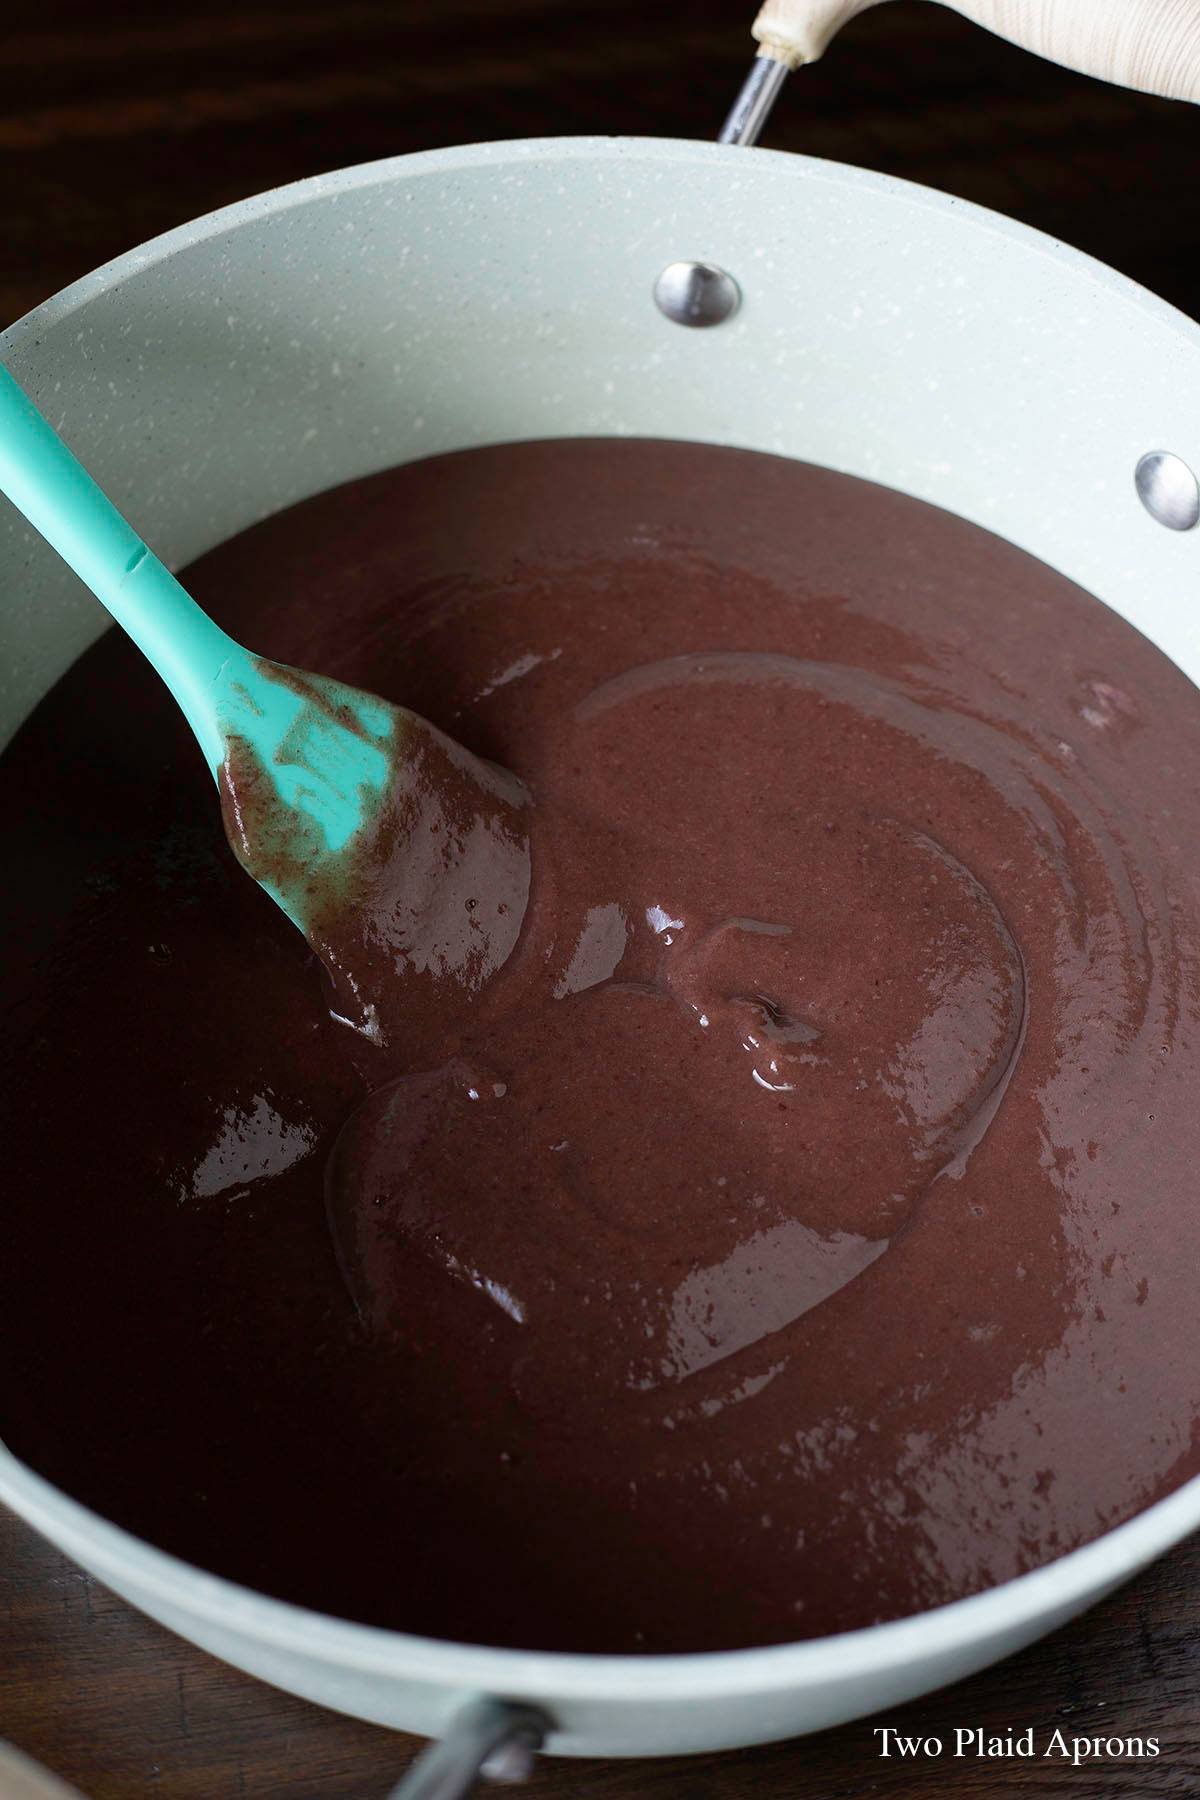
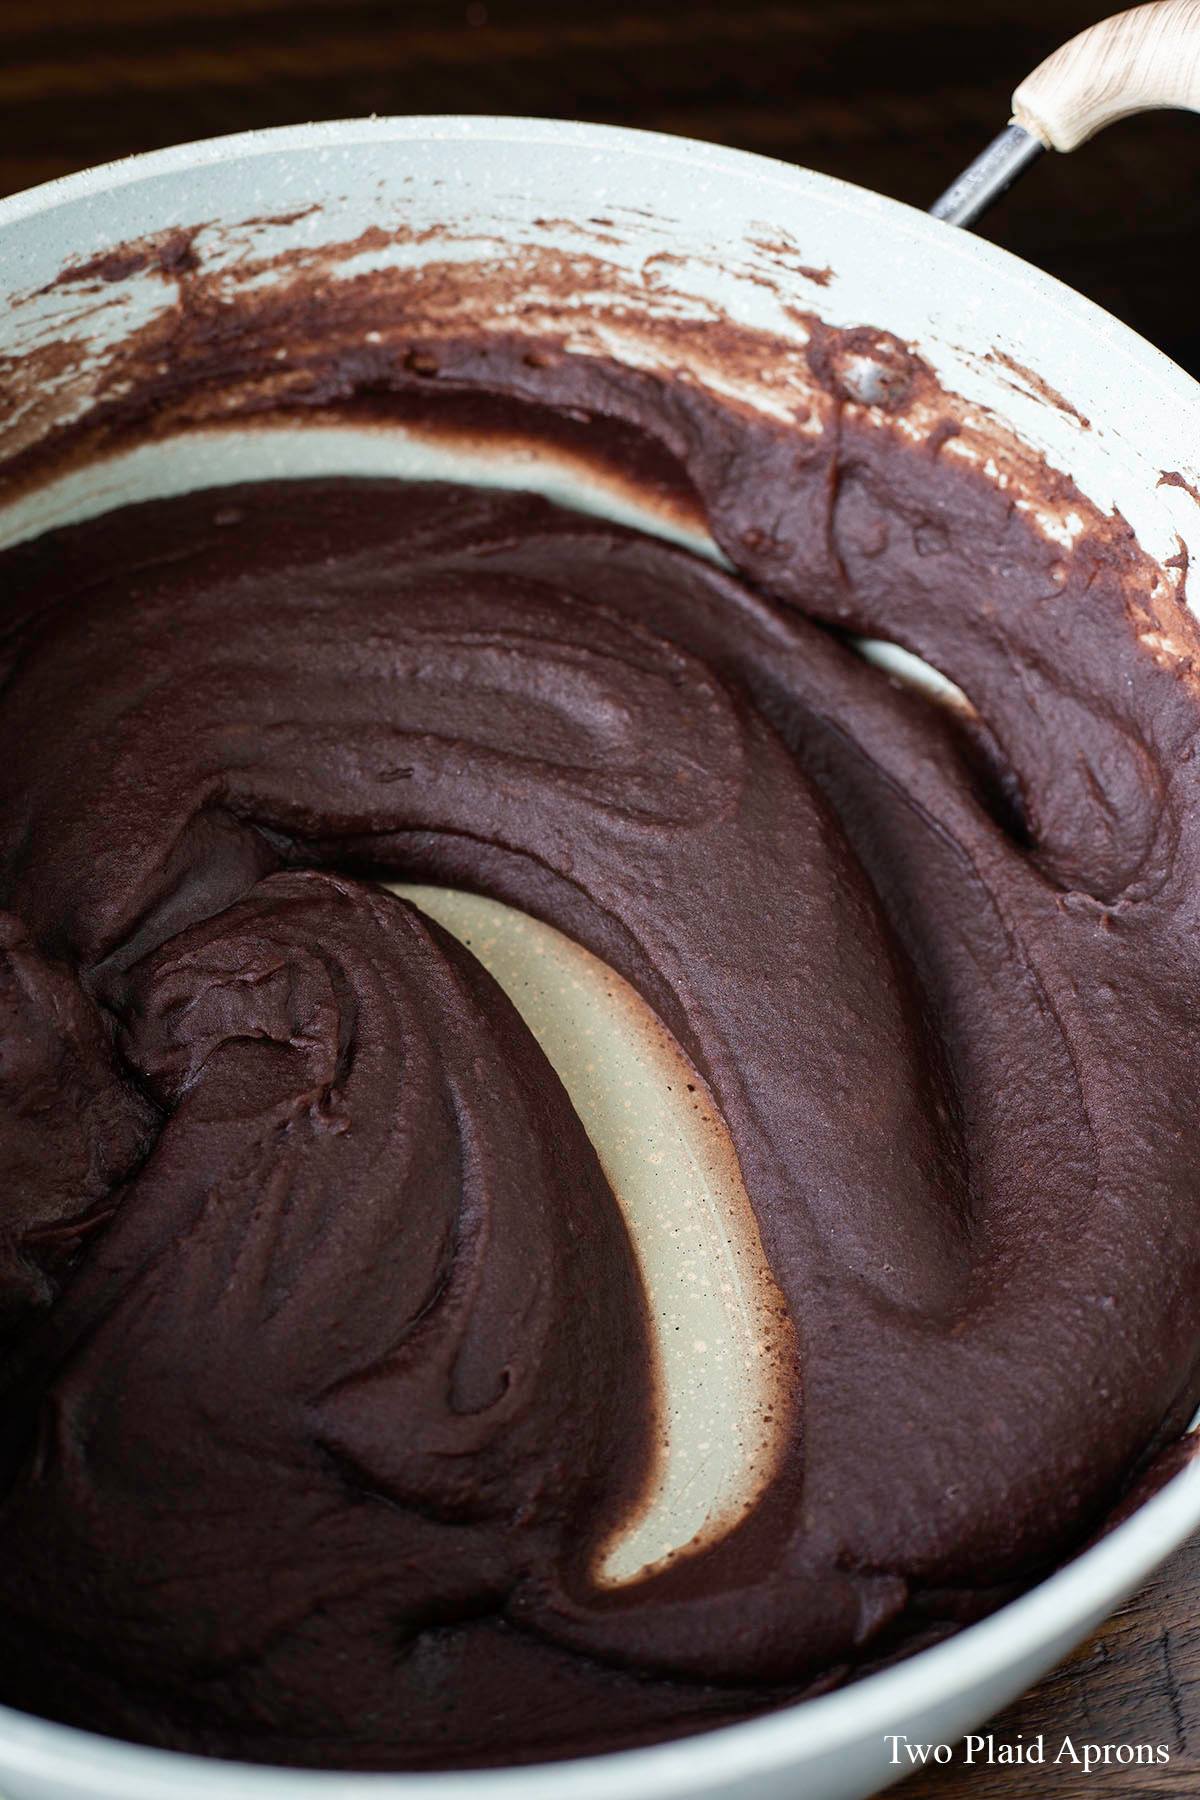
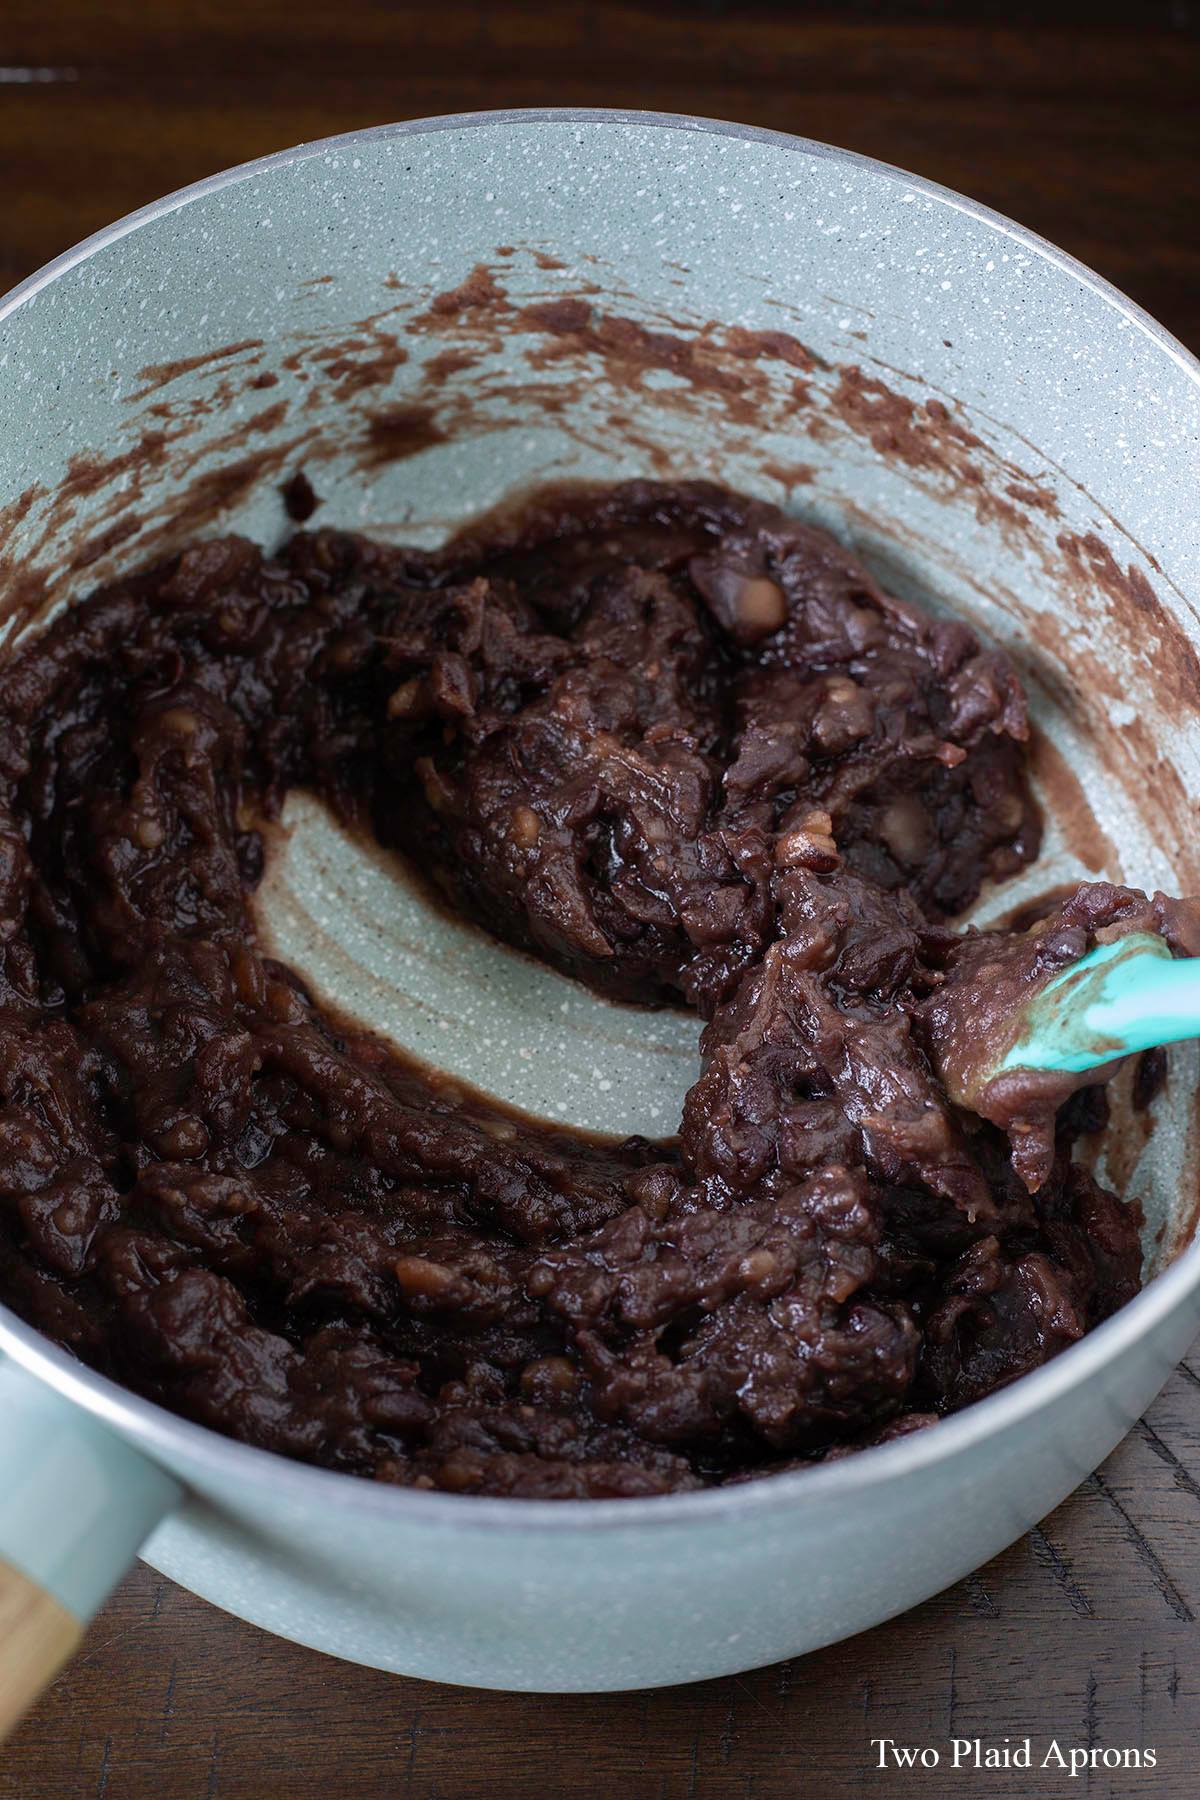
Depending on if you're making anko or tsubuan, and what you're using the azuki bean paste for, the thickness of the paste can vary. Typically, for anko, the bean paste is cooked until you can draw a line through it without it disappearing. This is the middle ground consistency for most anko related desserts and pastries. On the other hand, tsubuan tends to be on the looser side of the two bean pastes, since tsubuan is commonly used as a dessert add-on or a topping to another dessert. For tsubuan, it can be cooked until a line drawn through it slowly disappear.
Either azuki bean paste you plan on making, one good rule of thumb is to imagine how you plan to serve the bean paste. If you plan on serving the red bean paste hot, like in steamed buns with red bean paste, you want to stop cooking the bean paste when it's about the same consistency as you would see in your steamed buns when you're enjoying them. Also remember, cooking continues for a few more minutes after you remove the bean paste off the heat.
After blending the pressure cooked azuki beans, it'll be smooth and fairly loose. After cooking my anko for about 5 to 10 minutes, it becomes a thicker consistency where I can draw a line through it and the line stays. As for tsubuan, add it straight into a pan after draining. After cooking my tsubuan for about 5 to 10 minutes, I can draw a line through it. But you can probably see that I kept my tsubuan a bit looser than my anko.
Advantages for making your own azuki bean paste
Aside from knowing exactly what is going into your body, one of the greatest advantage of making your own, homemade azuki bean paste, is definitely being able to control the sweetness of the bean paste. This recipe has just enough sugar to make the bean paste the perfect sweetness if using it as a filling for breads and pastry. When cooled, the bean paste also becomes a bit less sweet. But if you prefer your red bean paste sweeter, you can always add more sugar to the recipe. The best time to taste and adjust the sweetness is when the bean paste is almost cooked to its proper consistency.
The other advantage of making your own azuki bean paste is your control over the consistency of the paste. As mentioned above, usually red bean pastes are cooked until you can draw a line through it without it disappearing. However, depending on what you'll be using the bean paste for, consistency can vary.
How to make homemade red bean paste less crumbly
If you've ever made homemade bean paste before, you've probably noticed that, compared to commercial bean paste, your homemade ones is crumblier, especially after it's cooled. That's because our homemade version contains way less sugar than the commercial ones. Commercial red bean pastes, often time, are cooked with oil and corn syrup. All three of these extra ingredients help keep commercial bean pastes more pliable and putty-like.
So if you also want to also make your homemade azuki bean paste more pliable and less crumbly, you can add a few Tablespoons of neutral cooking oil and a Tablespoon or two of corn syrup or maltose syrup to the paste when cooking it.
How to store azuki bean paste
Because our homemade azuki bean paste doesn't contain a ton of sugar, which acts as a preservative, the bean paste won't have as long of a shelf life. So we do recommend using the bean paste as soon as possible, but if you've got leftovers, you can refrigerate it for up to 4 days or kept frozen, up to 1 month. Make sure to properly store the azuki bean paste in an airtight container!
If you're looking for other dessert recipes, you may like these:
- Sweet Potato Mochi Pancakes/ Hotteok
- Sparkling Strawberry Lemonade (with Fresh Strawberry Boba)
- Matcha Mochi Breads
- Black Sesame Tang Yuan (黑芝麻汤圆)
If you’ve made this recipe or any recipes from our blog, please tag us on Instagram using #twoplaidaprons! You can also tag us in your Instagram stories using @two_plaid_aprons. We would love to see your creations! It absolutely makes our day! 🥰
📖 Recipe
Instant Pot Sweet Azuki Bean Paste
Ingredients
- 1 cup dry azuki bean (about 7 oz. or 200g)
- 4 cup water
- ¾ cup granulated sugar
- Pinch of salt
Instructions
- Wash the azuki beans by rinsing them a couple of times in a bowl. Pick out any debris or beans that look black or undesirable. Drain the beans and place them in the pot insert of your Instant Pot along with the 4 cups of water.
- Place the lid on the Instant Pot, put it into the lock position, and make sure the vent is switched to "sealing". Select the normal "Pressure Cook" setting and change the time to "25 minutes" on high pressure.
- Once the Instant Pot has completed the 25 minutes of cooking time, let it naturally release for 10 minutes. Then, using a spoon or chopsticks to carefully switch the vent to "venting." Once the all of the steam has been released, open the Instant Pot Lid.
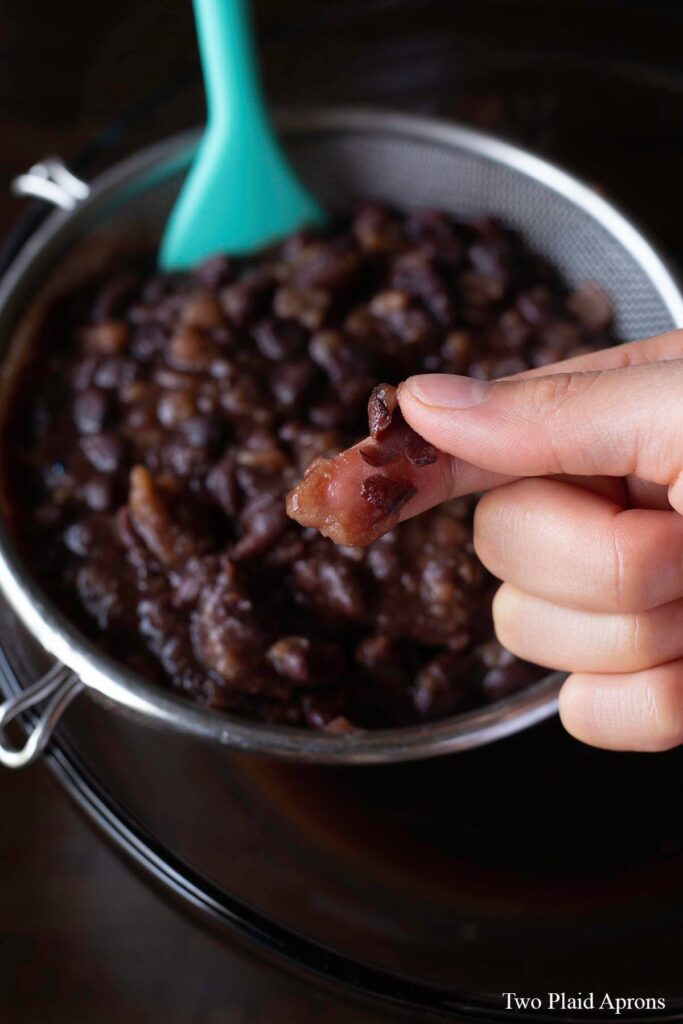
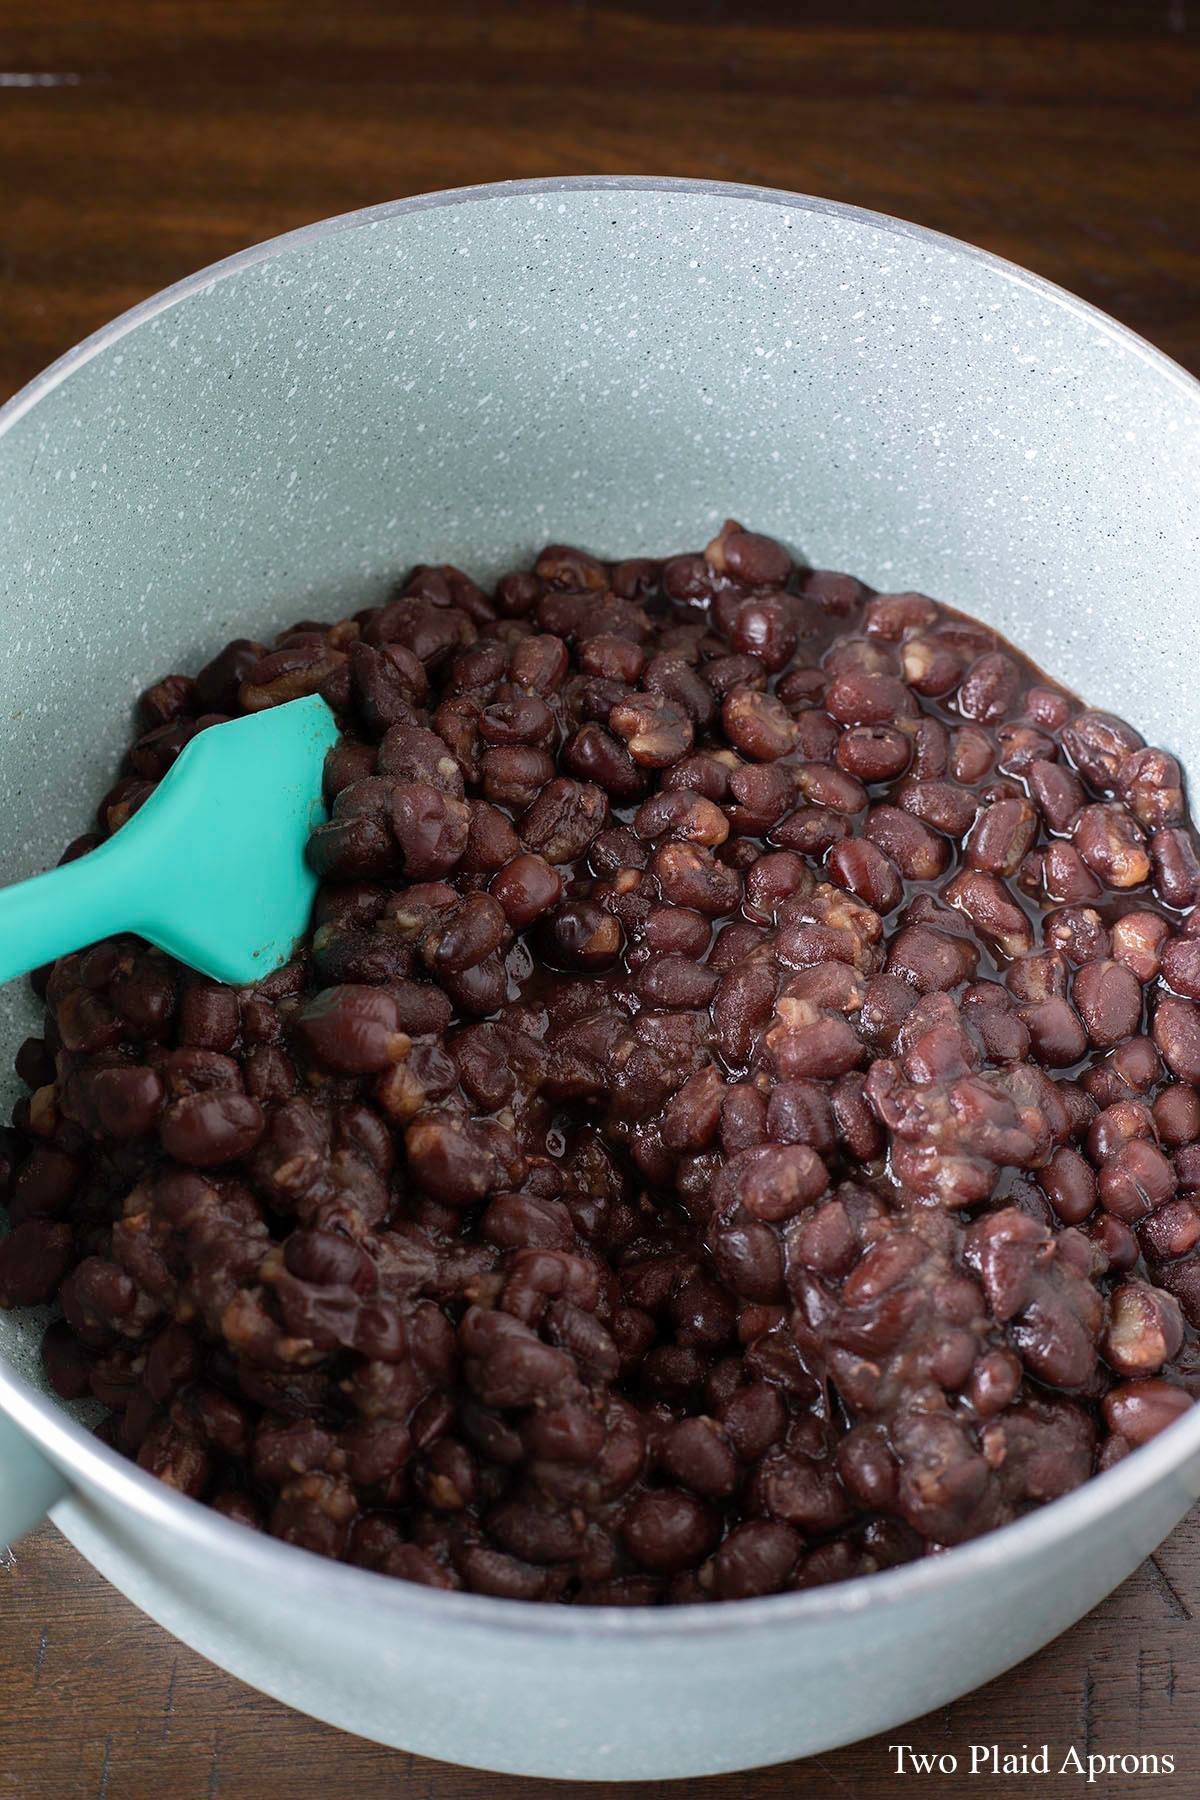
- At this point, the beans should be able to be easily mashed between your fingers. Carefully, remove the Instant Pot insert and drain the beans into a fine mesh strainer. Let the beans drain naturally.Reserve about ½ cup of the bean liquid if you are making the fine azuki bean paste!*To check the doneness of the azuki beans, check the post for picture reference.*
For the coarse azuki bean paste (aka tsubuan):
- Transfer the drained azuki beans into a large, nonstick pan. Add the sugar and pinch of salt to the beans, and cook the mixture over medium high heat. Make sure to stir constantly and scrape the bean paste off the side of the pan to prevent the bean paste from scorching. Once the bean paste starts to look thick, turn the heat to medium and continue to cook the bean paste until a line drawn through the bean paste doesn't disappear. The entire process will take about 5 to 10 minutes.*For some picture reference, check out the post above!*
- Remove the azuki bean paste from the heat once it's reached the right consistency. Transfer the paste to a heatproof container and cover the paste with a plastic wrap, making sure the plastic is touching the paste. Let the bean paste cool at room temperature or in the fridge. Once cooled, use the bean paste immediately, or keep it refrigerated and store it in an airtight container.
For the fine azuki bean paste (aka anko):
- Once the beans are drained, transfer the beans to a blender. Blend the beans until smooth, or as smooth as possible. If the bean paste seems too thick and is difficult to blend, add about ¼ to ½ cup of the reserved bean liquid to the paste and blend until smooth.
- Transfer the blended bean paste to a large, nonstick pan and add the sugar and the salt. Cook the bean paste mixture over medium high heat until the bean paste starts to look thick, then reduce the heat to medium and continue to cook the bean paste until a line drawn through the paste doesn't disappear. Make sure to continuously stir the mixture and scrape down the sides of the pan to prevent scorching and clumps of bean paste becoming overly dry.The process will take about 5 to 10 minutes.*For some picture reference, check out the post above!*
- Remove the azuki bean paste from the heat once it's reached the right consistency. Transfer the paste to a heatproof container and cover the paste with a plastic wrap, making sure the plastic is touching the paste. Let the bean paste cool at room temperature or in the fridge. Once cooled, use the bean paste immediately, or keep it refrigerated and store it in an airtight container.




Al says
This recipe is so awesome, tastes like the anko my mom made! I have always avoided making anko because it takes so long, since finding this recipe a couple weeks ago I made it twice! Thanks!
Mei says
Hi Al!
Thank you so much for your kind words! We're so happy that you liked our anko recipe! You totally made our day!
Mei ❤️
Melissa says
What if I would like to use the red beans whole as a topping for shave ice ? Do I add more water? Do not drain ?
Mei says
Hi Melissa!
You are correct. If you want to make whole red bean toppings for desserts like shaved ice, you would have to use more water, don't strain it, and reduce the pressure cooking time. But the best way to make those types of red bean toppings is on the stovetop so that the beans keep their shapes and integrity.
Mei ❤️
Lamont says
I made this twice. My wife is from Japan and has been trying to recreate the special taste that she was accustomed to. I made this as a double batch but cut the sugar by half. It came out delightful. Your recommendation of draining most of the liquid after the initial cooking, was spot on. The rich red color of the mashed beans really shines through. I think keeping too much liquid would dull the color. Thanks for this tip.
Mei says
Thank you for trying out our recipe Lamont! We're so happy to help you all recreate the taste of Japan at home! And totally agree, the extra liquid would have dulled out the color but most importantly, it would require longer cook time to cook out all the extra moisture =)
Mei ❤️