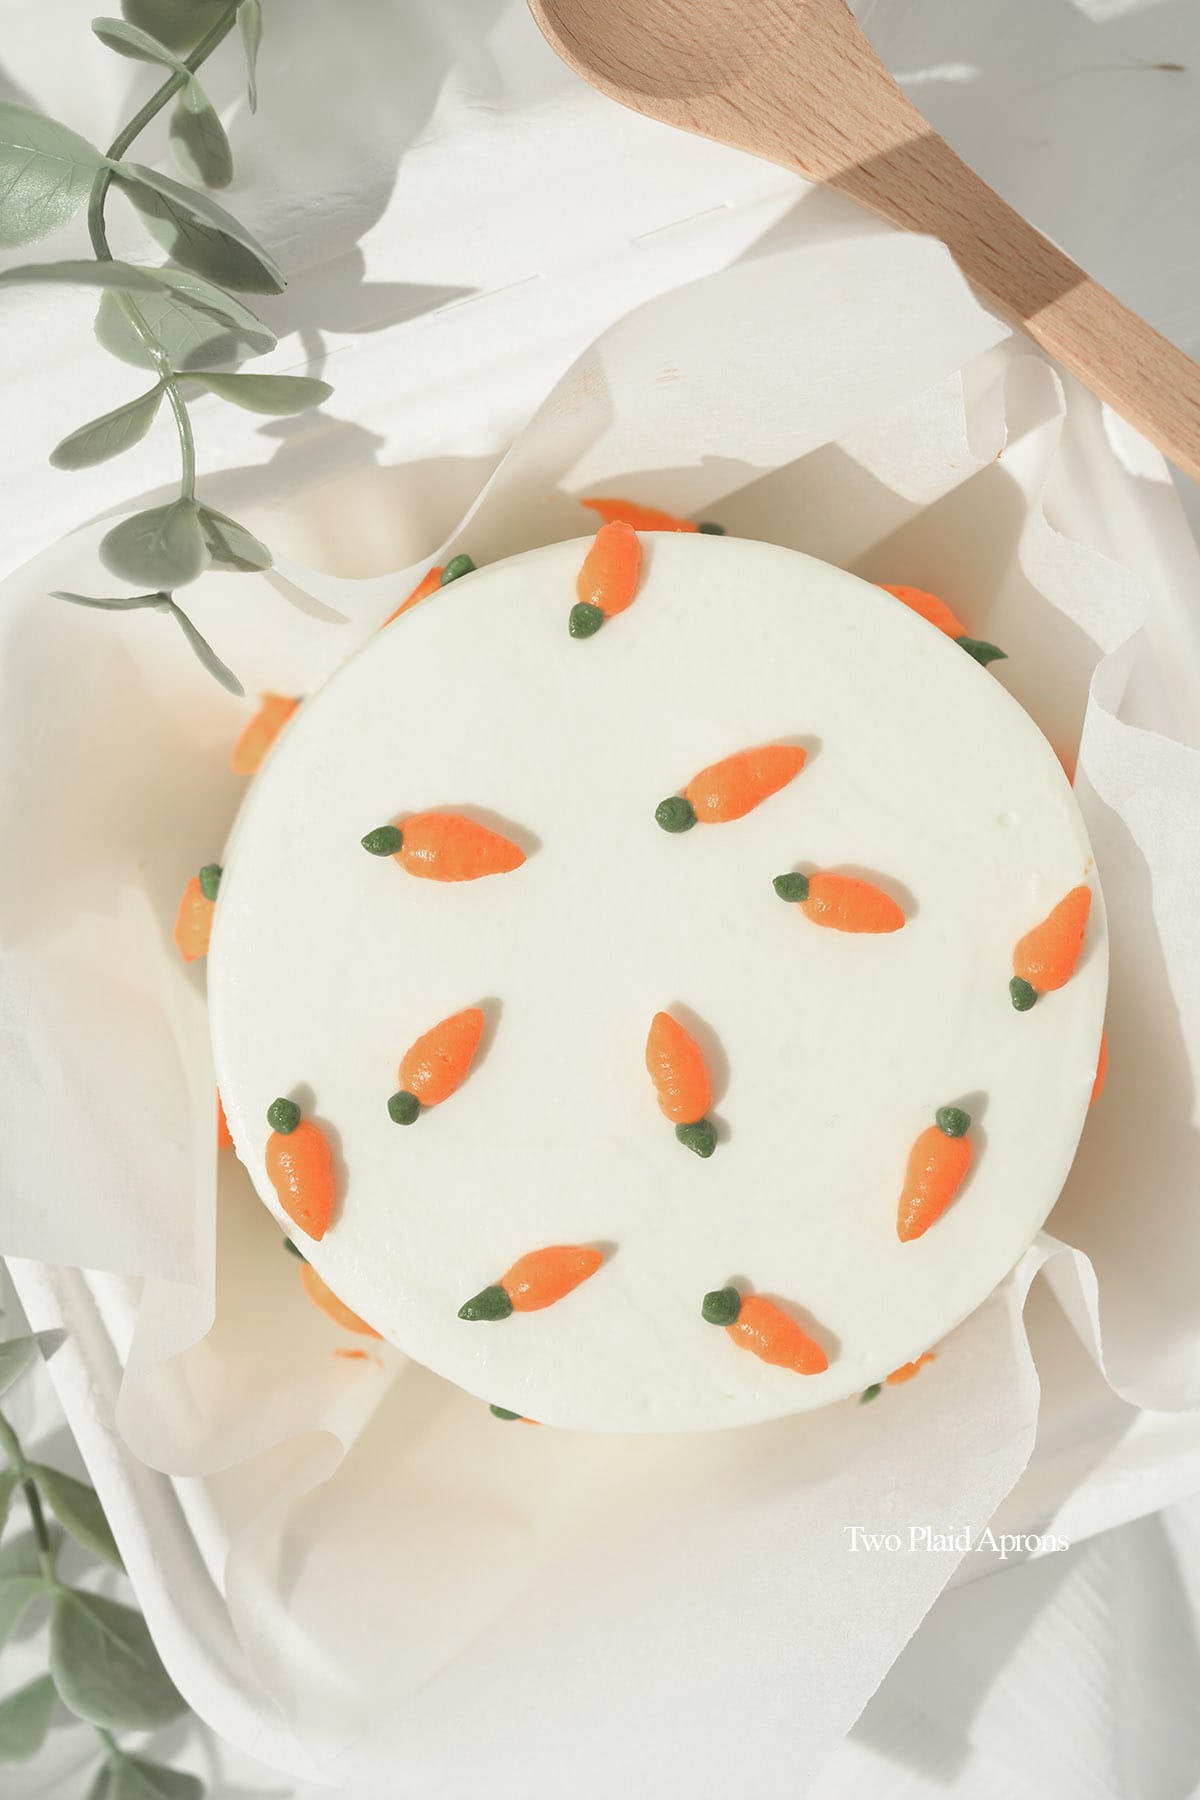
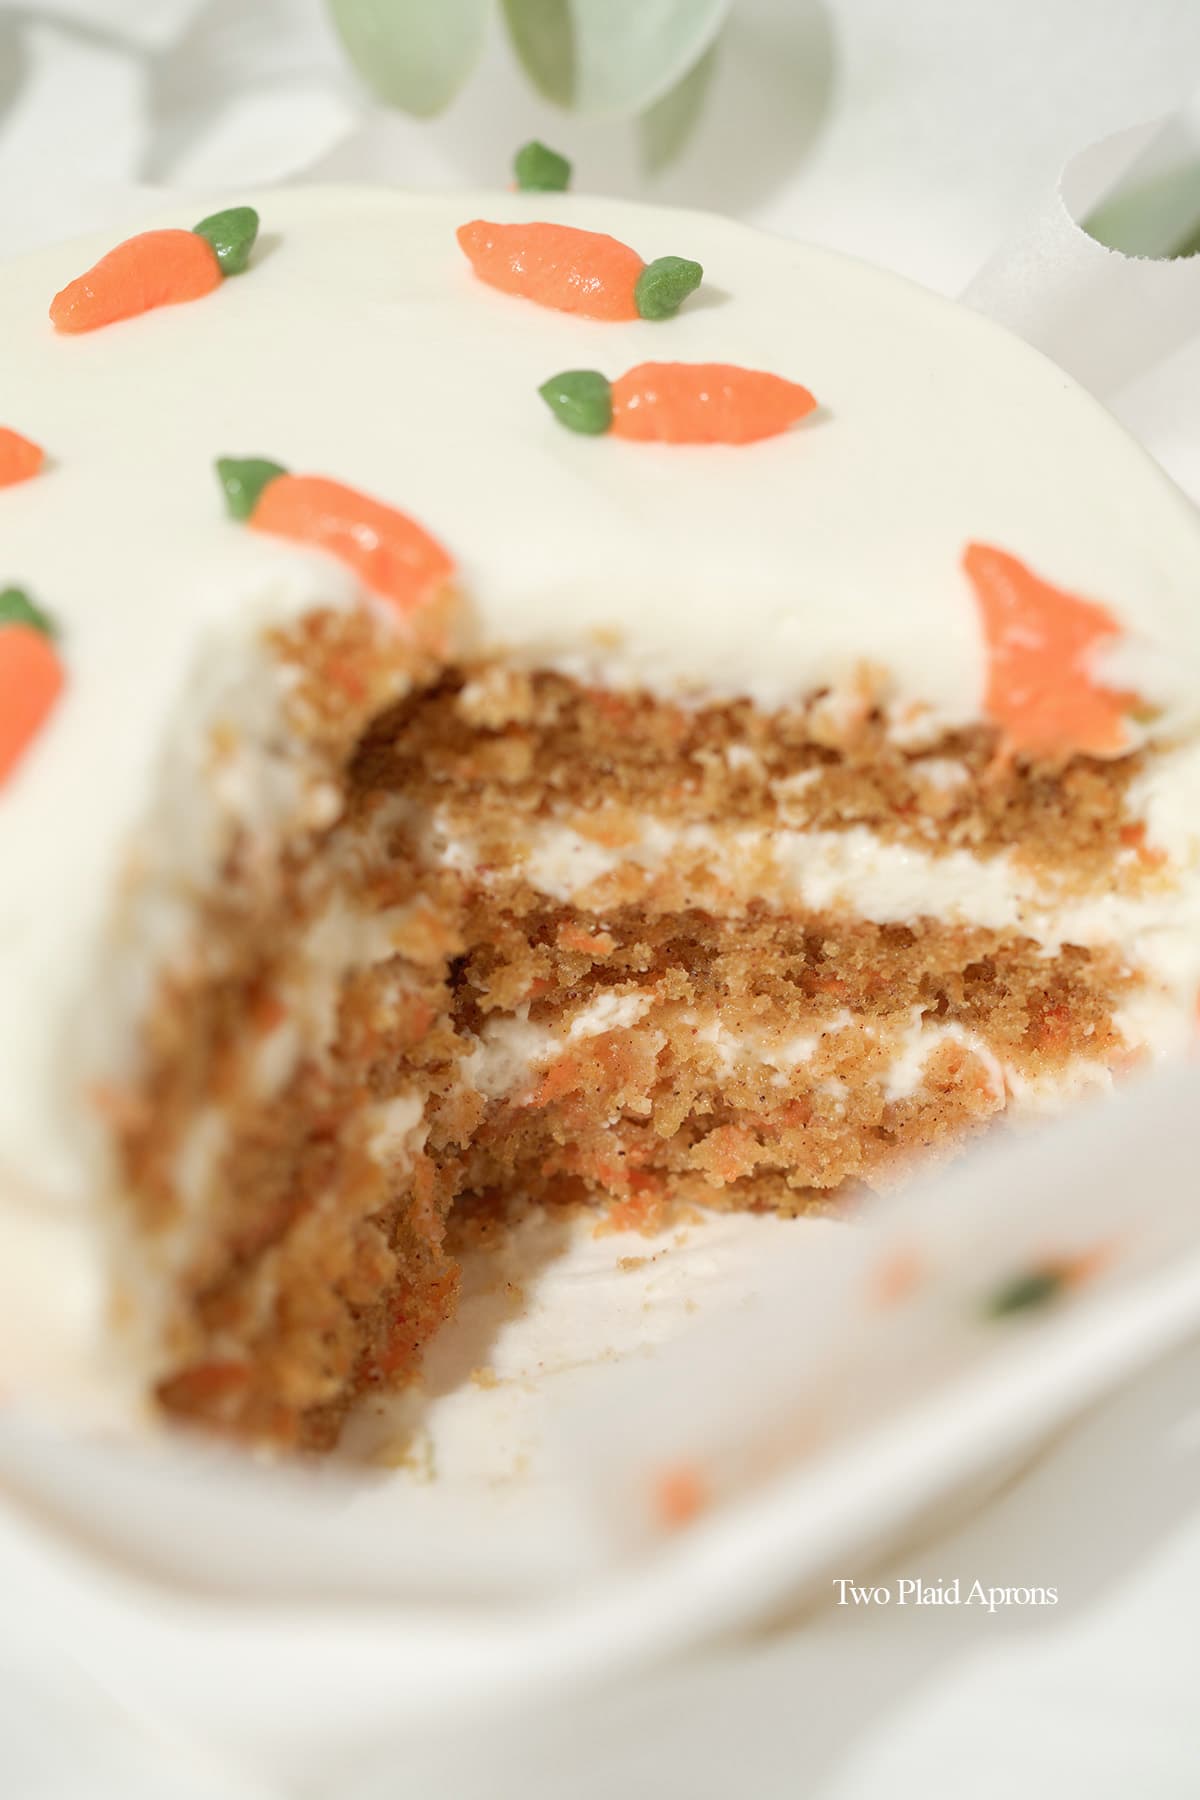
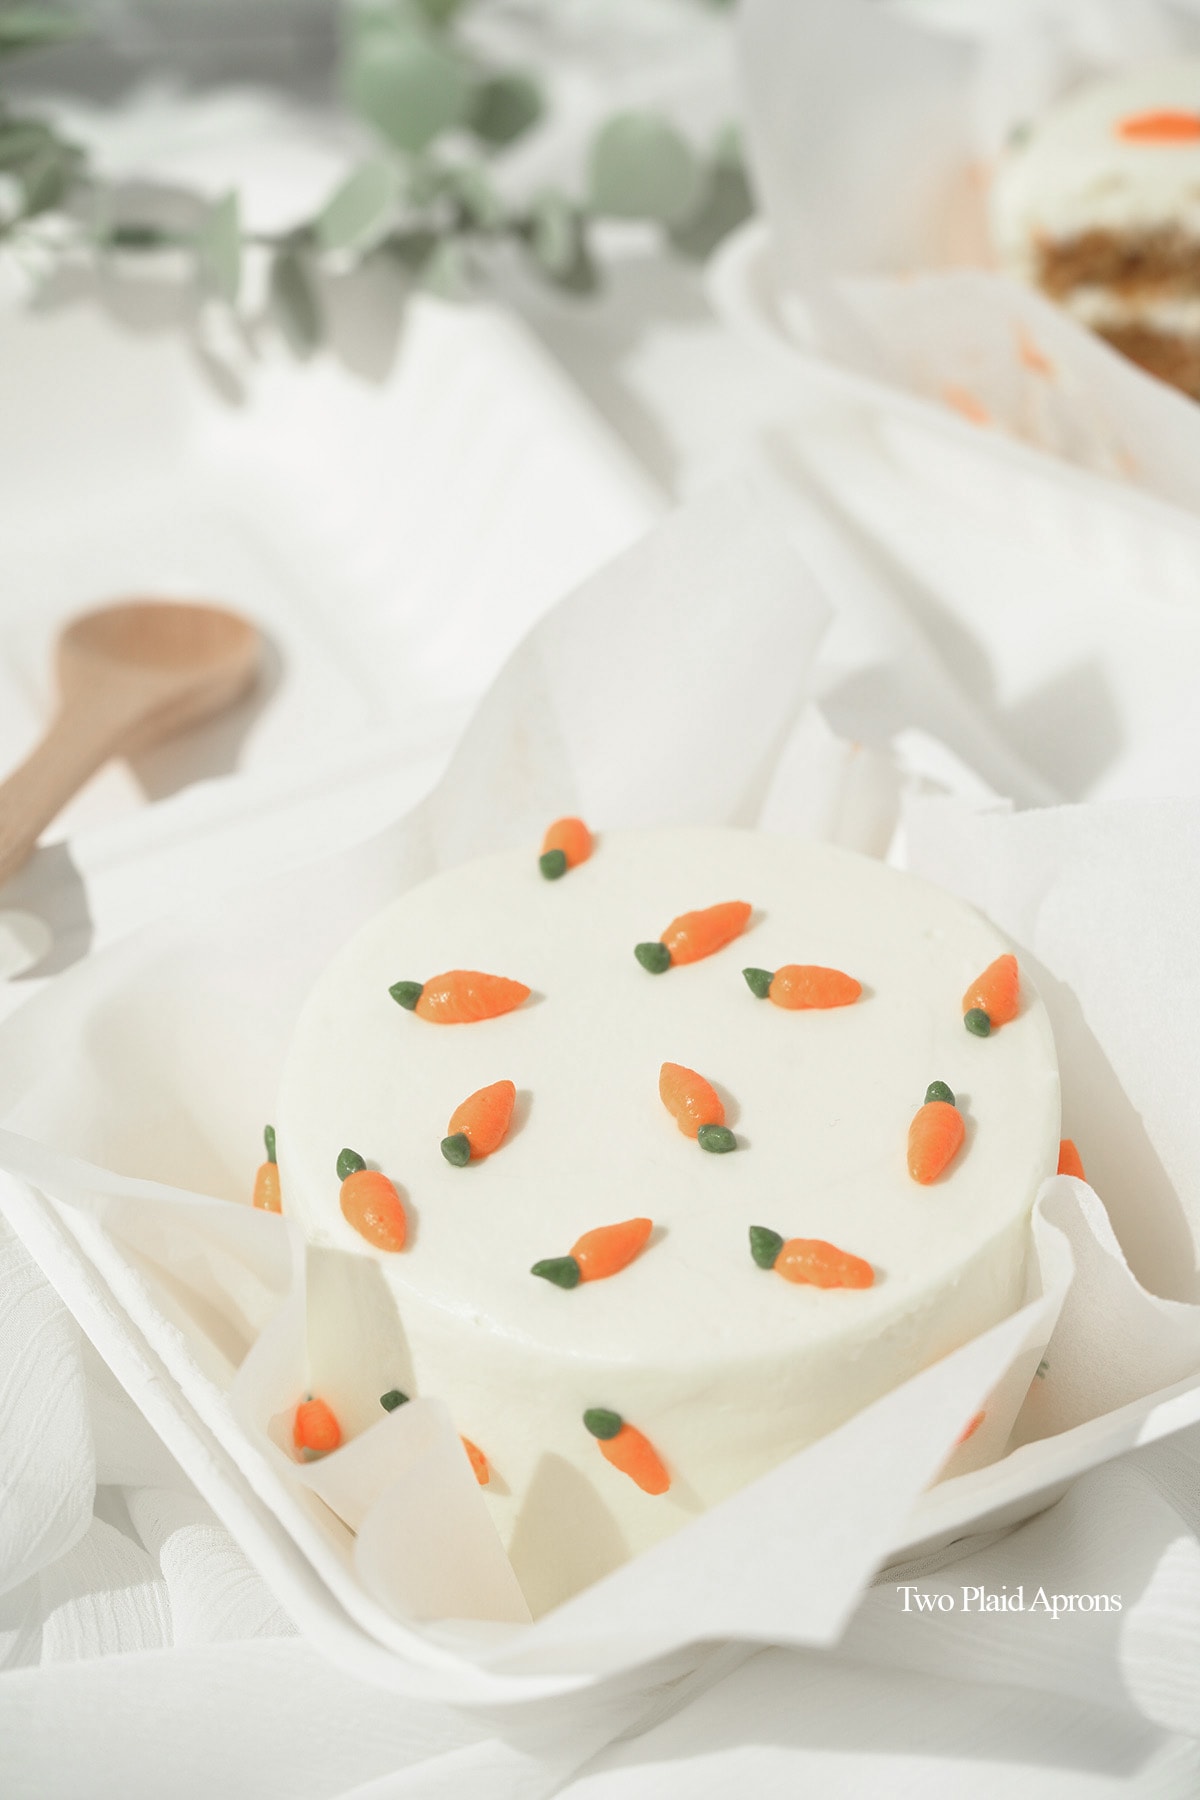
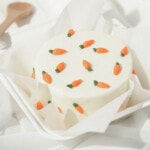
This mini carrot cake is an inspiration based on Korean lunch box cake. It's cute, personal sized, and perfect for Easter! These mini lunch box carrot cakes are soft and fluffy and frosted with a lightly sweetened, fluffy cream cheese frosting.
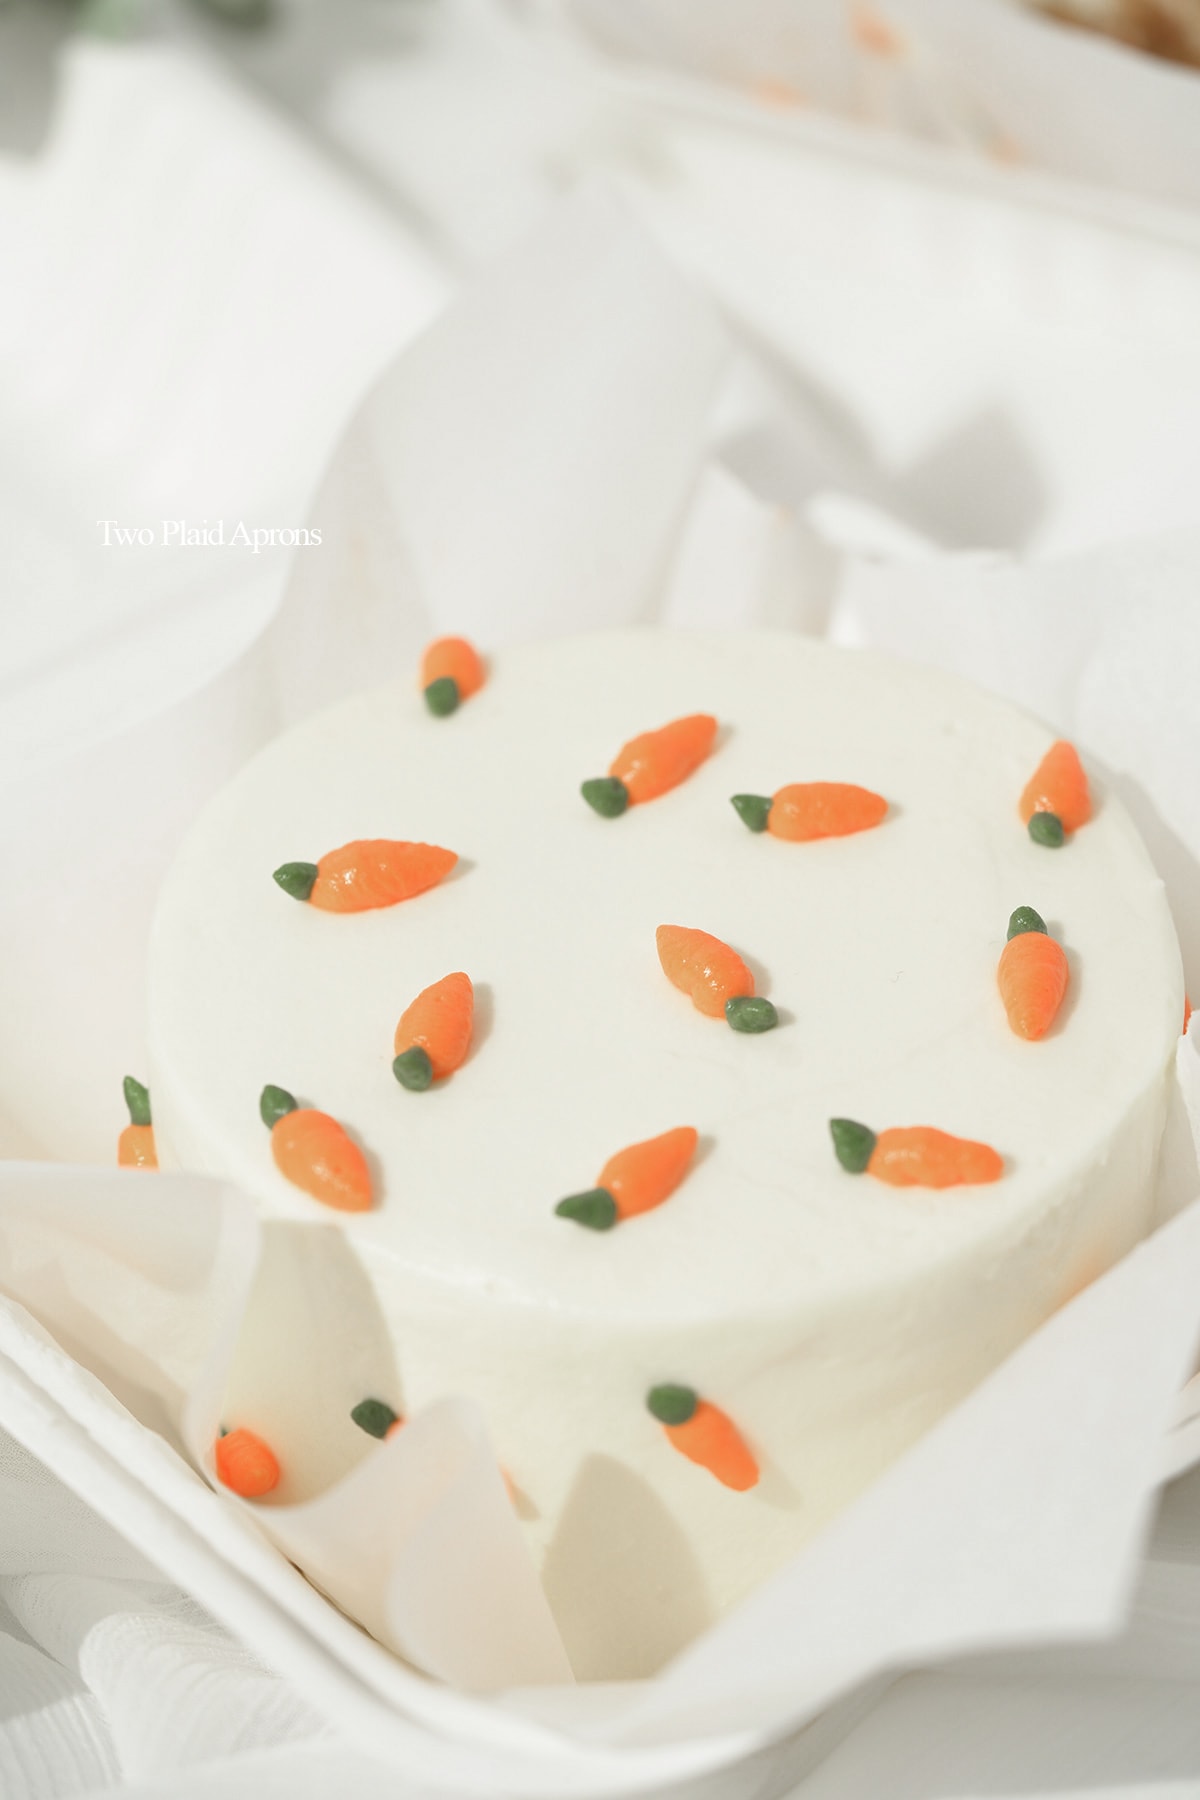
We've always wanted to make Korean lunch box cakes, so we decided to make these mini lunch box carrot cakes. They're really cute and are the perfect personal Easter cakes for sharing and gifting!
The carrot cakes are soft, fluffy, and moist, and they are frosted with a lightly sweetened, fluffy cream cheese frosting. So good!
For more spring recipes, you may also like our matcha crème brûlée, creamy citrus vinaigrette salad, and miso banana bread.
Ingredients to make lunch box carrot cake
For the carrot cake:
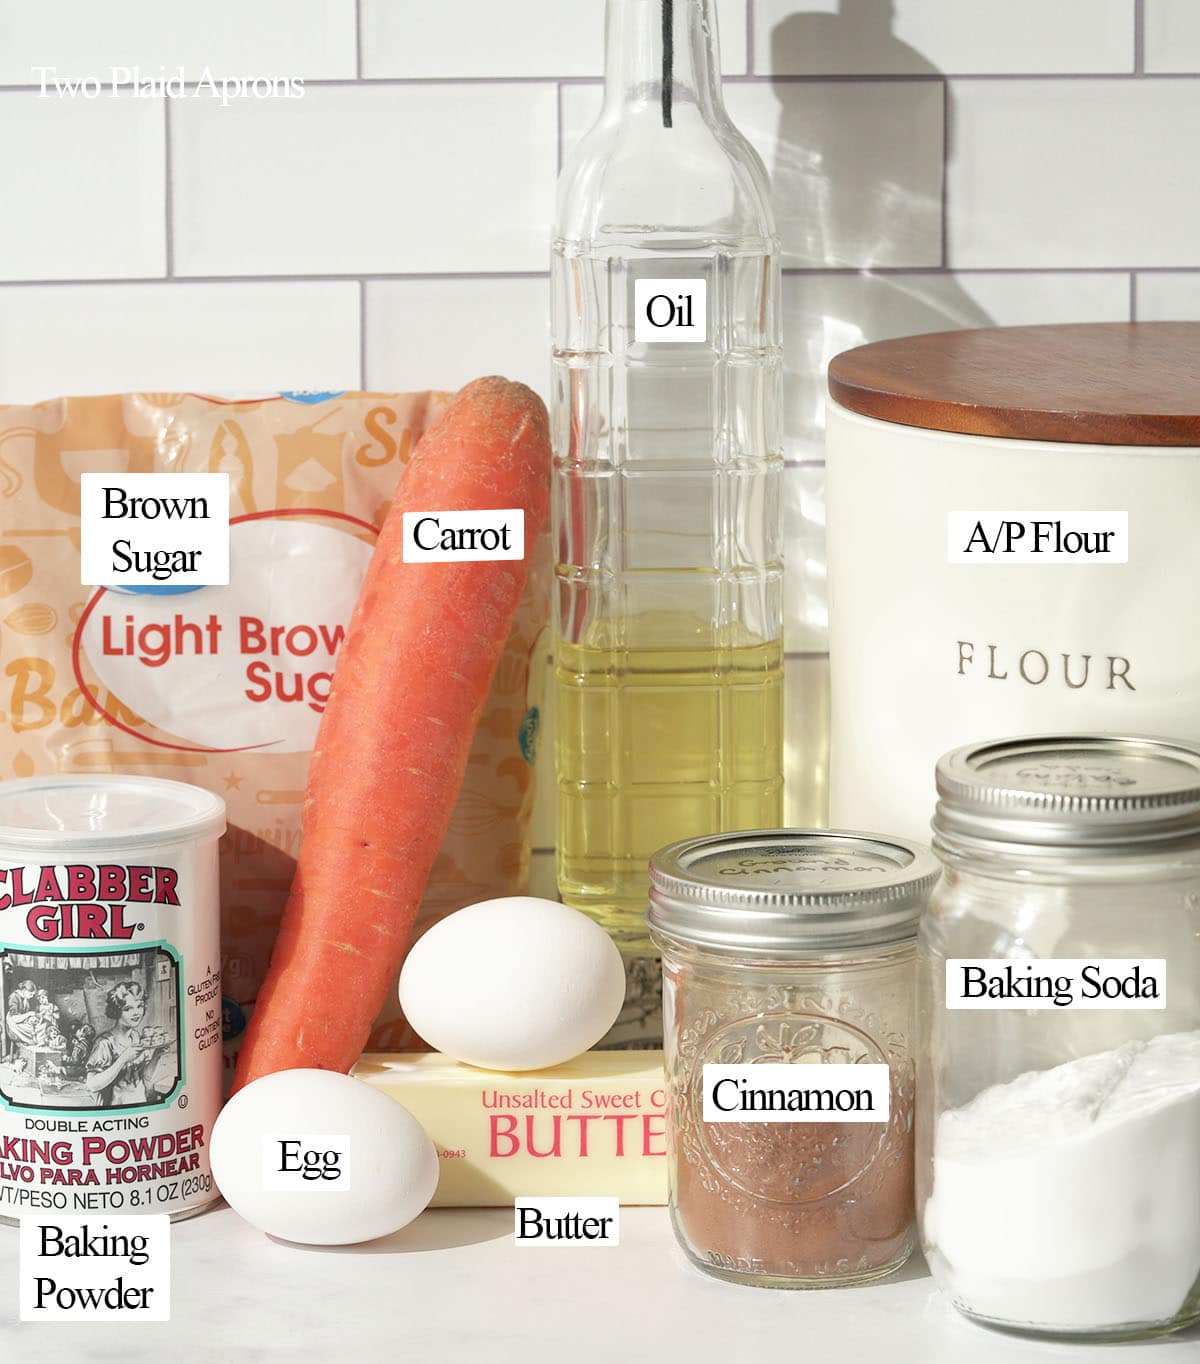
- All-purpose flour - Just plain old all-purpose flour will do, as long the cake isn't over mixed, the cake will still be fluffy and tender.
- Ground cinnamon - The main flavoring of carrot cake! Can't make a proper carrot cake without some cinnamon.
- Baking soda and baking powder - Both leavening agents are needed to properly leaven the carrot cake.
- Brown sugar - You can use either light or dark brown sugar. It provides carrot cakes with extra moisture, the brownish color, and slight molasses flavor.
- Unsalted butter and oil - We opted for a combination of oil and butter to give the carrot cake richness while also keeping it moist.
- Eggs - This recipe uses large eggs. The eggs add richness to the carrot cake and keeps it moist. Also eggs are the binder of this carrot cake.
- Carrot - We can't make carrot cake without carrots, of course! We recommend grating the carrot using a fine grater. Coarsely grated carrots will not bake properly and will ruin the cake texture.
For the cream cheese frosting:
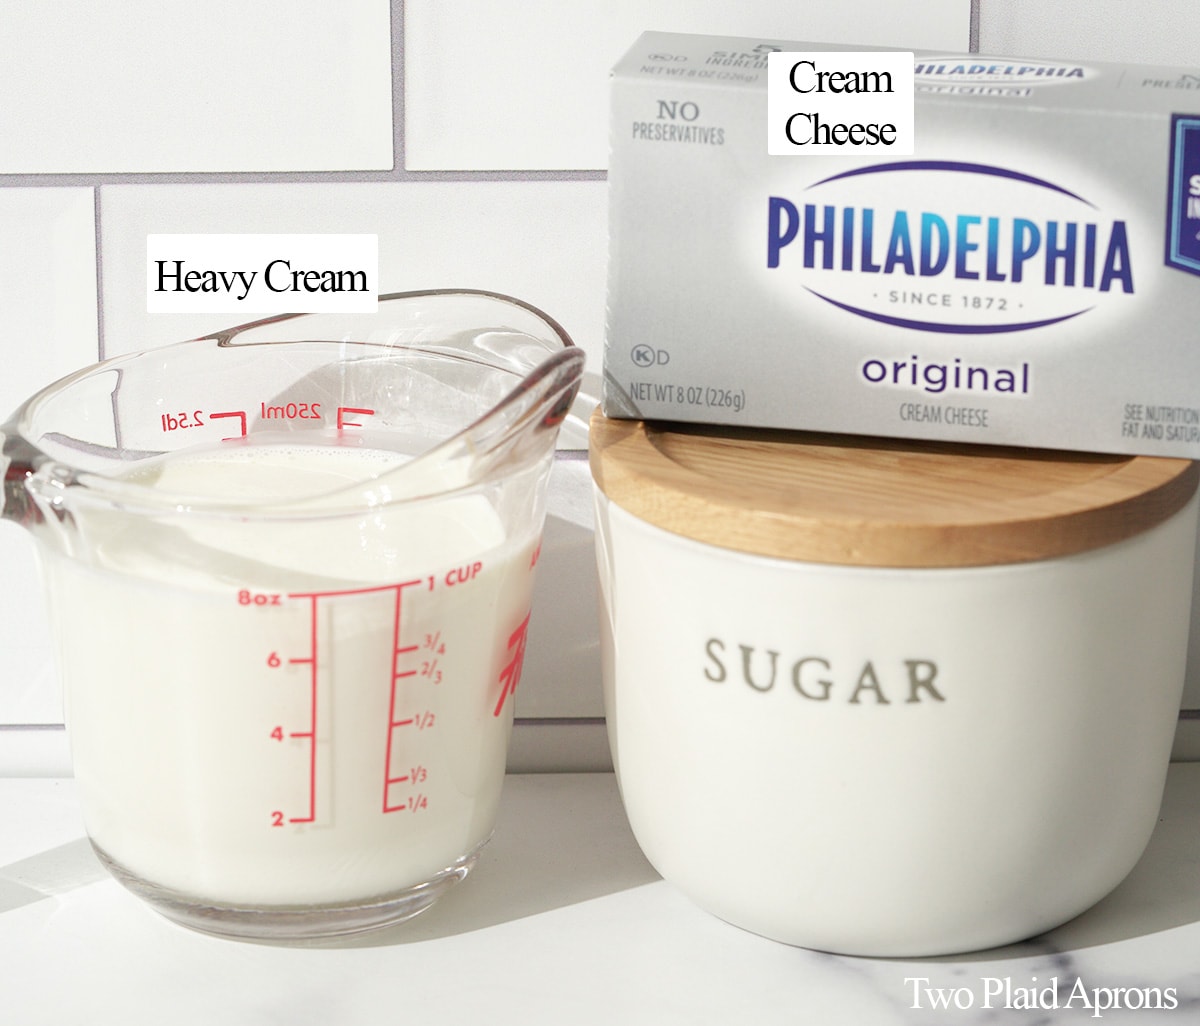
- Cream cheese - Carrot cakes taste the best with cream cheese frosting. We decided to pair this mini carrot lunch box cake with a "lighter," fluffier, cream cheese icing that's also easier to ice with. Just make sure to soften the cream cheese at room temperature ahead of time!
- Heavy cream - Also known as heavy whipping cream. The cream will be incorporated into the cream cheese to make the icing fluffier and lighter.
- Granulated sugar - Used to sweeten the cream cheese frosting.
- Food coloring (optional) - If you wish to decorate the lunch box carrot cake with carrot pipings, add some food colorings to a small amount of frosting. We used Wilton's orange gel coloring for the carrot and Jupiter green gel for the stem/leaves.
Recommended Equipments
You can use whatever equipments that you prefer for decorating cakes. Here if you'd like some recommendations, these are what we used to make our mini lunch box cake:
- Cake turntable - A durable cake turntable that turns smoothly can help you decorate cakes with ease. It's a must have for cake decorating.
- Offset spatula - Because these lunch box cakes are so small, we recommend using small offset spatulas for icing the cake. You could use straight cake spatulas as well. It really depends on preference.
- Parchment paper - Normally, we like to decorate our cakes on cake boards, but since lunch box cakes are stored in takeout lunch boxes, they're placed on parchment paper. So we thought we'd knock out two birds with one stone. You can decorate on the parchment and use it to transfer the cake to the lunch box.
- 3.5 inch circle cookie cutter - Although you could cut the cakes freehanded, using a circle cookie cutter will save you a lot of time. It'll also make perfect circles!
- 6 by 6 inch takeout lunch box - Typically mini lunch box cakes/ bento box cakes are about 4 inches in size. So they'll fit perfectly in a 6 by 6 box. We recommend the takeout boxes with a hinge lid.
How to make mini carrot cake
Make the carrot cake:
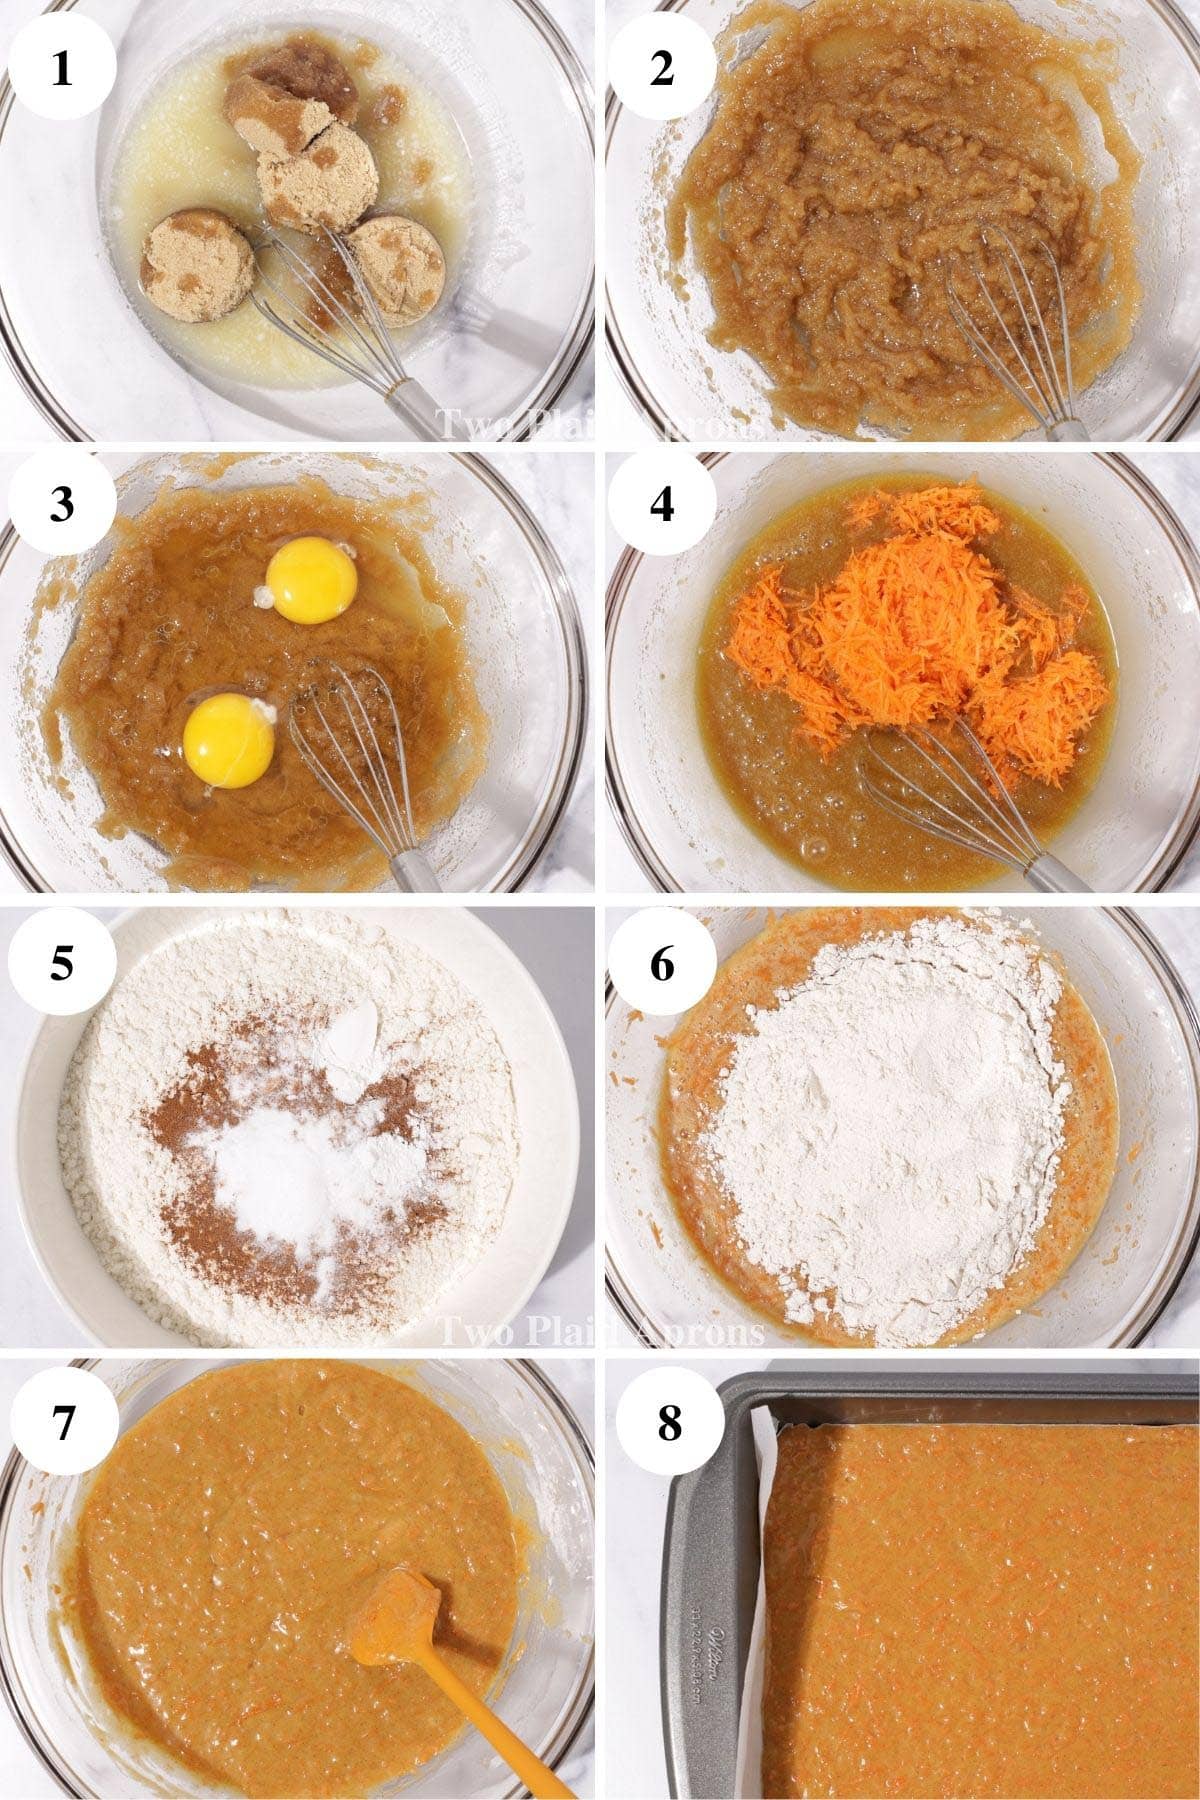
1. Preheat the oven to 350°F and prepare a half sheet pan or jelly roll pan lined with parchment paper. If needed, you can add a couple drops of oil to the pan to help the parchment adhere.
2. In a small bowl, combine the flour, cinnamon, baking soda, and baking powder. Mix everything together until well combined. Set aside.
3. In a large mixing bowl, add the brown sugar, oil, and butter. Use a hand mixer and blend everything together on medium speed until combined. Scrape the sides of the bowl and mix on medium high speed about a minute. At this point, the fat and sugar may look separated, but don't worry! It'll come together in the next step.
🌟 Pro tip: Start on low to medium low speed if needed to help the break up the sugar. Then increase the speed to medium once the sugar is easier to mix.
4. Add the eggs and blend on medium speed to combine. Then add the finely shredded carrots and mix with a rubber spatula until well combined.
5. Lastly, add the dry ingredients (flour mixture) and mix with the rubber spatula just until no more dry flour is visible. Don't over mix or the carrot cake will become tough and dry!
6. Pour the carrot cake batter onto the prepared sheet pan then evenly spread out the batter to about ¼ inch thick using an offset spatula.
📝 Note: If you're baking in a half sheet pan, there won't be enough batter to spread from corner to corner. But that's okay! Just spread the batter as evenly as possible to ¼ inch thick and keep the edges as straight as possible.
7. Bake the carrot cake for 12 to 15 minutes or until a toothpick inserted in the center comes out clean. Remove the cake from the oven and let it cool completely before using.
Make the cream cheese frosting:
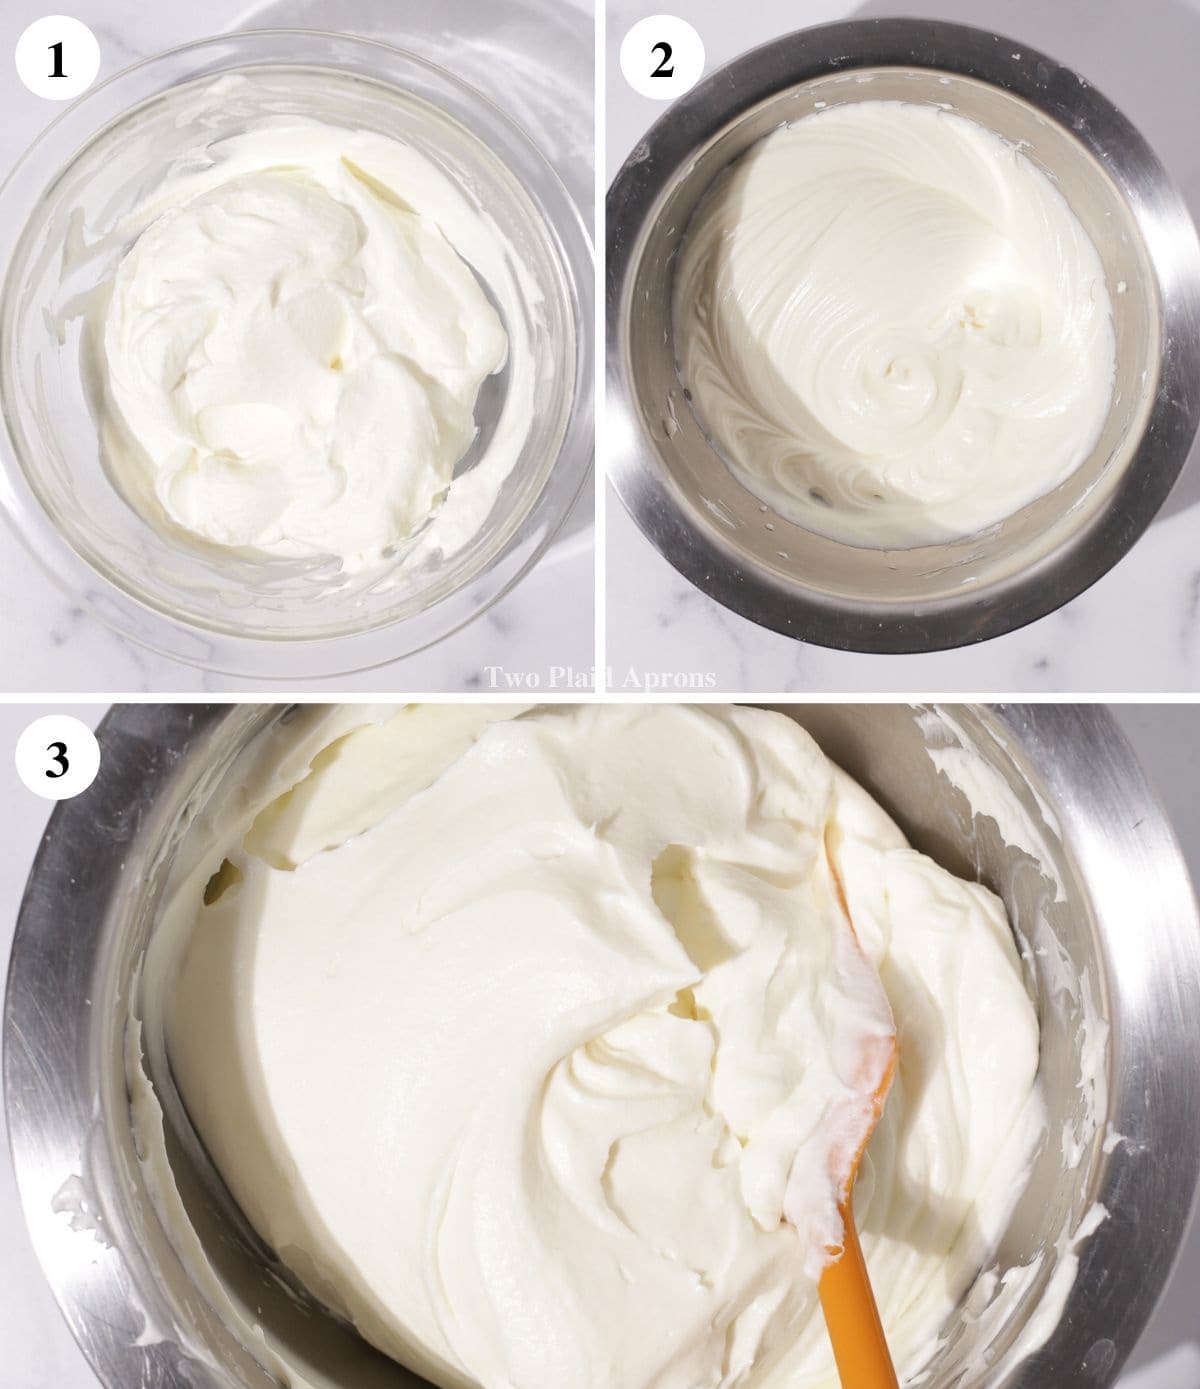
1. In a cold mixing bowl, add the heavy cream. Using a hand mixer, whip on medium speed until medium peak, or when the whipped cream starts to hold its shape and forms a slight peak. Let the cream chill in the fridge until needed.
🌟 Pro tip: Heavy cream whips up faster when cold. So if you live in a hot area or it's the summer, you can place the bowl of cream over a bowl of ice water to keep it cold while whipping.
2. In another mixing bowl, add the softened cream cheese. Using the same hand mixer, mix on medium speed until the cream cheese is smooth.
3. Add the granulated sugar and continue mixing until the sugar is combined and the cream cheese looks smooth. If you rub some of the cream cheese between your fingers, you shouldn't feel any sugar granules.
4. Add a third of the whipped cream to the sweetened cream cheese and mix on low speed until well combined. Repeat twice more, with a third of the whipped cream at a time. Make sure to scrape down the sides and the bottom of the bowl between each addition.
5. Mix the cream cheese frosting on medium speed until it looks stiff, about 1 to 2 minutes. Keep refrigerated until needed.
(Optional) Color the icing for carrot decorations:
If you're decorating the lunch box cake with carrot designs, save 2 to 3 tablespoons of the cream cheese frosting for the carrot piping and 1 to 2 tablespoons of frosting for the stem/ leaf piping.
Color the frosting for the carrot pipping with an orange food color and the stem/leaf portion with green food coloring. We highly recommend gel food colorings! Add a rice grain size of food color at a time until desired color is achieved.
Transfer each of the colored icing to a piping bag. Fit the orange (carrot) frosting with a small round tip and the green (leaf) frosting with a leaf piping tip. Refrigerate the frosting until needed.
Frost the lunch box cakes:
1. Once the carrot cake has cooled, peel off the parchment paper and cut out nine 3.5 inch circles. Each cake will have 3 layers of cake.
🌟 Pro tip: To flip the carrot cake easily, you can place another pan or wire rack on the cake with a sheet of parchment in between and flip it.
2. Place a 8 by 8 inch square sheet of parchment on the turntable and tape down all for corners. Smear a small dollop of the frosting at the center of the parchment square then place a carrot cake on top. Gently press on the cake to adhere it to the frosting.
📝 Note: We like frost and decorate our mini lunch box cakes on parchment paper because it keeps the turntable clean and it makes moving the cake really easy. You could frost the cake straight on the turntable if you wish. Just make sure to clean and sanitize it well!
3. Add a dollop of frosting on the cake and evenly spread it to the edge. Place a second layer of carrot cake on the frosting and give it a gentle press. Repeat the frosting process and add the third layer of carrot cake.
🌟 Pro tip: Every time a new layer of cake is added, take a moment to make sure the cake is straight. This will ensure your cake remains straight in the end.
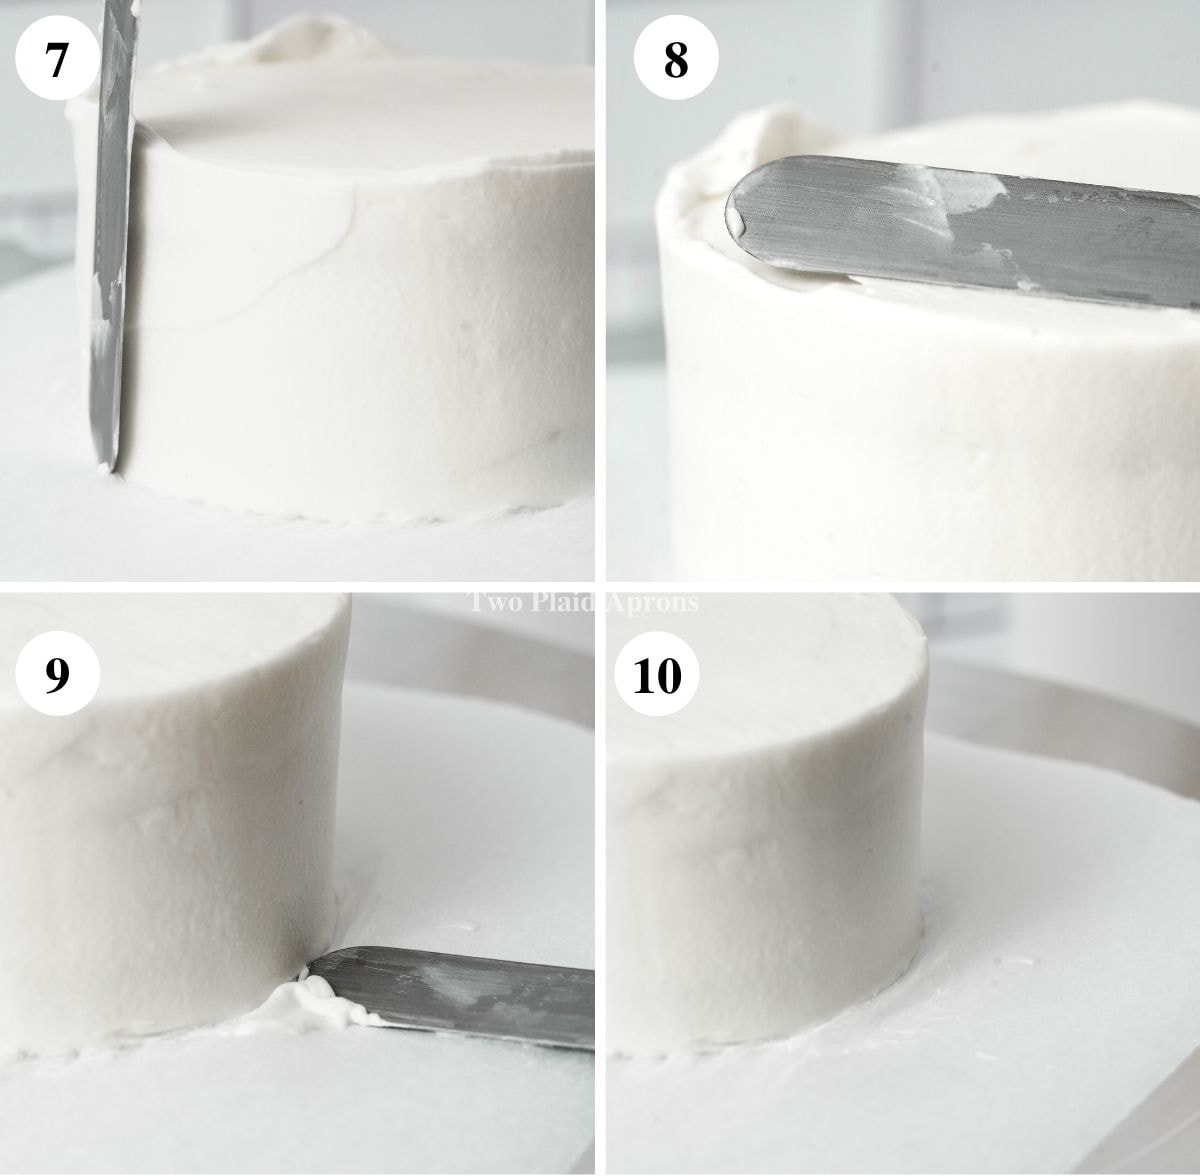
4. Give the carrot cake a gentle press and add a dollop of frosting to the cake. Evenly ice the top and sides of the cake to collect and adhere any crumbs. Add another more generous dollop frosting and evenly frost the cake with ¼ inch thick frosting.
5. Smooth out the cake and clean off the parchment. Transfer the cake to the fridge to chill while you work on the other two cakes. You can remove the take and lift the cake using the parchment paper.
(Optional) Decorate the lunch box cake:
1. Once all the mini carrot cakes have been frosted, place the last one in the fridge to chill and work with the first lunch box cake. Replace the first mini cake back onto the turn table.
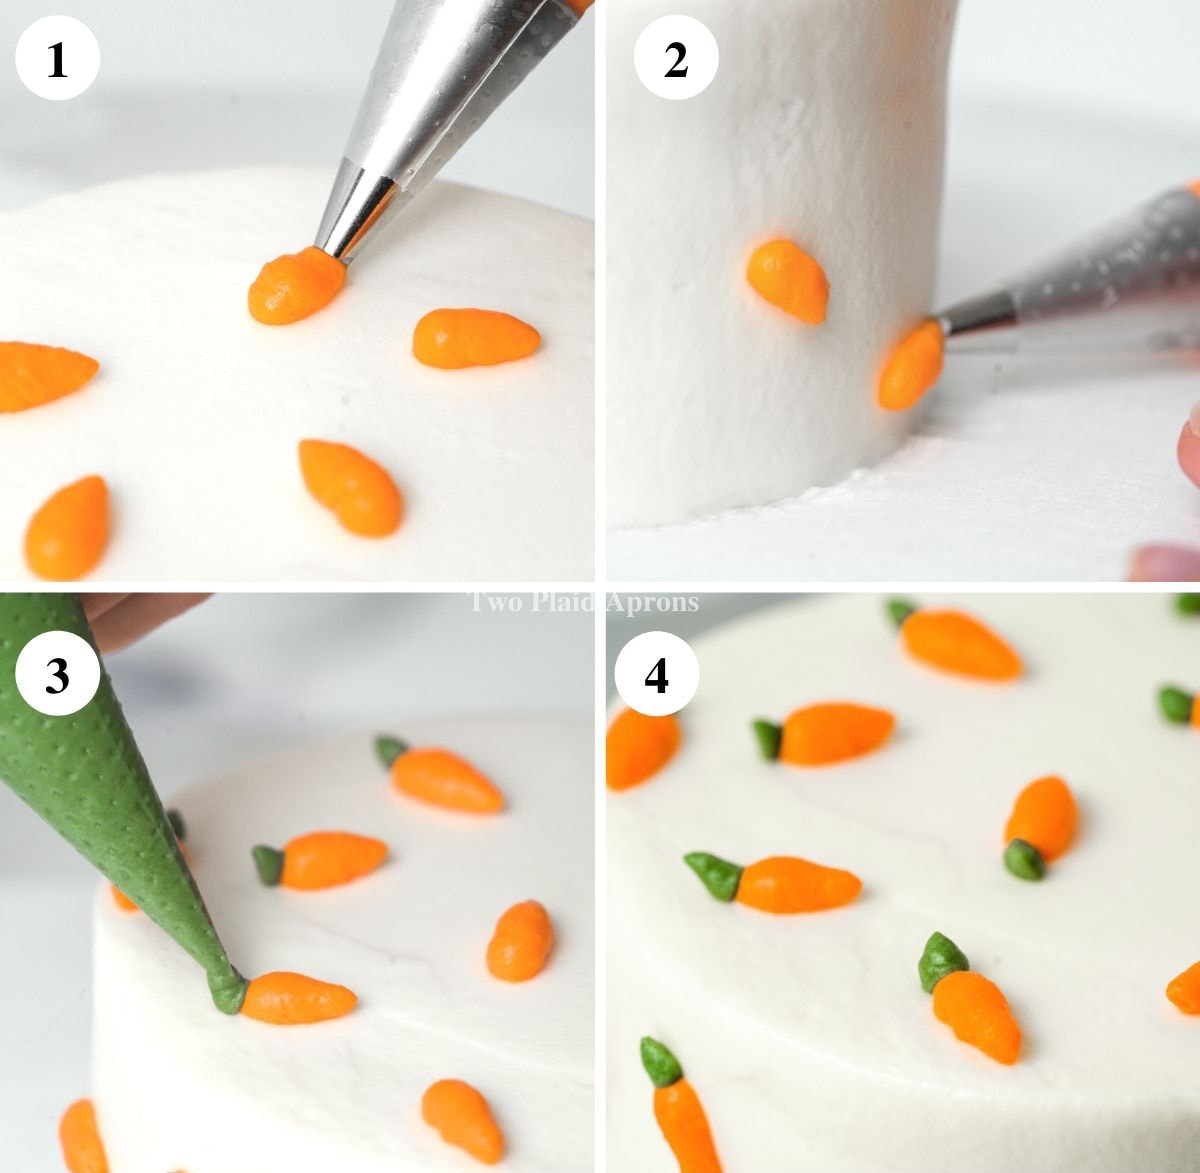
2. With the orange frosting fitted with a small round tip, pipe small carrots on the top of the cake (and the sides if you wish). Pipe horizontally with a squeeze, release, then pull motion to form little carrots. Repeat as many times as you wish around the cake.
3. With the green frosting fitted with a leaf tip, pipe vertically to form leaves. Get really close to the carrot, pipe using a squeeze, release and pull up motion. Make sure the pointed side of the tip is facing you when you pipe. Repeat on all the carrots.
4. Once done decorating the carrot lunch box cake, transfer the cake into the takeout lunch box by lifting the parchment paper and gently placing it into the box. Make sure to be slow and careful! Repeat with the second and third cake respectively.
Piping tips used for piping carrots
If you're wondering what tips I used to pipe those tiny carrots on the lunch box cakes, here they are:
- Wilton round tip # 6 - Tip 6 is small so it's easier to control the size of carrots I want to pipe.
- Wilton leaf tip #352 - Tip 352 pipes small round leaves that look kind of like ivy.
- Couplers - These are really handy to have. Couplers allow you to switch out piping tips so you can use one color for multiple designs or simply so that you can test out the piping tips.
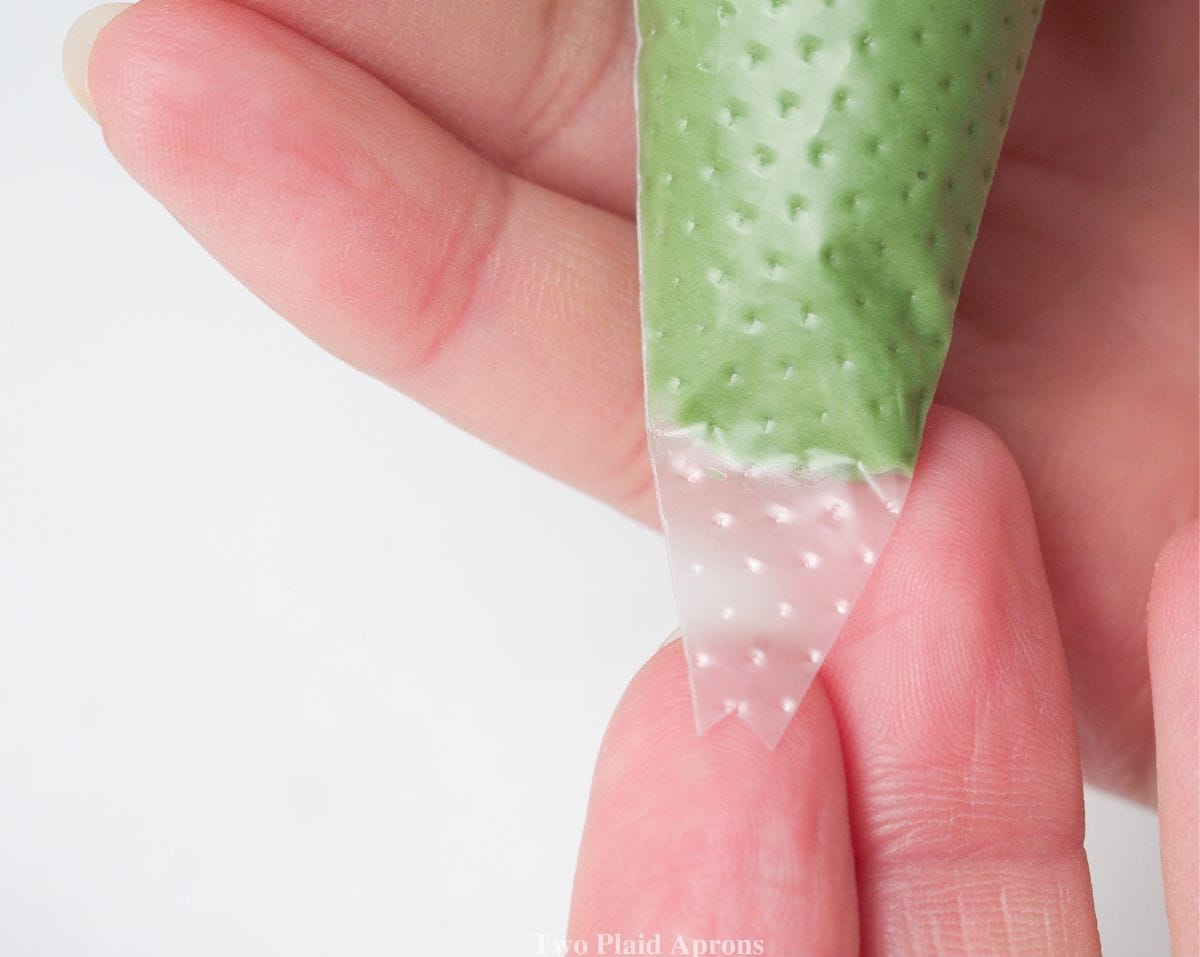
If you don't have a leaf tip, here's a hack to easily make your own! Hold a piping bag flat with the pointy end pointing down. Cut the tip to make a tiny triangle. You've got a leaf tip! You can also cut the tip smaller or larger to adjust the size of the leaves piped.
Recipe Tips
- Spread the cake batter evenly. This is crucial for keeping the cake layers even in thickness. You wouldn't want your cakes to be lopsided! I recommend spreading the batter into ¼ inch thick.
- Don't over whip the heavy cream. Over whipping the heavy cream can make the frosting look bumpy as if there's undissolved sugar granules.
- Keep the frosting chilled whenever you're not working with it. Because this cream cheese frosting uses heavy cream to lighten the texture, it is important to keep the frosting cold. If not, the frosting will soften and lose its shape.
- Decorate your lunch box cakes on parchment squares. This will keep your cake sanitary and your cake turntable clean. Plus you can easily move the cake around by lifting the parchment paper.
Make ahead of time
You can totally make the carrot cake ahead of time. The carrot cake actually tastes even better and more moist the second day. Just make sure to properly and tightly wrap them in plastic wrap and keep them refrigerated. They'll be good for a week or two. You can also freeze them for up to 2 months.
The frosting is best made the day you're using it. When the frosting sits, it will deflate and won't be as easy to frost with.
Carrot lunch box cake storage
These lunch box carrot cakes are actually the best enjoyed on the second day because the cake will become more moist. They will stay good for a week if kept chilled in the fridge and properly covered/ wrapped.
FAQ
Gel food colorings are highly recommended for this cream cheese icing. We used Wilton's orange gel for the carrot and Jupiter green gel for the leaves.
We used a small round tip (Wilton 6) for the carrots and a small leaf tip (Wilton 352) for the carrot stem/leaves.
If you see little granules in your cream cheese frosting, it's most likely cause by over whipped heavy cream. If your frosting just looks lumpy, then your cream cheese needs to be mixed longer before the whipped cream was added.
Dry carrot cakes can be caused by multiple factors. Here are the most common ones. First, is over baking (whether it's too long or the temperature was too high). Next, is not properly measuring the ingredients. Too much flour can cause the cake to be dense and dry. Lastly, is over mixing. This will cause your cake to become tough and dry. So mix just until no more dry flour is visible and no more!
If you’ve made this recipe or any recipes from our blog, please tag us on Instagram using #twoplaidaprons! You can also tag us in your Instagram stories using @two_plaid_aprons. We would love to see your creations! It absolutely makes our day! 🥰
📖 Recipe
Lunch Box Cake (Mini Carrot Cake)
Ingredients
For the carrot cake:
- 180 grams all-purpose flour
- 1 teaspoon ground cinnamon
- ½ teaspoon baking soda
- ½ teaspoon baking powder
- 150 grams brown sugar light or dark (if using cups, packed)
- 120 milliliters oil any neutral oil will do
- 57 grams unsalted butter softened
- 2 large egg
- 135 grams carrot finely shredded (about 1 cup packed)
For the cream cheese icing:
- 340 grams cream cheese softened
- 150 grams granulated sugar
- 356 milliliters heavy cream kept cold
- Green and orange food colorings (optional for decorating)
Instructions
- Make the carrot cake:Preheat the oven to 350°F and prepare a half sheet pan or jelly roll pan lined with parchment paper.
- In a small mixing bowl, combine the flour, cinnamon, baking soda, and baking powder. Mix until well combined and set aside.
- In a large mixing bowl, add the brown sugar, oil , and unsalted butter. Using a hand mixer, blend on medium low speed until the sugar and fats are somewhat combined. Increase the speed to medium high and blend for about a minute, or until everything is well combined. Scrape down the sides of the bowl as needed.*At this point, the sugar and fat will look a little separated, but don't worry! It'll come together in the next step.*
- Add the eggs and mix on medium speed until well combined. Make sure to scrape down the bowl! Add the finely shredded carrots and mix it in with a rubber spatula.
- Lastly, add the dry ingredient (flour mixture) and mix with the rubber spatula until just combined and no more dry flour is visible. DON'T over mix! Over mixing will result in a dry, tough cake!
- Pour the carrot cake batter onto the prepared sheet pan/ jelly roll pan, and evenly spread the batter into about ¼ inch thick layer. Bake the carrot cake for about 12 to 15 minutes, or until a toothpick inserted in the center comes out clean.*If you're using a half sheet pan, there won't be enough batter to spread from corner to corner. As long the batter is about ¼ inch thick, it'll be good.*
- Remove the cake from the oven and let it cool completely before using.
- Make the cream cheese icing:In a cold mixing bowl, add the heavy cream. Using a hand mixer, blend the heavy cream on medium speed until medium peak (where the whipped cream kind of holds its shape but is still soft). Place it in the fridge until needed.*Please refer to the post for photo reference. When you first start mixing the heavy cream, it will splatter a lot. So start on low speed if needed then increase the speed once the cream thickens a little.*
- In another mixing bowl, add the softened cream cheese. Using the same hand mixer, blend on medium speed until the cream cheese is smooth. Add the sugar and continue mixing on medium speed until the cream cheese is smooth and the sugar is well combined.*You should not be able to feel any granules of sugar in the cream cheese.*
- Take the whipped cream out of the fridge and add a third of it to the sweetned cream cheese. Mix on medium low speed until everything is well combined. Repeat this step until all of the whipped cream has been added. Finally, mix the cream cheese icing on medium high speed until stiff peak, about a minute or two. Refrigerate until needed.*Make sure to also scrape down the sides and bottom of the bowl in between each addition!*
- (Optional) Coloring the icing:Save about 2 to 3 tablespoons of icing for the carrot pipping and 1 to 2 tablespoons for the carrot stems.Add some orange and green gel food color to the reserved icing to get your desired shade of orange and green. Start with a grain size dollop. Transfer the icings each to a pipping bag. The orange one fitted with a small round tip for the carrot pipping. The green one fitted with a small leaf tip for the carrot stem pipping. Keep the icings refrigerated until needed.*Please refer to the post for more details on the pipping tips, food coloring we used, and alternative to using a leaf tip!*
- Ice the lunch box cakes:Once the carrot sheet cake has cooled, peel the parchment off the cake and cut nine 3½ inch circles out of the cake.*We used a 3½ inch circle cookie cutter, but you can cut it by hand as well. You can save the leftover carrot cakes for snacks, cake pops or parfaits!*
- On the cake turntable, tape down an 8 by 8 inch square sheet of parchment paper. Take the cream cheese icing out of the fridge and smear a small dollop of the icing at the center of the parchment paper.*You can also ice the cake directly your turntable is you prefer, but we like using parchment paper to keep the cake sanitary and the turntable clean. Prepare 3 squares of parchment paper if using this method.*
- Place a circle of carrot cake on the icing, at the center of the parchment. Gently press down on the cake to help it adhere. Place a small amount of icing on the cake and evenly spread it to the edge of the cake. Place the second circle of cake on the icing with a gently press and repeat.
- Place the third layer of carrot cake on the icing and press down gently. Add a dollop of icing to the cake and thinly ice the cake to collect and adhere all the crumbs.
- Next, add a generous dollop of icing to the cake and evenly spread it all around the cake into about ¼ inch thick layer. Smooth out the cake and clean the off the parchment paper. Remove the tape and transfer the cake to the fridge to chill as you ice the remaining two cakes.*You can move the cake around by lifting up both sides of the parchment paper. But do be gently and move carefully.*
- Once all of the cakes have been iced, bring the first cake back onto the turntable to add the carrot pippings. Pipe the carrot using the round tip with a squeeze and pull motion. Then use the leaf tip and pipe upwards with a squeeze and pull motion. Pipe small carrots on top of the cake (and the sides if you wish). Repeat with the other two cakes as well.
- Once the cakes are done decorating, carefully lift the cakes up by using the parchment paper. Gently place each cake into a 6 by 6 inch takeout lunch box. You can serve the cake on a plate as well. Enjoy immediately or keep chilled until ready to serve!
Notes
- Every oven is different. So make sure to adjust the carrot cake baking time as needed!
- If you prefer, you can make the carrot cake a day ahead of time. Carrot cake actually tastes better the next day. So if you want, you can bake the carrot cake the day before and frost it the next day.
- Grate the carrot with a fine grater. Finely grated carrots will give the carrot cake better texture compared to coarsely grate carrots. And please do not use pre-shredded carrots for carrot cake! The extra elbow grease is worth it!












Comments
No Comments