

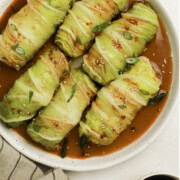


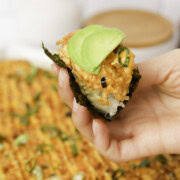
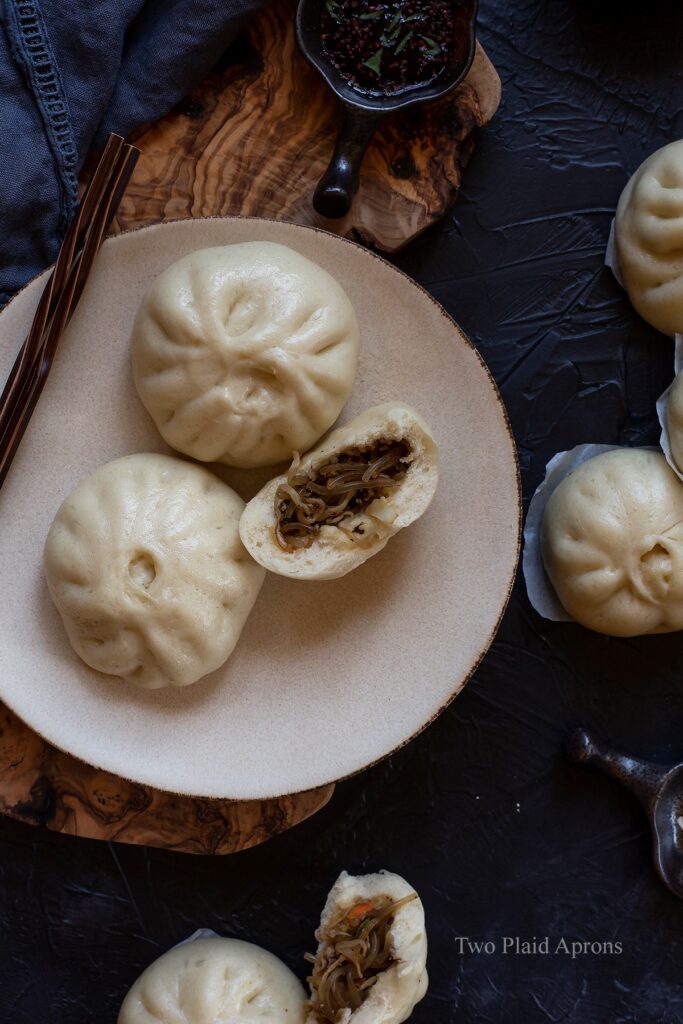
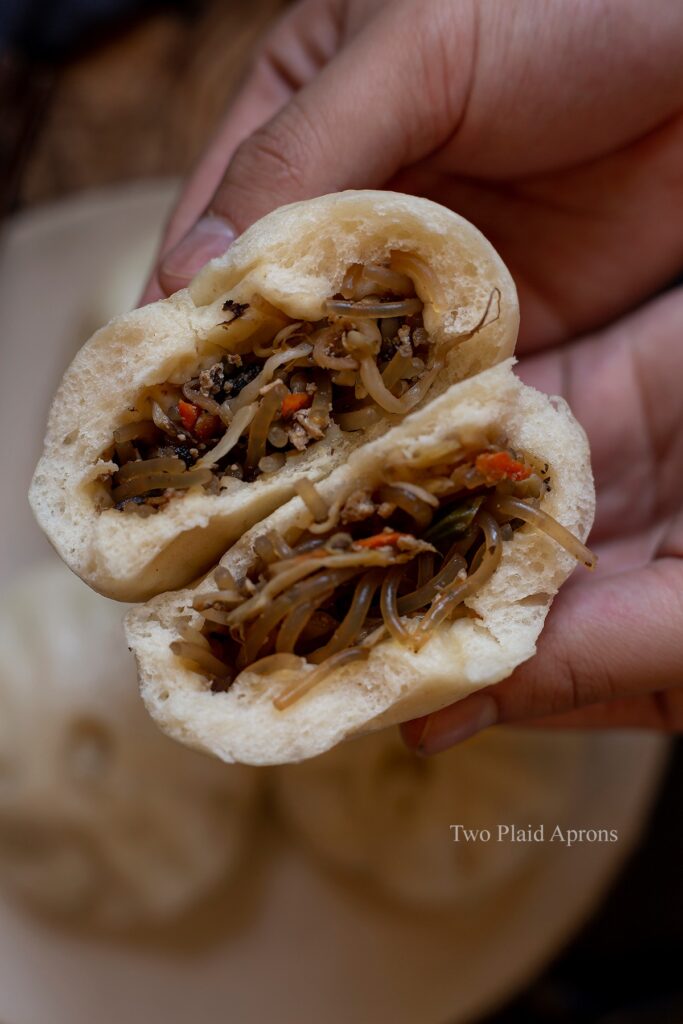
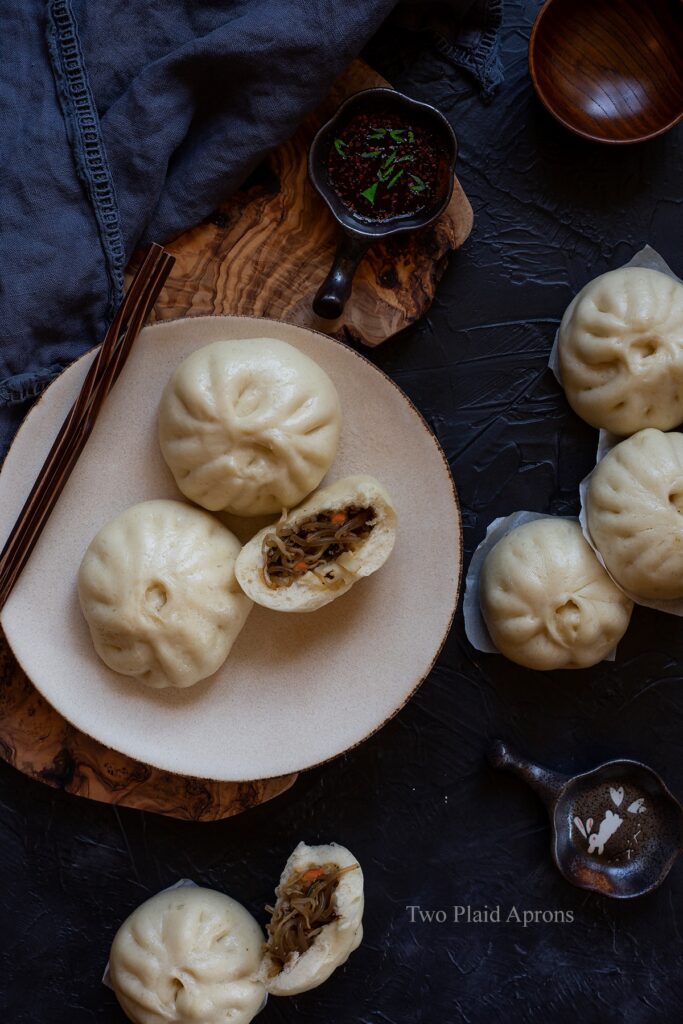
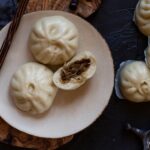
These vegetarian bao buns are Korean style adaptation of the traditional Chinese bao buns, or baozi (包子). They're stuffed with Korean japchae noodles and a variety of vegetables that you can easily adapt and substitute to your preference.
I am a lover of all baos, so naturally when Kyong mentioned Korea's wang mandus (literally translates to big dumplings), I felt the need to make some.
These vegetarian bao buns are an inspiration from Kyong's childhood memories of the dumpling wrapping parties his family had during get togethers and holidays. Everyone would sit around the table and helped with making dumplings and baos while chatting about life and chuckling about past memories.
We hope you enjoy these Korean style vegetarian bao buns as me as Kyong treasured his memories of making them with his family! And hopefully, you'll make it part of your family's treasured memories.
Can I use bread flour for these vegetarian bao buns?
Absolutely. Feel free to use bread flour instead of all-purpose flour for this recipe. However, do note that bread flour tends to absorb more water than all-purpose flour, so adjust accordingly. Also, bread flour will produce bao buns that are chewier than all-purpose flour.
Korean brand all-purpose flour
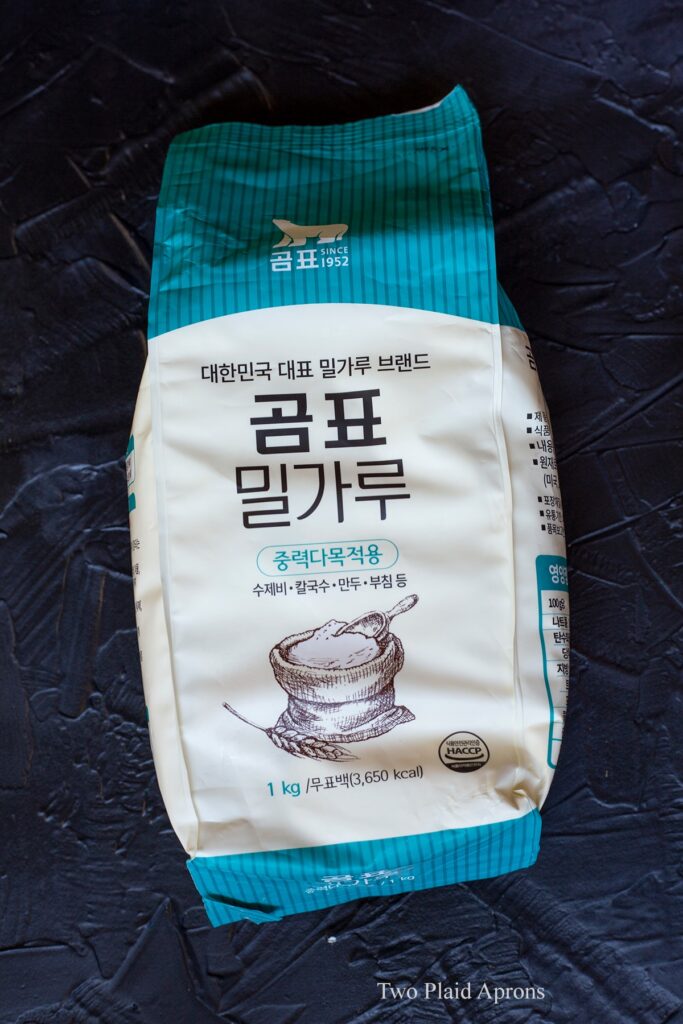
Although I am an advocate for all things convenient and use what you have, I do very muchly love using this Korean brand all-purpose flour for making breads and bao buns. This brand of flour is finer than our everyday all-purpose flour. It's also produce breads that are whiter and fluffier than regular all purpose flour. With all that said, this flour is much more expensive than the average all-purpose, so there's the pros and cons.
Speed up process with stand mixer
This bao bun recipe is made to not require a stand mixer. It relies on the natural fermentation process to develop gluten, which takes a little time. So if you'd prefer, feel free to skip the waiting and knead the dough until it's smooth, supple, and passes the window pane test. You can do that either by hand or with a stand mixer, then proof then bread until doubled.
Filling substitution
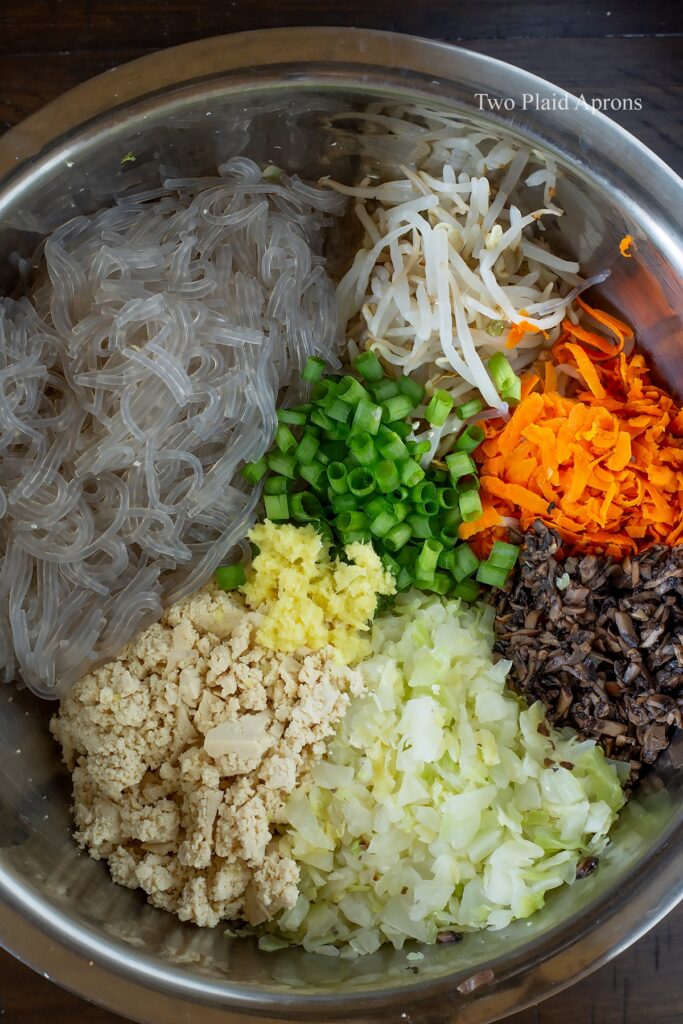
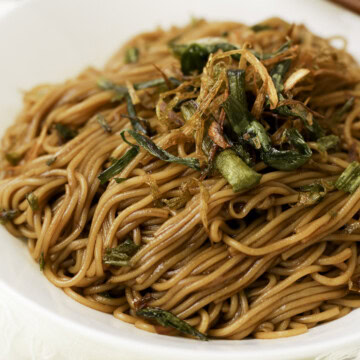
This vegetarian bao bun filling is made Korean style with basic bao vegetables like cabbage, bean sprouts, and sweet potato glass noodles (aka japchae noodles). You are welcomed to adjust it to your liking and to the vegetables you have on hand. The only things you have to accommodate for is the tenderness of the vegetables, which may need additional cooking or cutting before filling. Also, with the change in vegetables used, you may need to also adjust the seasoning.
Meat for tofu
Because this is a vegetarian bao bun, we used tofu in place of meat...and because we always have a stock pile of tofu on hand, lol 😆. But, do feel free to substitute the tofu for ground pork, which is the most popular and most common choice of meat for baos. If you are substituting tofu for ground pork, simply precook it in a pan with the grated ginger and a couple dashes of soy sauce or salt. Strain the pork if needed if it has a lot of fat or juice.
Strain the filling
It is really important to strain the filling of excess liquid if possible. This will prevent your bao buns from going soggy after they are steamed. Besides the tofu, I prefer to let the vegetables naturally drain than squeezing out their moisture. This will keep the vegetables crunchy and juicy without over saturating the buns. You can strain the filling by using a strainer or placing a bowl upside-down in a larger bowl. The bowl method will keep the fillings at the top and the liquid at the bottom.
How to make and shape bao buns:
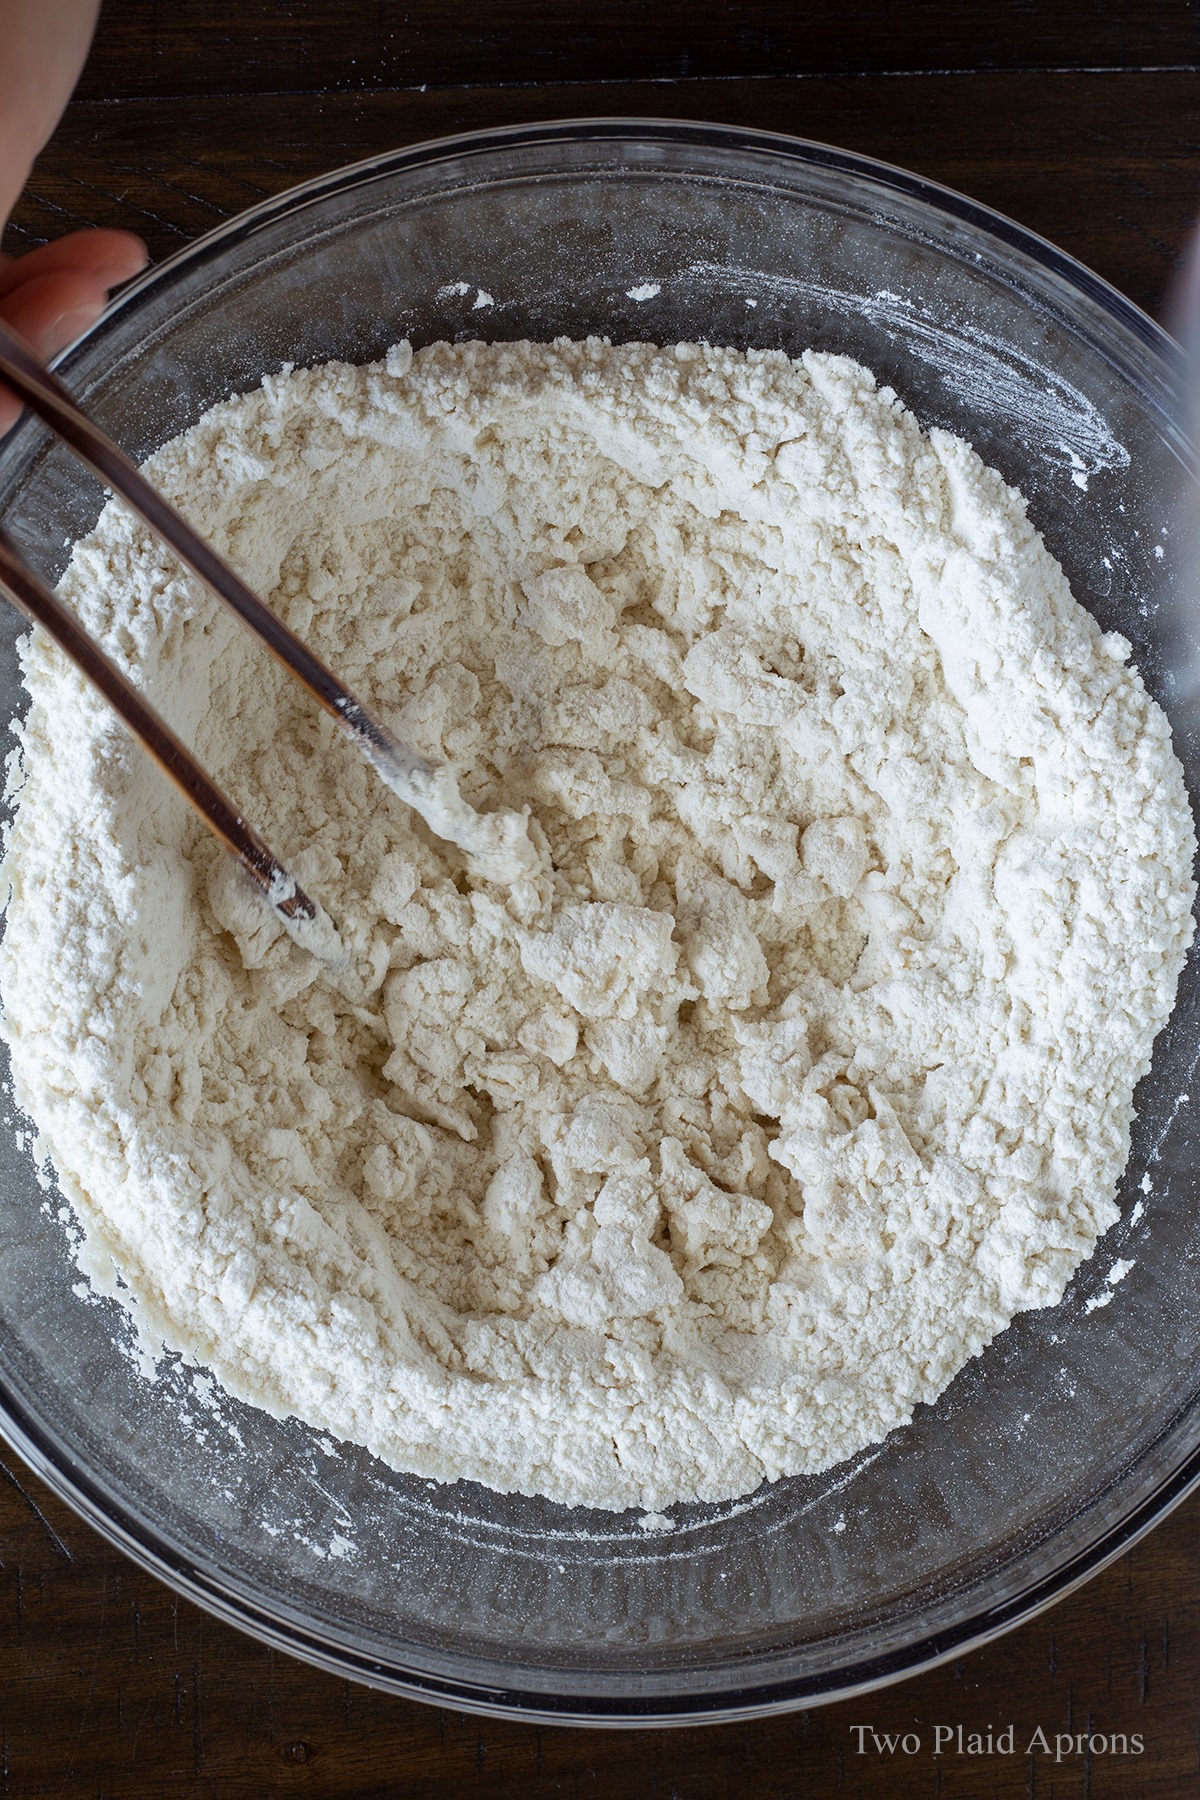
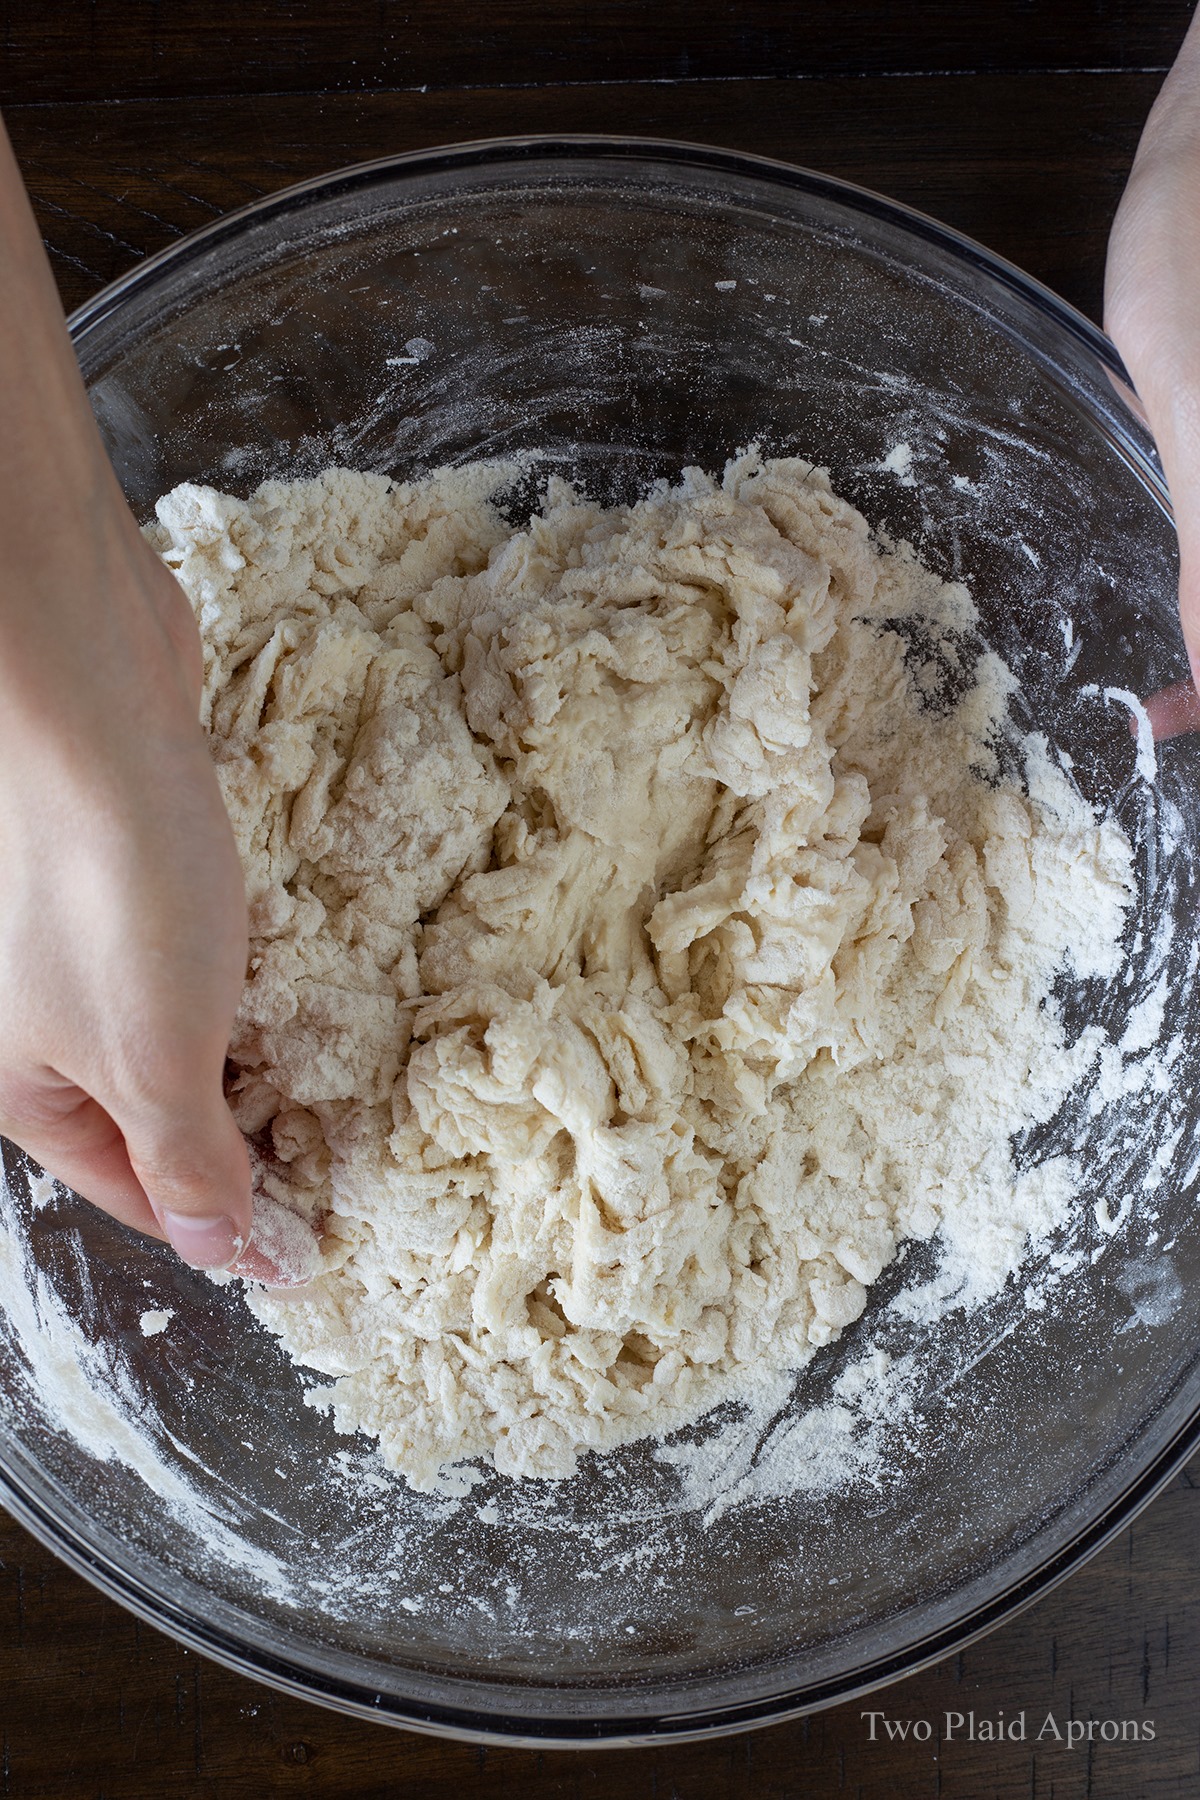
- Slowly drizzle in the liquid into the flour while stirring. Once the dough is shaggy start knead the dough together to form a cohesive ball. Cover and ferment for 30 minutes.

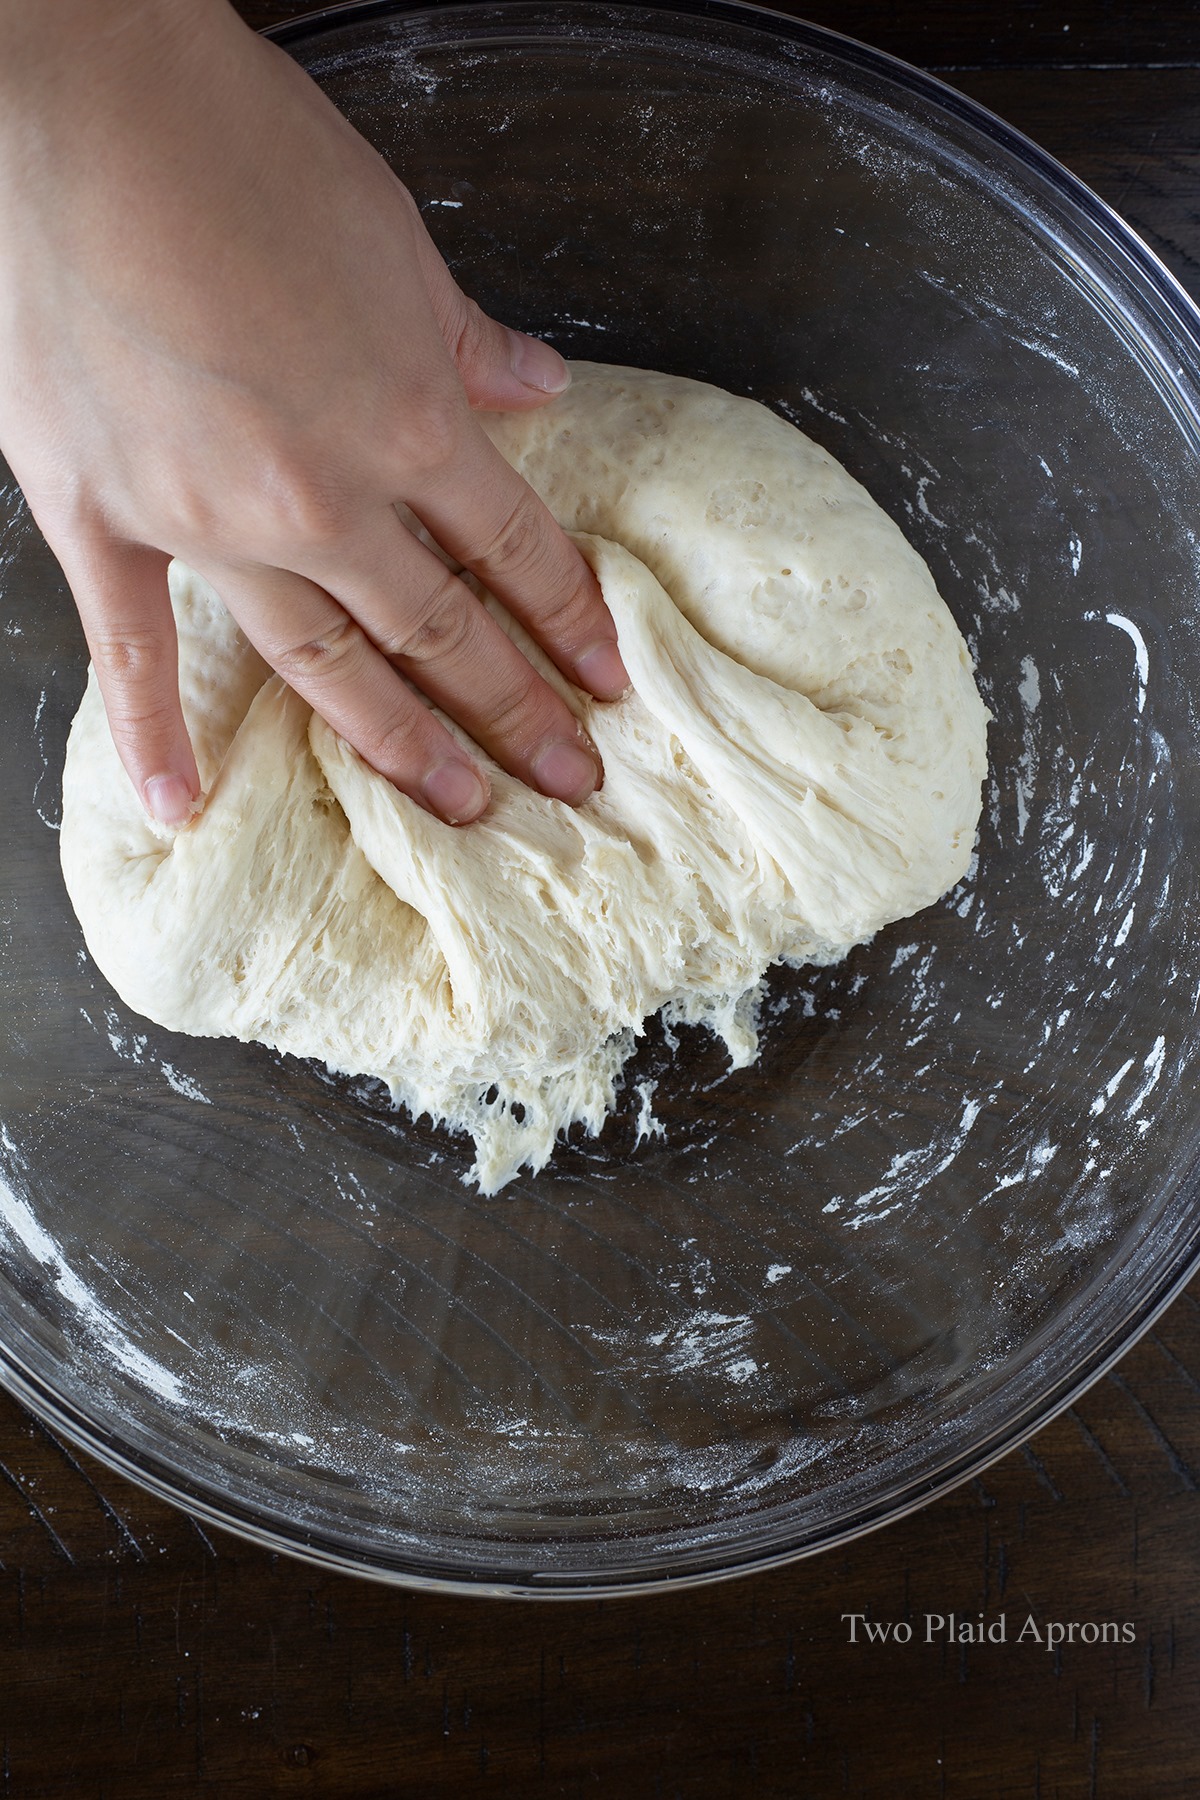


- After the fermentation, fold the dough onto itself and knead it back into a ball, around its original size. Let it proof for 45 minutes to 1 hour until the dough doubles . You can check by poking a hold in the center. The dough should not bounce back nor collapse.
- Fold the dough onto itself and knead it back into a ball its original size. The dough should no longer be soft, but very bouncy. Divide the dough into 10 equal pieces and roll them into a rough ball.
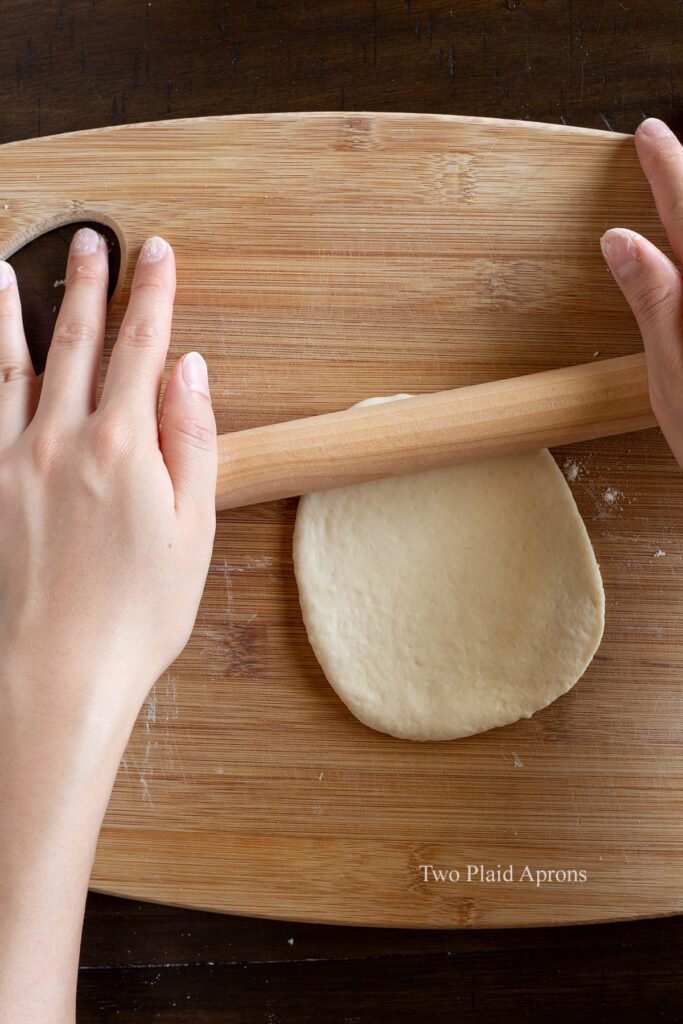
- Working with 1 piece of dough at a time, flatten the dough ball and roll it out into a sheet, about 4 inches wide. Keep the center thicker than the edge. (The center should be about 3 millimeters while the edge should be about 1-2 millimeters thick.)
***When flattening, roll from the center to the edge to release excess bubbles. Then, roll from the edge to the center when thinning out the edge.***


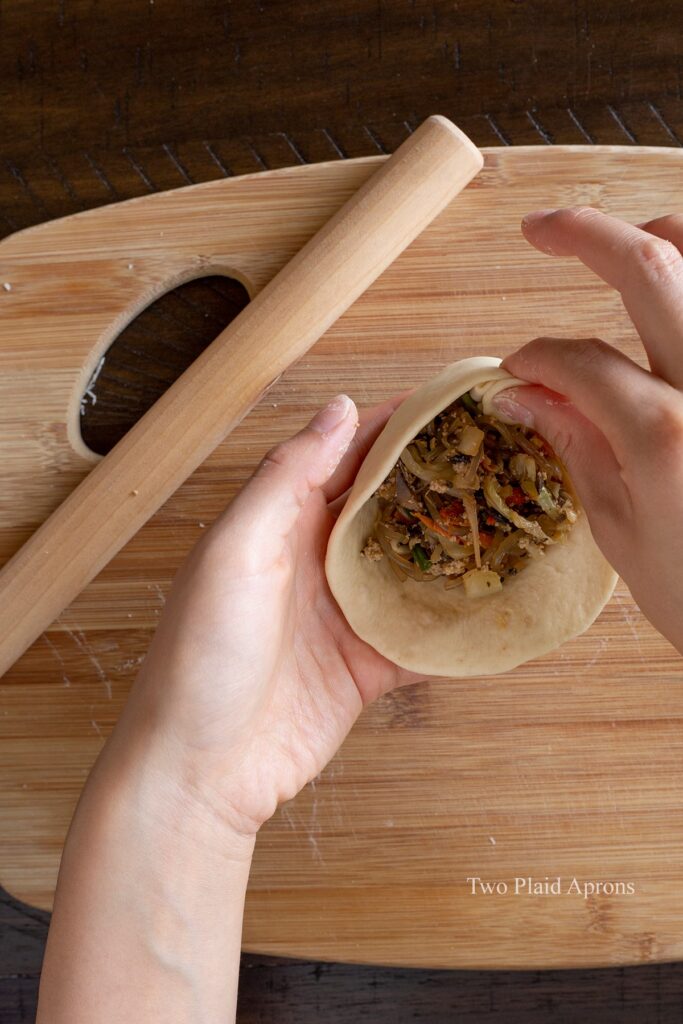
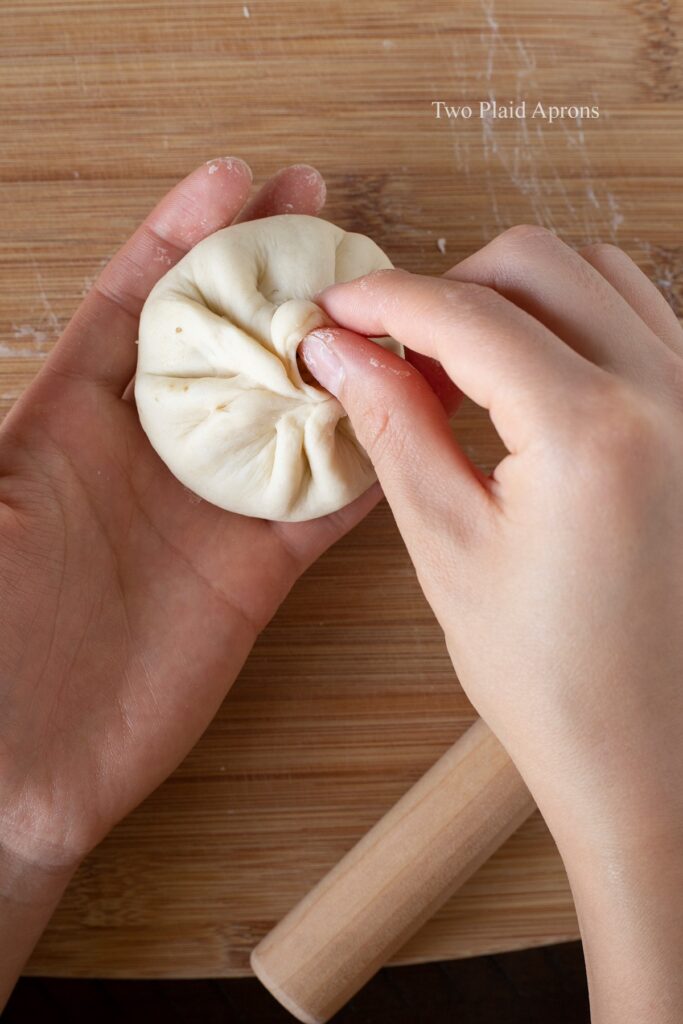
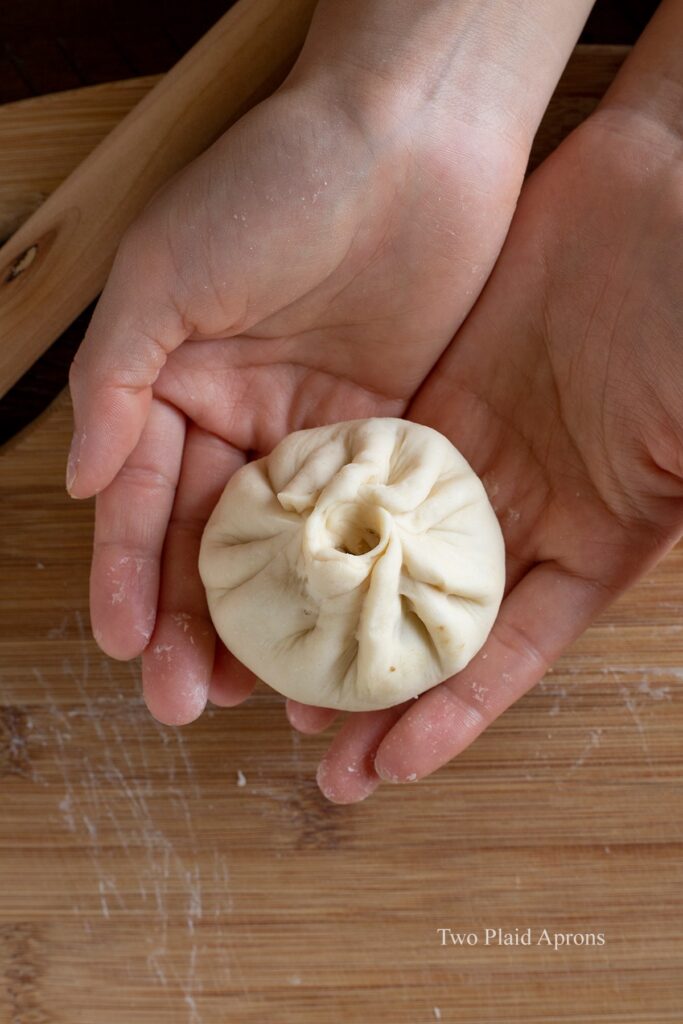
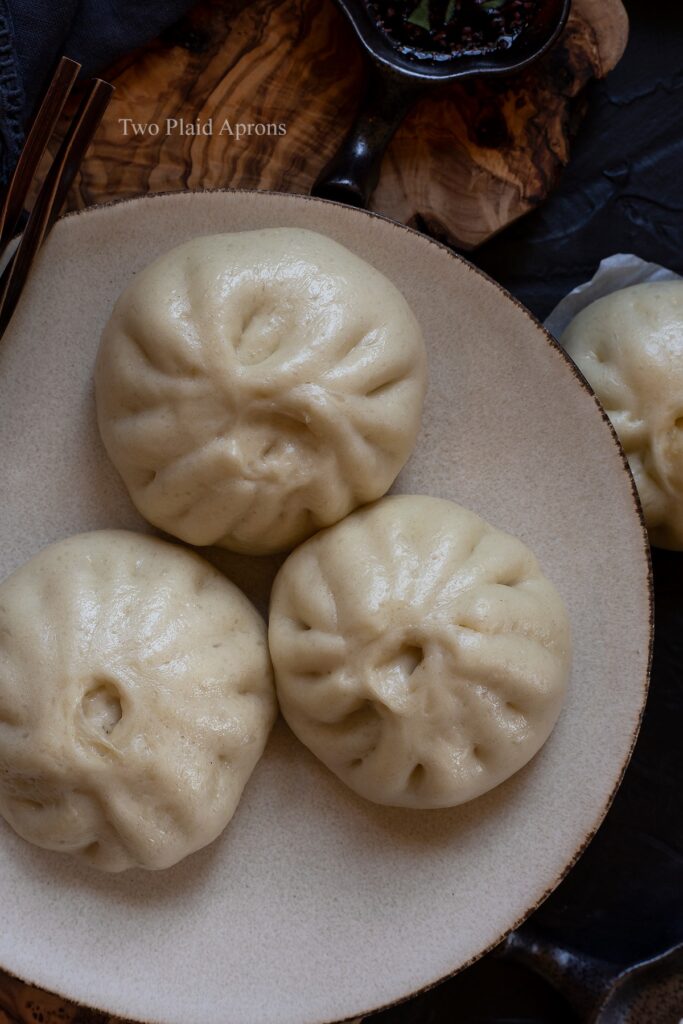
- While holding the wrapper in one hand, fill it with about 3 tablespoons of filling. With your other hand, pleat the edge of the wrapper together by folding and pinching until the entire wrapper edge is pleated. Feel free to completely seal off the top or keep it slightly open like mine.
Steaming bao buns
To steam bao buns, start off with a pot of cold water. You can steam the baos on either metal steamers or bamboo steam baskets. Just make sure to keep the water 1 inch below the bottom rack of the steam rack.
Bring the cold water up to a boil then down to a simmer and let the bao buns steam for 15 minutes. Once the 15 minutes are up, remove the pot from heat, but let the bao buns temper for 5 more minutes before removing the lid.

Storing the vegetable bao buns
These Korean style vegetable bao buns can be stored in the fridge, properly wrapped, for about one week. You can also freeze these buns for up to 2 months. Just make sure to properly wrap and store them in airtight containers.
When you're ready to eat them, simply defrost the buns overnight in the fridge and steam them for 8 to 10 minutes.
If you're looking for other Asian snacks, you may like these:
- Korean sausage bread
- The BEST Chinese pork dumplings
- Korean cream cheese garlic bread
- Korean Fried Chicken Wing Gyoza
Cook with love!
Mei ❤️
If you’ve made this recipe or any recipes from our blog, please tag us on Instagram using #twoplaidaprons! You can also tag us in your Instagram stories using @two_plaid_aprons. We would love to see your creations! It absolutely makes our day! 🥰
📖 Recipe
Vegetarian Bao Buns (Korean Style)
Ingredients
For the bao buns:
- ¾ cup water , warm (95-110°F)
- 1½ Tablespoon granulated sugar
- ½ teaspoon active dry yeast
- 2½ cup all-purpose flour , plus more for dusting (spooned & leveled)
For the vegetable filling:
- 2 ounce sweet potato glass noodles (aka japchae noodles)
- 3 ounce mung bean sprouts (roughly 1 cup)
- ⅙ head cabbage , roughly chopped (about 1½-2 cups)
- 3 baby portobello mushrooms , roughly chopped (about 1 cup)
- ½ medium carrot , peeled & shredded
- 4 ounce firm tofu (or ¼ block of a 1 lb. tofu)
- ¼ cup green onion , sliced (optional)
- ½ inch knob of ginger , peeled and grated
- 3 Tablespoon soy sauce (or to taste)
- 1 teaspoon toasted sesame oil (optional)
- Salt (as needed)
- Cooking oil (as needed)
Optional soy dipping sauce:
- 6 Tablespoon soy sauce
- 2 teaspoon rice vinegar
- 4 teaspoon granulated sugar
- ½ teaspoon crushed red pepper flakes (optional)
Instructions
For the bao buns:
- Add the sugar into warm water and stir until dissolved. Then, sprinkle in the active dry yeast and give it a stir. Let the yeast sit and dissolve, about 3-5 minutes.
- In a mixing bowl, add the flour and slowly pour in the water with dissolved yeast while stirring with a fork. When all the water is added and the dough looks shaggy, knead the dough until it's one cohesive ball. Cover the dough and let it ferment for 30 minutes to develop gluten.*You can speed up this process by kneading the dough until smooth, supple, and passes the window pane test. This can be done both by hand or in a stand mixer.*
- After the 30 minute fermentation time, fold the dough onto itself and knead out the air. Fold the dough back into a ball, cover, and let it proof until doubled in a warm place, about 45 minutes to 1 hour.
For the vegetable filling:
- For the sweet potato glass noodles, soak them in a warm water for 15-20 minutes until softened. Once soft, drain and cook the noodles in a pot of boiling water until the center is no longer starchy and the entire noodle is just tender, about 3-5 minutes (depending on brand).Drain the noodles and rinse it under cool water to wash off excess starch. Using a pair of scissors, cut the noodles into smaller pieces, roughly 2 to 4 inches long.
- For the bean sprouts, blanche it in a pot of boiling water until they turn kind of translucent and no longer tastes raw. Drain and rinse in cold water. Leave the bean sprouts in the strainer for about 5 to 10 minutes to remove excess moisture.
- For the cabbage, mushrooms, and carrots, sauté each on medium high heat with a small amount of cooking oil until just limp, about 3-5 minutes. Season it with a small amount of salt and transfer to a plate to cool.
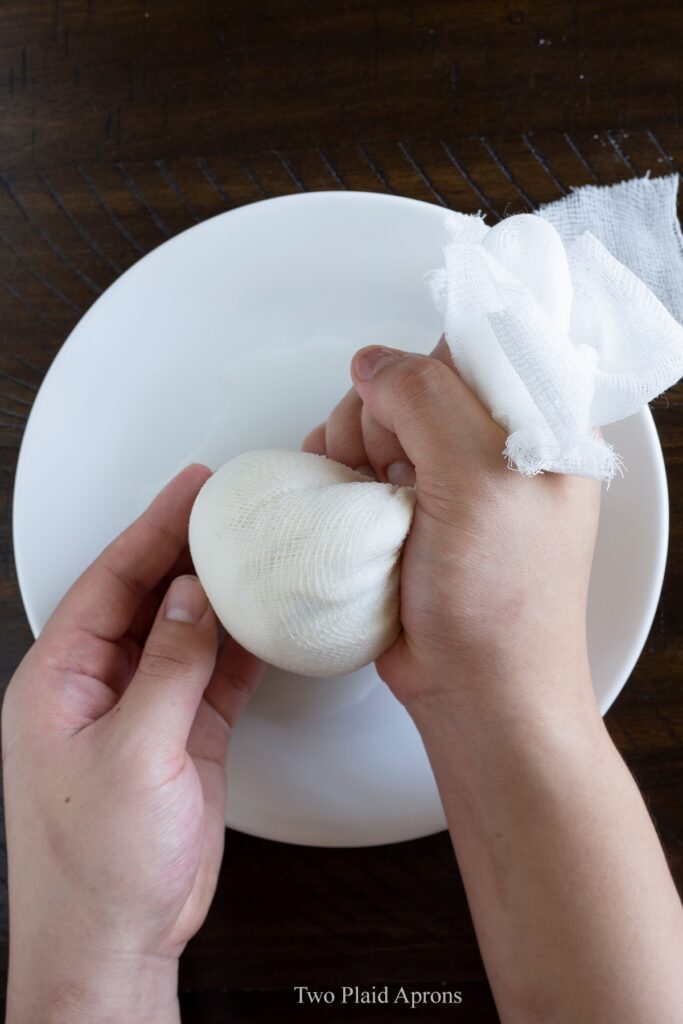
- For the firm tofu, wrap it in two layers of cheese cloth and squeeze out as much of excess moisture as possible.
- Combine all the prepared noodles, vegetables, tofu, grated ginger, soy sauce, and sesame oil into a bowl and toss to combine. Set aside until needed.*The mixture should be a little saltier than you'd prefer because it has to compensate for the bao bun. If you want the filling to be a bit more flavored, simply add a little more soy sauce, 1 Tablespoon at a time.*
- When the bao bun dough has doubled, punch it down, fold it onto itself, and knead it into a ball. Divide the dough into 10 equal pieces and knead the into balls. Cover the dough with a damp towel or plastic wrap and work with 1 piece of dough at a time.
- Using a small amount of flour for dusting if needed, flatten the dough ball into a circular disc and roll it out into a circular sheet. Keep the center thicker than the edge. The center should be around 3 millimeters inch while the edge should be around 1 to 2 millimeters.
- Fill the wrapper with about 3 Tablespoons of vegetable filling and seal the bao by pleat the dough. *Refer to post for picture reference.* Place the finished bao buns on a small sheet of parchment paper and let it rest as you make the remaining buns.
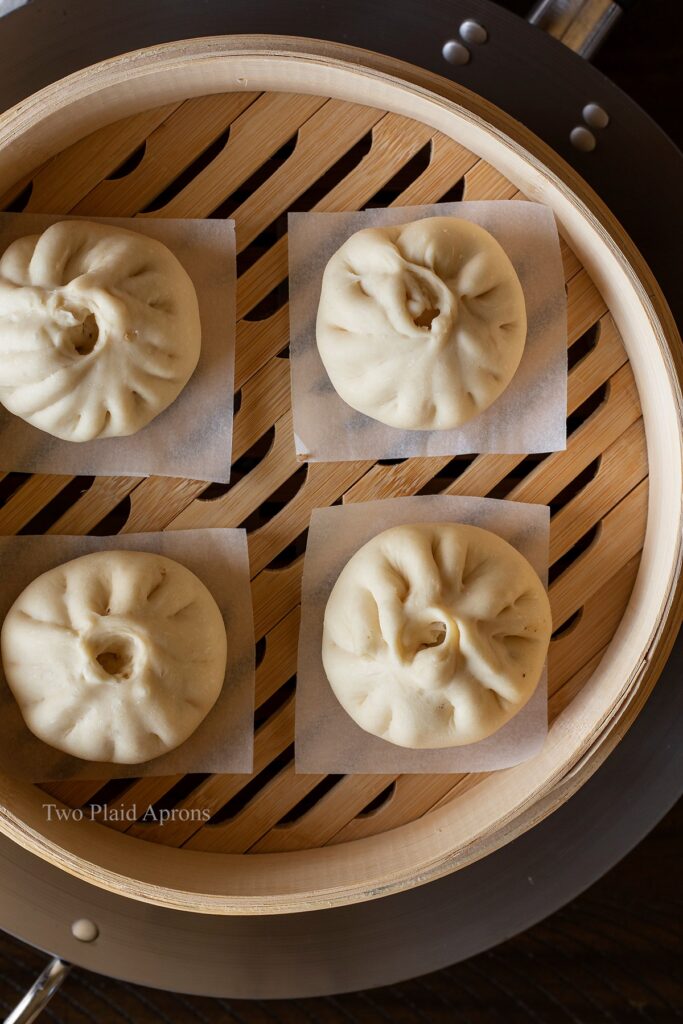
- Once all of the baos have been filled and pleated, arrange the baos into your steamer, keeping them at least 1½ inch from each other and the edge. Let the baos rest for another 5-10 minutes or until the bun looks almost doubled.
- Fill a pot with cold water and place your steamer basket over it. Make sure the water is at least 1 inch from the bottom rack of the steamer. Bring the water to a boil and lower it to a simmer. From this point on, let the buns steam fro 15 minutes.
- When the time is up, take the pot off the heat and let the steam basket stand for 5 minutes before uncovering. Remove the baos from the basket and repeat with remaining baos.
- Enjoy the bao bun warm by itself or with the soy dipping sauce!*For the soy dipping sauce, simply combine all the ingredients and stir until the sugar has dissolved.*
Notes
- Once the bao buns are steamed and cooled, you can store them in the freezer for up to 2 months, if properly wrapped in an airtight container. To reheat, simply defrost the buns in the fridge and steam them for 8-10 minutes.


Jen says
I came for the basic bao recipe, and I was not disappointed! This was such a great recipe and it came together so easily I was surprised when I realized it was done. I stuffed mine with a spicy siracha veggie mix I made to pair with some pho noodle soup, but I ran out of filling for the last 4 buns. I grabbed a bar of chocolate squares I hadn't used yet and stuffed the last of the bao with those and let me tell you... They were AMAZING. Perfect for a simple dessert. I'll definitely be playing with different sweet and savory fillings in the near future. Thanks for this!
Mei says
Hi Jen!
Thank you so much for trying out our bao recipe and so glad you liked it! And YESSS! We sometimes fill our buns with sweet fillings (like red beans or chocolate as well), and they are amazing!
Looking forward to your next bao creation! 😉
Cook with love!
Mei ❤️
Ary says
These pack so well in lunch boxes, and I have made the recipe several times now. I needed something for the kids (and my) lunches and these are perfect and great for hiding fridge leftovers in as well. Thank you for the easy to follow steps. I love the idea that I can freeze them to store, unfortunately none have lasted that long.
Mei says
Hi Ary!
Thank you so much for trying out our recipe and leaving such kind words! These are also our favorite freezer snacks and quick lunch for busy workdays.
Cook with love!
Mei ❤️
Maria says
This was a great recipe! I very much enjoyed these vegetarian bao buns!
Thank you 🙂
Mei says
Hi Maria!
Thank you for your feedback and for trying out our recipe! So glad you enjoyed them! We like to make big batches and freeze them for days when we're too busy to cook =)
Happy cooking!
Mei ❤️
Jackie McCoy says
Bao was very delicious!! I was afraid about it having no oil and it seemed like a dry dough, but following your steam method, it was the moist bun I have ever made!!! My daughter will love this!!! I chose to add the shiracha to it as another reviewer commented and she will enjoy as she likes the heat!! I did prefer the original recipe as is though because it was very delicious too!!!
Mei says
Hi Jackie!
Thank you so much for your kind words and trying our recipe! We're so happy that you guys enjoyed the baos! They are one of our favorites as well. And yes, sriracha is a great addition to the buns if you'd like some heat.
Hope your daughter enjoys the bao buns just as much!
Mei ❤️
Donna says
I am steaming these right now. I used my own Bao bun recipe but used your filling recipe. A little left over in the bowl is yummy. Cannot wait for them to be done. Nice combo for tasty meatless dish
Mei says
Hi Donna!
Thank you for your kind words! Hope you enjoyed the buns!
Mei❤️
Ovi says
So I absolutely loved this recipe, but I am hoping for a little clarification. At first, I didn’t read the recipe properly and threw in the sugar, yeast, and flour into a bowl and added warm water and kneaded it until it formed a dough. Then I realized I screwed up. So I set it aside (figured I’d use it if I had leftover filling, which I did), and made another one, this time following the instructions to the letter. I mixed the sugar(1.5 tbsp) then the yeast (1/2 tsp) into the 3/4th cup of warm water, then slowly added it to the flour and kneaded the dough, set it aside for 30 min. But the screwed-up dough ended up having more of a bun texture than the other one. I’m not entirely sure if the second dough even cooked all the way through or if it’s still raw. what did I do wrong
Mei says
Hi Ovi! Sorry to hear that there was some trouble with the dough, but so glad you still enjoyed the buns!
First, did you use regular active dry yeast or fast acting dry yeast? Second, did the "correct" dough proof (doubled in volume) like the first one did?
If you used fast acting dry yeast, you won't need to dissolve the yeast in water and could add all the ingredients to the flour and mix.
For the second batch "correct" dough, was it proofed enough before you used it?
Doughs can turn out feeling raw, usually due to 2 reasons. The dough could be too dry/dense (which shouldn't be the issue) and/or the yeast was no good/dough wasn't properly proofed.
That's all I can offer for now based on what you've shared. I'm sorry I can't be of more help, but if you have any other details to share or other questions, we'd love to help!
Mei ❤️
Ovi says
Thank you Mel! I think it’s the fast acting yeast which resulted it in not rising properly. I tried again and this time it worked
Mei says
So glad you were able to fine the culprit, Ovi! If you only have fast acting/instant yeast, you can ensure that they work by dissolving it in some warm water with a pinch of sugar. They should foam up just liker regular active dry yeast =)
Mei ❤️